Breads and Muffins

Daring Bakers: Cinnamon Rolls with Peach Preserves & Cream Cheese Icing

I made these rolls, took pictures and began this post a couple weeks ago since I was expecting a baby mid-June.  I cannot believe I am actually posting this month!  Special thanks to my amazing friend, Carrie, who held my sweet baby boy and also entertained my toddlers and therefore made it possible for me to finish this post this morning!  You’re amazing 🙂

Our baby’s due date was June 19, so I knew I had to get this challenge completed before my typical completion of a Daring Bakers challenge, a day or two before posting.  The day I made these rolls I thought, “It will be good to have these for our house guests after the baby comes.” thinking that this baby would be early like our other two.  But over a week passed before our sweet baby arrived and we’d already finished off a pan!  I froze the other pan after baking it so we did have some for grandparents when they came to see the baby.

peachrolls3

And here he is!  Christopher was born on June 23 and we love him.

photo 2 (95)

This month the Daring Bakers kept our creativity rolling with cinnamon bun inspired treats. Shelley from C Mom Cook dared us to create our own dough and fill it with any filling we wanted to craft tasty rolled treats, cinnamon not required!

peachrolls4

This challenge had me excited from the moment I read it!  I love cinnamon rolls, both the making of and the consumption of them.  But I’ve never ventured beyond the traditional cinnamon sugar filling.  This challenge encouraged creativity from the Daring Bakers.  I know some people got incredibly creative, and I admire those people for not only having creative minds but for being brave enough to try something new!  I played it pretty safe and just added peach preserves to the rolls.  I know, it’s kinda lame.  But it’s still  super delicious!

I used a sweet dough recipe from America’s Test Kitchen as the base for the rolls.  In the cookbook this dough is also used for hot cross buns and sticky buns.  It comes together nicely, rises well, is easy to roll out and handle, and bakes into a lovely sweet bread.  It’s a keeper.

peachrolls6 peachrolls7 peachrolls8 peachrolls9

Peach just seemed like a good summer choice, but you could use any kind of jam or preserves in these rolls.  Add in nuts if you like.  Or leave out the jam and make a simple cinnamon roll with a traditional cinnamon and brown sugar filling.

peachrolls10 peachrolls11 peachrolls5

The icing is sweet with just enough tang from the cream cheese.  You can make it more icing-like by adding less milk, or more like a glaze by adding a little more.  The recipe below makes a generous amount for the 2 pans of rolls.  Ice these when they are still a little warm so that the icing can seep in between the layers and get all wonderfully gooey.  Or you can ice them individually to control the amount of icing on each roll since some people are big icing lovers and others are crazy not so much.

peachrolls1

Peach Cinnamon Rolls with Cream Cheese Icing

Adapted from America’s Test Kitchen Family Cookbook

Ingredients

Dough

  • 3/4 cup buttermilk
  • 6 tablespoons butter, melted and cooled
  • 3 eggs, lightly beaten
  • 4 1/4 cups flour
  • 1/4 cup sugar
  • 2 1/4 teaspoons instant yeast
  • 1 1/4 teaspoon salt

Filling

  • 3/4 cup brown sugar
  • 1  1/2 teaspoons cinnamon
  • 3 tablespoons melted butter
  • 3/4 to 1 cup peach preserves

Icing

  • 5 tablespoons cream cheese
  • 1 1/2 cups powdered sugar
  • 3-5 tablespoons milk

Directions

Dough

  1.  Whisk the buttermilk, butter and eggs in a small bowl.
  2. Mix 4 cups of flour, sugar, salt and yeast in stand mixer fitted the dough hook.
  3. Add buttermilk mixture to flour, mix on low until dough comes together.
  4. Increase speed to medium low and knead until dough is smooth and elastic, about 10 minutes.  Add extra flour if dough seems sticky, one tablespoon at a time.
  5. Turn dough out onto clean counter and knead by hand to form a smooth round ball.
  6. Place dough in oiled bowl, cover and let rise for 2 to 2 1/2 hours until doubled in size.

Fill, Shape and Bake Rolls

  1. Mix brown sugar and cinnamon in a small bowl and set aside.
  2. Turn dough out onto a floured surface and dust lightly with flour.  Pat the dough fat, and then use a rolling pin to roll dough out into a 12×16 inch rectangle.
  3. Brush dough with melted butter, then spread with peach preserves leaving a 1/4 inch edge all around.  Sprinkle brown sugar mixture over the preserves and spread out.
  4. Roll dough into a long cylinder, as tight as you can get it.  Pinch the edge of the dough to seal the roll.
  5. Use a serrated knife to carefully cut into 14-16 buns.
  6. Butter 2 round cake pans and place 7 or 8 buns in each.  Cover with plastic wrap that has been sprayed with non-stick spray and let rise for about 1 to 1 1/2 hours.  Rolls should be pressed up against each other.  To Make Ahead: Pop them in the fridge after covering, before they rise.  Keep them there for up to 16 hours.  When you’re ready, take them out and let them rise at room temp for 1 1/2 hours, then bake as below.
  7. Preheat oven to 350°F.
  8. Bake rolls for 25-30 minutes, until golden brown and puffed.
  9. Let rolls cool for 10 minutes before icing.

Icing (make while rolls are baking)

  1. Beat cream cheese and powdered sugar until mixed well.  Add in milk, a tablespoon at a time until the icing is the consistency that you like.
  2. Ice rolls in the pan or turn rolls out and ice on a platter.


Blueberry & Cream Cheese Coffee Crumb Cake

With the birth of our 3rd baby fast approaching I’m finding myself trying everyday to accomplish things that will make the transition easier.  Having all the laundry cleaned and put away, keeping the kitchen well stocked (and relatively clean) for our older kids for when we’re in the hospital and someone else is watching them, washing newborn clothes for a girl and a boy, checking my hospital bag daily to be sure I haven’t forgotten anything, and going through my lists of baby names to narrow it down.  But what do I decide is the most important?  Making this coffee cake, of course.  Baking is a great way to procrastinate, don’t you think?

Blueberry & Cream Cheese Coffee Crumb Cake | Hottie Biscotti

I saw this recipe for cream cheese coffee cake from Shugary Sweets on Pinterest and immediately knew I needed to make it.  With a pint of beautiful blueberries in the fridge it became blueberry cream cheese coffee cake because there was just no other option.

Blueberry & Cream Cheese Coffee Crumb Cake | Hottie Biscotti

So I put this together, baked it, and let it cool.  No big deal.  And I had a little corner of it in the evening before I went to bed.  It was delicious.  In the morning I cut myself another square for breakfast.  Something wasn’t right.  It seemed a little underbaked.  I had baked it 5 minutes longer than instructed, so I was surprised.  As I cut a little more into the center I saw that it was mostly raw goo.  I was real bummed about it.  I tried to save what I could around the edges, but then I had to do one of the hardest things a sweets loving girl can do.  I had to scrape all of that goodness right into the trashcan.  Heartbreaking.

Later in the day I restocked on blueberries, cream cheese, and butter and came home and did it all over again.  Because I’d originally misread the ingredients and messed up the streusel topping I was glad to have a second chance at it.  So I guess it was kind of a good thing that I underbaked it the first time?  Regardless, I wound up with this lovely cake when all was said and done and that makes it all worth it.

Blueberry & Cream Cheese Coffee Crumb Cake | Hottie Biscotti

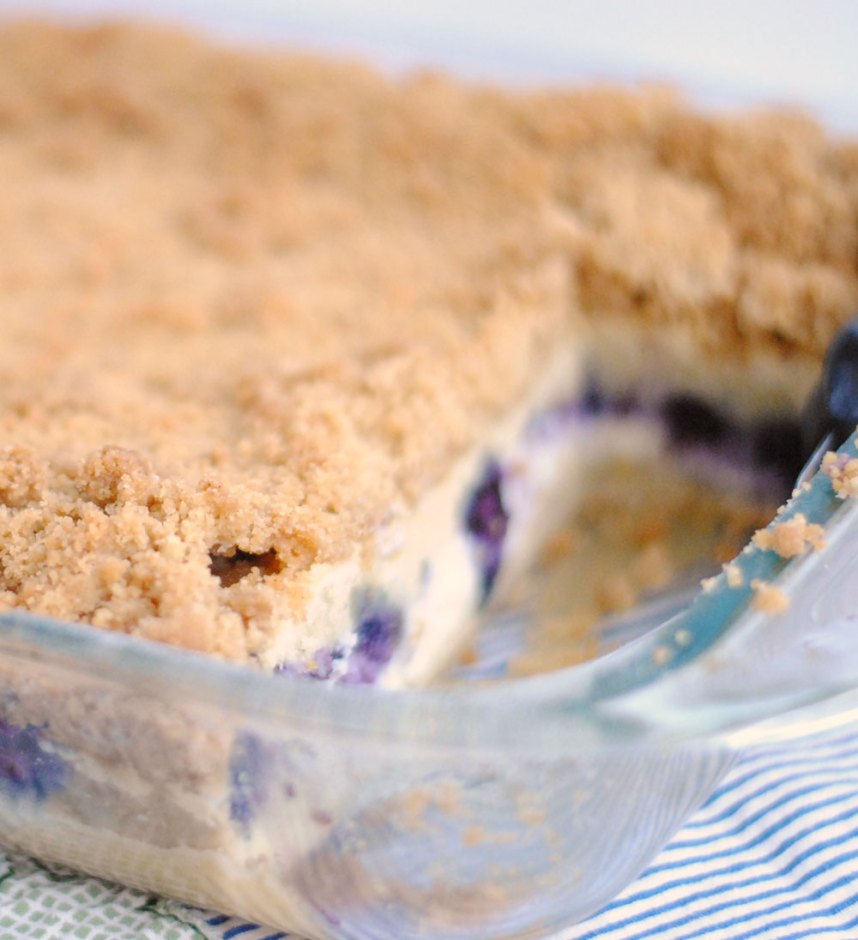
This breakfast dish is delicious and quite decadent, but the blueberries make it good for you!  It’s fruit!  The berries also add a nice pop of color and a lovely tartness to each bite.  The cream cheese filling is amazing, and the crunchy streusel topping is the perfect counterpart to the smooth cake and creamy filling.  Enjoy!

Blueberry & Cream Cheese Coffee Crumb Cake | Hottie Biscotti

Blueberry & Cream Cheese Coffee Crumb Cake

Ever so slightly adapted from Shugary Sweets

Serves 12-16

Ingredients

Cake

  • 2 1/2 cups of flour
  • 1 cup sugar
  • 1/2 teaspoon baking powder
  • 1/2 teaspoon baking soda
  • 1/2 teaspoon kosher salt
  • 3/4 cup unsalted butter, room temperature
  • 3 eggs
  • 2 teaspoons vanilla
  • 2/3 cup buttermilk

Cream Cheese Filling

  • 2 packages cream cheese, room temperature (low fat is fine)
  • 1/2 cup sugar
  • 1 egg
  • 1 pint of blueberries, rinsed and dried and tossed with a tablespoon of four (the flour keeps them from sinking all the way down in the batter)

Streusel Topping

  • 1 stick of butter, melted
  • 1/3 cup sugar
  • 1 cup brown sugar
  • 1 1/2 teaspoons cinnamon
  • 1 to 1 1/2 cups flour

Directions

Cake

  1. Preheat oven to 325°F
  2. Grease and flour a 9×13 inch pan.
  3. Beat flour, sugar, baking powder, baking soda and salt with the softened butter until combined.
  4. Add in the eggs, one at a time, beating between each addition.
  5. Add in buttermilk and vanilla.  Cream for 3-4 minutes until mixture lightens in color and is fluffy.
  6. Spread half of the batter in to the prepared pan.

Filling

  1. Beat cream cheese, sugar and egg together until creamy.
  2. Spread evenly over the cake batter.
  3. Sprinkle the berries over the cream cheese layer.
  4. Spread the remaining cake batter over the berries.

Streusel

  1. Combine both sugars and cinnamon.
  2. Add in the butter and mix to combine.
  3. Add in a cup of the flour and, using clean hands, mix together until crumbly.  Add in up to 1/2 cup more flour if it seems too wet.
  4. Spread evenly over the batter.

Bake

  1. Bake for 1 hour, until toothpick or cake tester inserted into the center of the cake comes out with a few crumbs attached.
  2. Let cool completely on a wire rack before cutting and serving.


Daring Bakers: Pão de Queijo (Brazilian Cheese Bread)

This challenge was so simple, so fun and so delicious!  As always I was given the opportunity to try something I’d never tried before, and something I’d never even heard of!  These little light and airy cheesy Brazilian bread balls are something special and I’m excited to share them with you.

Pão de Queijo | Hottie Biscotti

This month’s Daring Bakers’ Challenge took us on a trip to beautiful Brazil! Renata of “Testado, Provado & Aprovado!” taught us how to make Pao De Queijo, tasty cheese buns that make the perfect snack or treat, and that will make your taste buds samba!

Pão de queijo are almost like popovers.  Their airy texture combined with their rich cheese flavor makes them super addictive, especially when eaten warm.  They’re great right after coming out of the oven just cool enough to handle.  But I rewarmed room temp ones in the microwave for about 8 seconds with great success 🙂  If you’re gluten free, then you’re in luck!  Instead of wheat flour you use tapioca flour here, which I found without any trouble at my grocery store with all the other specialty flours.  The texture is different than a bread made with all purpose flour, of course, but it still has a nice bready chew that would’ve fooled me if I didn’t know they were gluten free.

Pão de Queijo | Hottie Biscotti

Renata gave us the option of using any cheese we liked.  When I searched recipes I found Parmesan to be a popular choice.  So I went with 6 ounces of a goat cheddar and 2 ounces of Parmesan.  I liked the way it turned out, but she says any cheese or combination of cheeses would work, so get creative!

pao5 Pão de Queijo | Hottie Biscotti

The dough is very easy to make, but a little messy since you get in there with your hands and it is a bit sticky.  You don’t need any fancy equipment and your mixer doesn’t have to get dirty.  The recipe I used calls for 1-3 eggs and you may or may not use them all.  I did use all 3.  She recommends whisking all 3 eggs together and then adding what you need as you begin working the dough together.  Once it’s all together it rolls quite easily into balls and bakes up beautifully.

pao3 pao2 pao9

Since these are best eaten fresh from the oven I just baked half of the dough, then shaped the rest of the dough and froze it.  I haven’t tried it, but apparently you can bake them straight from frozen!  And that is what I plan to do the next time I need a last minute appetizer or snack for guests.  Bam.

pao10

Something I wish I’d tried was making this dough in a waffle iron.  I cannot begin to imagine the deliciousness of using this as the bread for a breakfast sandwich!

Thanks for the great challenge this month, Renata!  I really enjoyed it and am excited to experiment more with this terrific bread.

Pão de Queijo (Brazilian Cheese Bread)

From Renata of Testado, Provado e Aprovado

Ingredients

  • 4 cups (500 grams) tapioca flour/tapioca starch
  • 1 cup whole milk
  • 3 tablespoons butter
  • pinch of salt (or more if your cheese is not salty)
  • 9 ounces of coarsely grated cheese (I used a goat cheddar and Parmesan)
  • 1-3 large eggs, beaten

Directions

  1. Preheat oven to 400°F.
  2. Sift tapioca flour into a large bowl.
  3. Combine milk, butter and salt in a saucepan and heat over medium until mixture boils, then remove from the heat.
  4. Pour hot milk over tapioca flour and begin stirring with a fork, working the mixture until the milk is evenly distributed.  It will look crumbly.  Let it cool off a bit.
  5. With clean hands, work in the grated cheese.
  6. Add in the eggs, a little at a time, working the dough together with your hands.  Once the dough holds together, you’re done.
  7. Line cookie sheets with parchment.
  8. Roll dough into balls about the size of ping pong balls.  They puff a little during baking, so don’t crowd them  too closely on the pan.
  9. Bake for 15-20 minutes. until tops just begin to brown.  Remove from the oven and cool just slightly before eating.


Daring Bakers: Paasbrood, Dutch Easter Bread

The challenge for the Daring Bakers this month was Easter Bread, which was perfect.  Easter was on the 20th this month, so of course you’d make your Easter bread and serve it at your Easter meal and then post about it a week later.  Unless of course you’re like me and procrastinate most of the challenges until just a few days before the posting date!  So while I did make an Easter bread for Good Friday, this bread is just for The Daring Bakers and was made well after Easter.

Paasbrood: Dutch Easter Bread | Hottie Biscotti

The April Daring Baker’s Challenge was hosted by Wolf of Wolf’s Den . She challenged us to Spring into our kitchens and make Easter breads reflecting cultures around the world.

I chose to make a Dutch Easter bread called Paasbrood.  I noticed many similarities in Easter breads as I searched for one to make.  Many had dried fruits, like raisins, and many were braided either in long loaves or circles.  This Dutch bread has raisins, and candied fruit peel (which I did not use) and is twisted into a long loaf.  Oh, and it’s stuffed with almond paste!  I couldn’t imagine anything better.

Paasbrood: Dutch Easter Bread | Hottie Biscotti

I found a recipe that looked reliable here, and I changed just a few things.  I used pre-made almond paste instead of making my own.  I also used a mixture of all-purpose flour and almond meal in the bread dough.  I could not find candied fruit peel, and to be honest I didn’t try all that hard.  I also added in some cinnamon with the cardamom.  As a result this bread was very similar to the Hot Cross Buns I made last week, with the exception of the almond filling. The dough was pretty easy to deal with and had good texture and flavor after baking. The almond paste, which I was totally excited about, wound up being a little much for me.  Maybe I should have used less of it.  I divided a 7 ounce tube in half, rolled the halves into long ropes and put them inside each piece of dough.

Paasbrood Prep | Hottie Biscotti Paasbrood Prep | Hottie Biscotti Paasbrood Prep | Hottie Biscotti Paasbrood Prep | Hottie Biscotti Paasbrood Prep | Hottie Biscotti Paasbrood Prep | Hottie Biscotti Paasbrood: Dutch Easter Bread | Hottie Biscotti

When I ate a piece of the bread just after glazing I found myself breaking up the paste a little and kind of spreading it out onto the bread instead of taking a bite of mostly almond paste.  And while the flavor of the bread was terrific, I wasn’t all that impressed with the almond paste filling.  Maybe it just needed to be less concentrated.  Or maybe I should have made my own so that the texture would’ve been different.  But overall the bread was nice and toasting a slice and spreading a little butter on it is a really nice way to enjoy it.

Paasbrood: Dutch Easter Bread | Hottie Biscotti Paasbrood: Dutch Easter Bread | Hottie Biscotti

Paasbrood (Dutch Easter Bread)

Adapted from Taste.com

Makes 1 loaf

Ingredients

  • 1/2 cup whole milk, warmed to about 100°F
  • 1 tablespoon sugar
  • 2 teaspoons yeast
  • 1 1/4 cup all purpose flour, plus extra flour for dough and counter
  • 1/2 cup almond meal
  • 1/2 teaspoon caradmom
  • 1/4 teaspoon cinnamon
  • 1/4 teaspoon salt
  • zest of 1 lemon
  • 1 egg, lightly beaten
  • 2 tablespoons of butter, melted
  • 1 cup raisins
  • 1 tube (7 ounces) almond paste
  • powdered sugar
  • water or milk
  • red food coloring (optional)

Directions

  1. Combine milk, yeast and sugar in a small bowl or measuring cup and allow to sit for 5 minutes, until foamy.
  2. Whisk flour, spices, salt and lemon zest in the bowl of a stand mixer fitted with a dough hook.  Add in milk mixture, egg and butter and turn mixer on low to start mixing, then on medium for 4-5 minutes.  Add in a few tablespoons of flour if dough is very sticky.  Once dough reaches a consistency where it is becoming more elastic than sticky, cover bowl with a towel and allow to rise in a warm place for an hour.
  3. Divide almond paste into two equal sized pieces and roll each into a log about 12 inches long.
  4. Preheat oven to 400°F.
  5. Flour a clean work surface and turn dough out.  Knead in the raisins, then divide dough in half.  Roll each half into a long rectangle a little longer than the almond paste log and a couple inches wide.
  6. Place the almond log in the center of the dough piece and enclose it by pinching the dough around it.  Repeat with the other dough and almond paste.
  7. Line a cookie sheet with parchment paper.  Place the dough pieces side by side on the sheet and pinch two end together, then twist the dough about 4 times, then pinch bottom ends together.
  8. Bake for 10 minutes, then reduce the heat to 350°F and bake for an additional 15-20 minutes, until bread is nicely browned.  Cool completely on a wire rack before drizzling with the glaze.
  9. Make the glaze: Mix about 1 cup of powdered sugar with either water or milk (you could also use lemon juice, like I did, but I would not do it again) a teaspoon at a time until it reaches a good drizzling consistency.  You can color with food coloring if you’d like at this point.  Drizzle over the bread and allow to set before cutting and serving.

Hot Cross Buns

It’s Good Friday, and while I have never personally associated hot cross buns with today, a lot of people in the UK, Australia and other countries with British ties do.  And The Pioneer Woman.  So of course she has an incredible recipe for them.  That’s just what she does.

hotcrossbuns2

I can see this becoming a tradition in our house.  My kids are too young to understand what Good Friday really means, but I did talk to Carson this morning about Jesus dying on the cross today after he ate (picked at) his hot cross bun.  As they get older I can see us starting the day on Good Friday eating these and talking about the importance and the meaning of the coming weekend.

hotcrossbuns4

I followed the recipe, found here, exactly.  The only thing I think I would do differently is to tear the dough into larger pieces.  The recipe says golf ball/ping pong ball sized, and that the recipe yields 18 buns.  When I was tearing them that small I was going to get more than 18.  I’d say make them a little bigger, maybe tennis ball size.  Also, watch them as they bake.  The smaller dough balls do not need 20 minutes in the oven.  Check them after 10 minutes, rotate the pan, and then keep an eye on them.  At 400°F they go from nicely browned to too dark very quickly.  The ones I overcooked were not as good at the ones I pulled from the oven before they got too dark.

The flavor of these buns is incredible.  I baked these last night and I just had to try one warm from the oven.  I was planning to have a pinch, but I stood there in the kitchen taking pinch after pinch until that bun was gone.  The frosting on top makes them extra beautiful, makes the name fit them, and adds a nice bit of extra sweetness.

hotcrossbuns1

I hope you try these, if not on Good Friday, just as a nice breakfast bread anytime.  If you lived back in the days of Elizabeth I you wouldn’t be allowed to enjoy these on any days but Good Friday, burials and Christmas!  Enjoy celebrating Easter this weekend!

Hot Cross Buns

From The Pioneer Woman

Makes 18-24 depending on size

Ingredients

Buns

  • 2 cups whole milk
  • 1/2 cup canola oil
  • 1/2 cup sugar
  • 1 package (2 1/4 teaspoons) active dry yeast
  • 4 cups flour
  • 1/2 cup (additional) flour
  • 1/2 teaspoon baking powder
  • 1/2 teaspoon baking soda
  • 2 teaspoons salt

Filling

  • 1/4 cup sugar
  • 1 teaspoon cinnamon
  •  Spices: cardamom, nutmeg, allspice (I used 1/2 teaspoon cardamom and 1/4 teaspoon nutmeg)
  • 1/2 cup raisins (I accidentally used 1 cup, and they were still great)

Glaze

  • 1 egg white
  • splash of milk

Frosting

  • 1 egg white
  • powdered sugar
  • milk
  • 1/2 teaspoon vanilla

Directions

Buns

  1. Heat milk, oil and sugar over medium heat until hot, but not boiling.  Remove from the heat and let cool until warm, between 100 and 115°F.
  2. Transfer milk mixture to a large bowl and sprinkle the yeast over the top, followed by 4 cups of flour.  Mix it all together well, then put a towel over the bowl and let it rest for 1 hour.
  3. Stir the sugar and spices together and set aside.
  4. Mix in the extra 1/2 cup flour along with the salt, baking powder and baking soda.  After it is combined, turn the dough out onto a well floured surface and flatten the dough evenly.
  5. Sprinkle some of the sugar over the dough, then sprinkle with some raisins.  Fold the dough over it self, flatten it out again and repeat with the sugar and raisins.  Fold over again, flatten, sprinkle with sugar and raisins, then fold once more and flatten slightly.
  6. Pull off pieces of dough, about tennis ball sized for larger buns, golf ball sized for smaller buns, roll into balls, pull the edges of the dough down and underneath the dough ball, and place on parchment lined cookie sheets.  Repeat for all the dough, leaving buns enough room to spread and rise in the oven.
  7. Place a clean towel over the buns and let rest for at least 30 minutes and up to 1 hour.
  8. Preheat oven to 400°F.
  9. Whisk egg white and a little milk for glaze and brush on the buns before putting them in the oven.
  10. Bake for 10 minutes, then check buns and rotate the pans.  Bake until buns are lightly browned, 10-12 minutes for smaller buns, 13-18 for larger buns.
  11. Let cool completely on wire racks.

Frosting

  1. Mix egg white with powdered sugar until it is smooth and thick.  Add a little milk to thin it out slightly, but still at a consistency that will not run off the buns.
  2. Put frosting in a piping bag or a ziploc, cut the tip and pipe a cross onto each bun.  Let harden (or not!) and enjoy.


Dried Cherry, Almond and White Chocolate Cream Scones

Scones.  Glorious scones!  Way better than muffins and not much more work.  In some ways I think they’re actually easier than muffins, I never liked cleaning muffin tins.  Scones are also easily adaptable.  These scones are full of goodies, but a simple scone with nothing in it is amazing when spread with a little jam or truly and simply plain.  If you’ve never tried to make scones, please do yourself a favor and make a batch of these!  You’ll be amazed at how easy they are and how amazing they taste. cherry-almond-scones-1 This is yet another recipe courtesy of my current favorite cookbook, America’s Test Kitchen Family Cookbook.  I took the basic recipe and added in dried cherries, sliced almonds and white chocolate chips.  I also brushed the tops with a little cream and sprinkled them with a little sugar.  I would’ve liked to have used coarse sugar but couldn’t seem to find mine, probably a sign I need to do some pantry organizing. cherry-almond-scones-4 In the recipe they recommend forming the circle in a cake pan, then turning it out before slicing into wedges.  What a wonderful idea!  It keeps it perfectly shaped and makes for beautiful scones.  But you can achieve equally tasty and lovely scones by free forming your disc.  I like to use a pizza cutter to cut the scones, but a bench scraper or large knife will do just fine. Like I said before, make these with what you like or have on hand to make them your own and experiment to find a combination that you really love.  Replace the cherries with your favorite dried fruit, the almonds with pecans, or walnuts, and leave out the chocolate altogether or use dark or milk chocolate chips.  Be careful not to load too much into these, though.  I used a total of 1 cup of additional ingredients and I wouldn’t go much heavier on the mix-ins than that.  As with biscuits, don’t over mix or over work the dough.  Mix and knead just until it holds together.  Overworking will yield a dense scone that doesn’t rise as well. cherry-almond-scones-2 I do have to warn you about these.  I photographed them while they were still warm and had a few bites of this one.  A few bites turned into me eating the entire thing.  And I loved every minute of it.  So make sure to exercise some self control and don’t eat all of them yourself!  Or do.  Just call it “research” or “quality control”. cherry-almond-scones-3

Dried Cherry, Almond and White Chocolate Cream Scones

Adapted from America’s Test Kitchen Family Cookbook Ingredients

Makes 8 scones

Ingredients

  • 2 cups flour, plus more for the counter
  • 3 tablespoons sugar. plus a little for sprinkling
  • 1 tablespoon baking powder
  • 1/2 teaspoon salt
  • 5 tablespoons butter, cold,  cut into chunks
  • 1/2 cup dried cherries
  • 1/4 cup sliced almonds
  • 1/4 cup white chocolate chips
  • 1 cup heavy cream, plus a little extra for brushing
  • 1/2 teaspoon almond extract

Directions

  1. Preheat oven to 450°F.
  2. Combine flour, sugar, baking powder and salt in the food processor.  Pulse a few times to combine.
  3. Add the butter chunks and pulse until the mixture is coarse like sand with some larger pieces of butter.
  4. Transfer the mixture to a large bowl and add the cherries, almonds and chocolate chips, then add the cream and the almond extract.  Mix with a rubber spatula until the mixture just comes together.
  5. Turn the dough out onto a floured surface and knead the dough until it comes together.  Press into 9-inch cake pan or free form the dough into a 9-inch disk.
  6. Turn dough out again (if you used a cake pan) onto a parchment lined cookie sheet.
  7. With a pizza cutter or other cutting tool, cut the disk into 8 triangles, separating them from each other a little.
  8. Brush with a little cream and sprinkle with a little sugar (or coarse sugar if you have some).
  9. Bake for about 15 minutes, until tops are light brown.
  10. Remove from the oven and let cool for 10 minutes before serving.

Mini Meyer Lemon Poppy Seed Pound Cakes

When you buy a bag of Meyer lemons, you need to use that bag of Meyer lemons.  I made these lovely lemon pudding cakes a few weeks ago and loved the flavor of the Meyer lemons, sweeter than a regular lemon but still tart.  How could I go wrong by using them in a lemon pound cake?

Meyer-Lemon-Pound-Cake-Slic

I’ve been on a kick with this cookbook lately.  It’s a great resource and it’s where I found the recipe for this pound cake.  I’ve made a cold oven pound cake before that is really special, but is pretty involved, whipping egg whites and such.  This cake come together quickly and uses a food processor to mix the wet ingredients so that curdling isn’t an issue thanks to the quick mixing speed.

Meyer-Lemon-Poppy-Seed-PounMeyer-Lemon-Popy-Seed-PoundMeyer-Lemon-Pound-Cake

You can make this pound cake in an 8-inch loaf pan or in mini loaf pans, which is what I chose to do so that I could give these as gifts.  I added lemon juice, lemon zest and poppy seeds to the classic pound cake recipe to make these cakes.  From what I can tell, this would create a fantastic plain pound cake as well and I’ll probably be trying it soon.

The flavor of this cake is perfectly lemony.  The texture is light and the crust is slightly crunchy and totally delicious. I think it’s sugaring the pans, one of my favorite things to do with quick breads, and now with pound cake.  The small loaf pans allow you to have a small piece that still looks complete instead of cutting a larger piece in half.  I think these would be perfect for a brunch, bay shower, tea party, etc.

Meyer-Lemon-Pound-Cakes

Mini Meyer Lemon Poppy Seed Pound Cakes

Adapted slightly from America’s Test Kitchen Family Cookbook

Makes 1 8-inch pound cake or 4 mini loaves

Ingredients

Cake

  • 1 1/2 cups cake flour
  • 1 teaspoon baking powder
  • 1/2 teaspoon salt
  • 1 1/4 cups sugar
  • 4 teaspoons Meyer lemon juice
  • zest of one lemon
  • 4 eggs, room temperature
  • 2 teaspoons vanilla
  • 2 sticks of butter, melted and hot
  • 1 tablespoon poppy seeds

Glaze

  • 1 cup powdered sugar, sifted
  • 6-9 teaspoons Meyer lemon juice

Directions

  1. Preheat oven to 350°F.
  2. Grease and sugar your pan/s.
  3. To make the cakes: Whisk flour, baking powder and salt together in a small bowl, then set aside.
  4. In the food processor combine the sugar, lemon juice, zest, eggs and vanilla and mix until combined, about 10 seconds.  With the processor still running, pour in the melted butter through the tube in a slow, steady stream.  Transfer the mixture to a large bowl.
  5. Sift 1/3 to half of the flour mixture over the wet ingredients and whisk until almost no flour is visible.  Repeat with the remaining flour in 1 or 2 more additions.  Whisk in the poppyseds just to combine and be careful not to overmix.
  6. Pour the batter into the prepared pan/s.  If you use mini loaf pans, 2 cups of batter each is about right.
  7. Bake for 40 minutes (for mini loaves) and 50-60 minutes for an 8-inch loaf until a cake tester comes out with a few crumbs.
  8. Let cool in the pan for 10 minutes, then remove from the pan and let cool on a wire rack.
  9. To make the glaze: after sifting the sugar add lemon juice, start with 1 tablespoon, then add juice one teaspoon at a time until it reaches the consistency you desire.  Drizzle onto the cooled cakes.

Basic Cream Biscuits

As I declared recently I am on a mission to be a master biscuit maker.  So today I am stating with a basic biscuit recipe, the cream biscuit.

creambiscuit1

The ingredients are simple and you probably have all but the heavy cream right now.  Maybe you have the cream if you’re an avid baker or you drink cream in your coffee, or you just have a kitchen that’s ready for anything!  I had to go out and buy some cream to make these biscuits, but I had everything else, flour, baking powder, salt and sugar.  That’s all you need.  And from start to finish these only take about 25 minutes!  What could be better than a quick, simple and delicious biscuit?

creambiscuit2

Everyone wants a tender biscuit.  So, as I began making these biscuits I was very conscious of a tip I’ve heard and read many times regarding biscuit making, DO NOT OVERWORK THE DOUGH.  So I mixed it up just until it held together, and I kneaded it just enough so that I could easily pat it together to cut from.  After cutting three 2 1/2 inch biscuits from my first round of dough I was a little scared to bring the scraps together to cut from, so I dealt with them very gently.  The result was a less uniform biscuit, but one that still tasted amazing!  The lesson I learned from this was to make sure you get as many biscuits from your first round of dough as possible to get as many beautiful biscuits as you can.

I was also shooting for tall biscuits, so I patted the dough out a little thicker than the recipe states, about 1 inch thick.  This led to fewer total biscuits, 6 instead of the 8 the recipe states you’ll get from the recipe.

The biscuits fill your house with an amazing and rich aroma as they bake.  It’s so delicious that you can’t help but take a bite of one of these as soon as they’re cool enough to eat.  And that, of course, is they best time to eat them, when they’re nice and warm.  If you make these ahead of time, you can warm them in a low oven before eating.  You can also cut the rounds of dough, place them on the cookie sheet, then cover them and refrigerate for up to 2 hours before baking.

creambiscuit3

Enjoy these with butter and jam, the simpler the better in my opinion.  However, I do plan to use some of the leftover biscuits to make breakfast sandwiches this weekend.

Basic Cream Biscuits

From America’s Test Kitchen Family Cookbook

Makes 6-8 biscuits, depending on the cutter

Ingredients

  • 2 cups flour, plus extra for dusting
  • 2 teaspoons sugar
  • 2 teaspoons baking powder
  • 1/2 teaspoon salt
  • 1 1/2 cups heavy cream

Directions

  1.  Preheat oven to 450°F and line a baking sheet with parchment paper.
  2. Whisk flour, sugar, baking powder and salt in a large bowl.
  3. Make a well in the center and add the cream.  Mix gently with a wooden spoon until just combined.
  4. Turn dough out onto a floured surface and knead just until dough comes together.
  5. Pat into a round about 3/4 to 1 inch thick.  Using a 2 or 2 1/2 inch cutter, press straight down without twisting to cut each biscuit.  Place on the baking sheet and continue cutting.
  6. Gather scraps together and cut as many more as you can.
  7. Bake for 12-15 minutes until tops are golden.

Sweet Potato and Rosemary Biscuits

I want to be good at biscuit making.  Really good.  So good that someday my kids or grandkids will say, “These aren’t as good as Mom’s biscuits.” when they have someone else’s.  But I’ve only made biscuits a handful of times, and you can’t get really good at something unless you do it a lot.  So I think I am going to start making biscuits more, and I’m starting with something a little out of the ordinary, but totally delicious.

sweetpotatobiscuits6

This recipe comes from The Kitchn, I just added some fresh chopped rosemary and opted not to make the maple butter, which I am sure is truly heavenly.  But I was looking for something a little more savory to serve with dinner.

sweetpotatobiscuits1 sweetpotatobiscuits2 sweetpotatobiscuits3 sweetpotatobiscuits4 sweetpotatobiscuits5

These biscuits turned out very well, although not tall and fluffy like I imagine perfect biscuits to be.  They are moist and the flavor is incredible.  The sweet potato isn’t all that noticeable, but does add a nice sweetness to the biscuit and a lovely orange hue.  The rosemary is just present enough without being overwhelming.

sweetpotatobiscuits7

Serve these with butter, cause you can’t ever have too much.   Enjoy them for breakfast, lunch or dinner.  I think a little bacon and egg on one of these would be a spectacular way to start the day.  With a few slices of ham they’d make nice little lunch sandwiches, and serve them along side soup or whatever you’re having for dinner.  Or just eat one as an afternoon snack.

Sweet Potato and Rosemary Biscuits

From The Kitchn

Makes 9 3-inch biscuits

Ingredients

  • 2 cups flour
  • 4 teaspoons baking powder
  • 1/2 teaspoon salt
  • 1 teaspoon fresh chopped rosemary
  • 1 cup cooked, mashed sweet potato (about 1 medium sized sweet potato)
  • 3/4 cup butter milk (you may not use quite all of this)
  • 6 tablespoons unsalted butter, cold and cut into chunks

Directions

  1. Preheat oven to 375°F.
  2. Line a baking sheet with parchment paper.
  3. Whisk together flour, baking powder and salt in a large bowl.  Set aside.
  4. Whisk sweet potato, 1/2 cup buttermilk and rosemary together in a small bowl.  Set aside.
  5. Cut butter into the flour mixture using a pastry blender, 2 knives, or your hands, until butter is a bit smaller than pea sized.
  6. Fold in the sweet potato mixture, add a little more buttermilk if mixture seems dry.  Bu it should still be a little sticky.  Chill the dough for 30 minutes.
  7. Flour a work surface and turn dough out onto it.  Pat out into a round, about 1 inch high.  Use a 2 or 3-inch round cutter and cut as many biscuits out from the dough as you can and place them on the baking sheet.  Pat the dough scraps together and cut more biscuits.
  8. Bake for 15 minutes, then let cool (or not) and enjoy.

Daring Bakers: Star Breads

Beauty surrounded the Daring Bakers this month as our host, Sawsan, of chef in disguise, challenged us to make beautiful, filled breads. Who knew breads could look as great as they taste?

pestobread2

When I saw this challenge I felt a little intimidated.  I don’t feel 100% comfortable with bread, always fearing I will make a mistake somewhere along the way and the dough won’t rise or the end product will be dry and inedible.  But I wound up with two wonderful loaves of beautiful bread that even my kids loved.  It was referred to as the “special bread” by my son.

This challenge gave Daring Bakers the freedom to choose what they used to fill their bread and also what design they would create.  Being the non-creative type I just used the suggested methods for twisting my loaves of bread.  And if any part of you thinks, “I can’t do that.” trust me, you can.  It’s easier than it seems. For fillings I made a savory bread and a sweet bread.  I used the same dough recipe for each.

For the savory loaf I chose basil pesto and mozzarella cheese.  My only regret is not adding just a little more cheese to the layers.  But it was delicious and something I would definitely go through the trouble to make again.  It would be a lovely and impressive bread to bring to a dinner party or pot luck.

pestobread1

For the sweet loaf I went with classic cinnamon sugar.  We ate this bread for breakfast over the course of 3 days and Carson was sad when it was gone.  Again, this is something I’d make again without hesitation.  The method I used in twisting the dough was a little more complicated and tedious than the pesto bread, but baked up beautifully.

cinnamonbread3 cinnamonbread2

I drizzled this bread with a simple milk and powdered sugar glaze before serving.  Almost like eating a cinnamon roll, possibly better.cinnamonbread1

Here are a few pictures of the process, none of the actual twisting of the bread since I am my own photographer and could not manage to get any action shots.

dough1 dough2 dough3 dough4 dough5 dough6

The instructions I am going to try to write for how to shape your bread will probably fail in perfectly communicating how to do it.  So here are a few links that will help you.

This one has a good video on the entire process.  This is not the twisting method I used, but I think it looks beautiful and wish I’d found it before I made my bread!

And this one is what I used.  I found the pictures and instructions to be very helpful.

Pesto Star Bread

Ingredients

Dough

  • 1/4 cup water
  • 3/4 cup milk, room temperature
  • 1/4 cup butter, softened
  • 1 large egg, room temperature
  • 1/4 cup white sugar
  • 2 teaspoons dry yeast
  • 1/2 teaspoon salt
  • 3-1/4 to 3 1/2 cups all-purpose flour (start with 3 1/4, add more if you need it)

Filling

  • 3-5 tablespoons basil pesto, store bought or homemade
  • 3-5 tablespoons shredded mozzarella cheese

Topping

  • olive oil
  • faked salt

Directions

Dough

  1. Heat butter, milk and water just until butter has melted and mixture is between 100 and 110°F, warm but not hot.
  2. Put milk mixture into the bowl of a stand mixer and whisk in egg and sugar, then sprinkle yeast on to the mixture, stir once then let sit for 10-15 minutes.  Mixture should be foamy after this, if it’s not your liquid was too hot and killed the yeast or your yeast was no good to begin with.
  3. Place the dough hook on your mixer and begin mixing, adding about a cup of flour at a time.  Once all the flour has been added, mix until dough comes together.
  4. Place in a large greased bowl, cover with a clean towel and let rise in a warm place for 1-2 hours, until doubled in size.

Filling and Shaping and Baking

  1. Line a baking sheet with parchment.
  2. Turn dough out onto a floured surface and divide into 4 equal sized pieces.
  3. Roll one dough piece out, just big enough to fit your template.  I used an 8-inch cake pan, but I think if you can manage to roll your dough out well enough you could get a 9 or 10-inch circle out of the dough.  8-inch was a nice size, though.
  4. Place the template onto the dough and trim off the excess.  Transfer to the cookie sheet.
  5. Spread with a heaping tablespoon of pesto, just about to the edge, then sprinkle with about 1 tablespoon of cheese.
  6. Repeat with the remaining balls of dough, but not topping the top layer with pesto and cheese.  Press and tuck the edges of the top piece to enclose the bread somewhat.
  7. Brush the top layer with olive oil.
  8. With a small sharp knife or a bench scraper, cut the bread into 12 wedges, leaving the outer edge intact, making sure to cut all the way through the layers.
  9. Take one triangle and twist it gently 3 times and place back  in the center.  Repeat with the rest of the wedges, twisting in the same direction.
  10. Let rest for 15 minutes while you preheat the oven to 450°F.  Sprinkle with flaked salt and bake for 5 minutes, then lower oven temp to 375°F and bake for 10-15 more minutes until bread is golden brown.  Keep an eye on it so that it doesn’t get too dark.

Cinnamon Star Bread

Ingredients

Dough

  • 1/4 cup water
  • 3/4 cup milk, room temperature
  • 1/4 cup butter, softened
  • 1 large egg, room temperature
  • 1/4 cup white sugar
  • 2 teaspoons dry yeast
  • 1/2 teaspoon salt
  • 3-1/4 to 3 1/2 cups all-purpose flour

Filling

  • 1/2 stick butter, melted
  • 1/4 cup sugar
  • 1 tablespoon cinnamon

Topping

  • 1/4 cup milk
  • 1 tablespoon sugar

Glaze (enough for 4 pieces, double for the entire loaf)

  • 1/3 cup powdered sugar
  • 1 to 1 1/2 teaspoons milk

Directions

Dough

  1. Heat butter, milk and water just until butter has melted and mixture is between 100 and 110°F, warm but not hot.
  2. Put milk mixture into the bowl of a stand mixer and whisk in egg and sugar, then sprinkle yeast on to the mixture, stir once then let sit for 10-15 minutes.  Mixture should be foamy after this, if it’s not your liquid was too hot and killed the yeast or your yeast was no good to begin with.
  3. Place the dough hook on your mixer and begin mixing, adding about a cup of flour at a time.  Once all the flour has been added, mix until dough comes together.
  4. Place in a large greased bowl, cover with a clean towel and let rise in a warm place for 1-2 hours, until doubled in size.

Filling and Shaping and Baking

  1. Whisk sugar and cinnamon in a small bowl.
  2. Line a baking sheet with parchment.
  3. Turn dough out onto a floured surface and divide into 4 equal sized pieces.
  4. Roll one dough piece out, just big enough to fit your template.  I used an 8-inch cake pan, but I think if you can manage to roll your dough out well enough you could get a 9 or 10-inch circle out of the dough.  8-inch was a nice size, though.
  5. Place the template onto the dough and trim the excess.  Transfer carefully to the cookie sheet.
  6. Brush bottom layer with butter, then sprinkle generously with cinnamon sugar.  Repeat with the remaining dough, but only brush the top layer with butter.
  7. Using a small sharp knife or a bench scraper cut circle of dough into 8 equal-sized wedges, making sure to cut all the way through the layers.
  8. With a small knife cut a slit in the center of each triangle leaving space at the top and bottom, the cut should not reach either the base or the tip of the triangle.
  9. Take the tip of the triangle and gently bring it up, over and through the slit, then repeat once more making two twists.  Place the triangle back on the baking sheet and repeat with the remaining pieces.
  10. Take the outside edge of each triangle and pinch the ends up and together.
  11. Whisk together the milk and sugar and brush onto the bread.
  12. Let rest for 15 minutes while you preheat the oven to 450°F.
  13. Bake for 5 minutes, then reduce oven temperature to 375°F and bake for an additional 10-15 minutes until golden brown.

Glaze

  1. Sift powdered sugar into a bowl.
  2. Whisk in milk until mixture is smooth.
  3. Glaze entire loaf (with a doubled recipe of the glaze) OR glaze each piece individually.  If you don’t plan to eat all the bread in one sitting I’d recommend waiting to glaze the remaining bread until you plan to eat it.

Store any leftover bread wrapped in foil at room temperature for 3-5 days.  Re-warm in a low oven, toaster oven or microwave.  You could also freeze this bread, wrap it well in plastic wrap, then foil.  Thaw then reheat in a low oven.