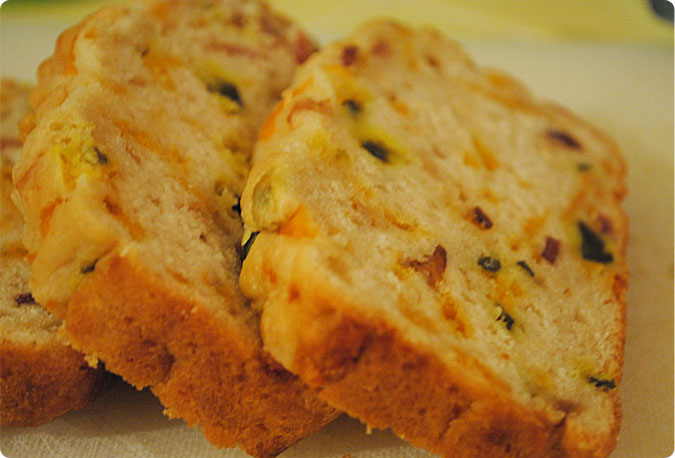
cheese

Daring Bakers: Pão de Queijo (Brazilian Cheese Bread)

This challenge was so simple, so fun and so delicious!  As always I was given the opportunity to try something I’d never tried before, and something I’d never even heard of!  These little light and airy cheesy Brazilian bread balls are something special and I’m excited to share them with you.

Pão de Queijo | Hottie Biscotti

This month’s Daring Bakers’ Challenge took us on a trip to beautiful Brazil! Renata of “Testado, Provado & Aprovado!” taught us how to make Pao De Queijo, tasty cheese buns that make the perfect snack or treat, and that will make your taste buds samba!

Pão de queijo are almost like popovers.  Their airy texture combined with their rich cheese flavor makes them super addictive, especially when eaten warm.  They’re great right after coming out of the oven just cool enough to handle.  But I rewarmed room temp ones in the microwave for about 8 seconds with great success 🙂  If you’re gluten free, then you’re in luck!  Instead of wheat flour you use tapioca flour here, which I found without any trouble at my grocery store with all the other specialty flours.  The texture is different than a bread made with all purpose flour, of course, but it still has a nice bready chew that would’ve fooled me if I didn’t know they were gluten free.

Pão de Queijo | Hottie Biscotti

Renata gave us the option of using any cheese we liked.  When I searched recipes I found Parmesan to be a popular choice.  So I went with 6 ounces of a goat cheddar and 2 ounces of Parmesan.  I liked the way it turned out, but she says any cheese or combination of cheeses would work, so get creative!

pao5 Pão de Queijo | Hottie Biscotti

The dough is very easy to make, but a little messy since you get in there with your hands and it is a bit sticky.  You don’t need any fancy equipment and your mixer doesn’t have to get dirty.  The recipe I used calls for 1-3 eggs and you may or may not use them all.  I did use all 3.  She recommends whisking all 3 eggs together and then adding what you need as you begin working the dough together.  Once it’s all together it rolls quite easily into balls and bakes up beautifully.

pao3 pao2 pao9

Since these are best eaten fresh from the oven I just baked half of the dough, then shaped the rest of the dough and froze it.  I haven’t tried it, but apparently you can bake them straight from frozen!  And that is what I plan to do the next time I need a last minute appetizer or snack for guests.  Bam.

pao10

Something I wish I’d tried was making this dough in a waffle iron.  I cannot begin to imagine the deliciousness of using this as the bread for a breakfast sandwich!

Thanks for the great challenge this month, Renata!  I really enjoyed it and am excited to experiment more with this terrific bread.

Pão de Queijo (Brazilian Cheese Bread)

From Renata of Testado, Provado e Aprovado

Ingredients

  • 4 cups (500 grams) tapioca flour/tapioca starch
  • 1 cup whole milk
  • 3 tablespoons butter
  • pinch of salt (or more if your cheese is not salty)
  • 9 ounces of coarsely grated cheese (I used a goat cheddar and Parmesan)
  • 1-3 large eggs, beaten

Directions

  1. Preheat oven to 400°F.
  2. Sift tapioca flour into a large bowl.
  3. Combine milk, butter and salt in a saucepan and heat over medium until mixture boils, then remove from the heat.
  4. Pour hot milk over tapioca flour and begin stirring with a fork, working the mixture until the milk is evenly distributed.  It will look crumbly.  Let it cool off a bit.
  5. With clean hands, work in the grated cheese.
  6. Add in the eggs, a little at a time, working the dough together with your hands.  Once the dough holds together, you’re done.
  7. Line cookie sheets with parchment.
  8. Roll dough into balls about the size of ping pong balls.  They puff a little during baking, so don’t crowd them  too closely on the pan.
  9. Bake for 15-20 minutes. until tops just begin to brown.  Remove from the oven and cool just slightly before eating.


Simple & Satisfying Potato Soup

The forecast for this past week boasted 3 days in a row of cool and rainy weather.  Time to make some soup!  I started looking around for a potato soup recipe but most looked so heavy, full of sour cream and cheese.  I wanted a soup that would leave us full and satisfied without being totally weighed down.  I finally found a terrific recipe from The Pioneer Woman (are you at all surprised?).  Instead of cups and cups of whole milk and sour cream, there are cups and cups of chicken broth, with a little dairy to round out the soup and add creaminess.  It is heavenly.

potato-soup-1

I was immediately excited about the celery, onion and carrot in this soup.  Made me feel like I was eating even healthier with those extra vegetables.  And they add such wonderful flavor.  I used shallot instead of onion because I didn’t have one.  Next time, though, I will use a regular onion.  Less peeling and chopping.  Everything else in the recipe is unchanged.  I might cook a few extra pieces of bacon because, if you are anything like me, having some of those crunchy bits on top is necessary.  The 6 pieces aren’t enough for the entire pot of soup.  Maybe this says something about our love of bacon.  I’d say 10 pieces would be good, and if you have extra, well, there is not a thing wrong with extra bacon bits.

After cooking the soup you puree about half of it in the blender.  This creates a nice balance of smooth and chunky so that every bite has something to chew on, which is what I like in a soup.  I used a sharp cheddar on top of the soup, but a sharp white cheddar would also be delicious, or whatever cheese you like on a baked potato.

Top this soup with a little bacon, cheese and green onion and you have all the flavor of a hearty baked potato soup but without the bulk of it.  This is definitely a recipe I’ll be making again.

Note:  When reheating you might need to add some chicken broth or milk to thin it out since it does thicken as it sits in the fridge.

potato-soup-2

Potato Soup

From The Pioneer Woman

Feeds 6-8

Ingredients

  • 6 – 10 slices of bacon, chopped
  • 1 whole medium onion, diced (I used 4 large shallots)
  • 3 carrots, diced (I used about 20 baby carrots)
  • 3 celery stalks, diced
  • 6 whole small russet potatoes (or 3 large) peeled and diced
  • 8 cups chicken or vegetable broth
  • 3 tablespoons flour
  • 1 cup milk (I used 2%)
  • 1/2 cup half and half (or heavy cream)
  • 1/2 teaspoon salt, more to taste
  •  Balck pepper to taste
  • 1/2 teaspoon seasoning salt (I used Lawry’s)
  • 1 tablespoon fresh parsley, minced
  • 1 cup grated cheese
  • 4 green onions, sliced thin

Directions

  1. Heat a large pot over medium high heat.  Add in the chopped bacon and cook until crispy, being careful not to burn it.  Remove from the pot and place on a paper towel-lined plate and wipe out some, but not all, of the bacon fat.
  2. Over medium high heat cook onion, celery and carrots for a couple minutes, until they begin to soften.  Add potatoes and cook, stirring things around a little, for about 5 minutes.  Season with salt, pepper and seasoning salt.
  3. Add the broth to the pot and bring it to a simmer.  Cook for 10 minutes, until potatoes are fork tender.
  4. In a bowl whisk flour and milk and add to the pot.  Stir together and cook for about 5 minutes.
  5. Puree about half of the soup in a blender (I filled my blender almost full).  Be sure to remove the center piece from the top of the blender and cover with a dish towel.  If you don’t, you could make a big mess since you’re pureeing hot liquid.
  6. Pour the puree back into the pot, taste and season as needed.  Add in the cream or half and half, and the parsley.
  7. Serve with cheese, bacon bits and green onion.


Daring Bakers: Jalapeño, Bacon and Cheese Beer Bread & Blueberry Almond Streusel Bread

Oh, how I love quick breads.  They are delicious, easy and, most importantly, quick.  This month’s challenge was quite versatile and so fun.  I was able to make one loaf of savory bread to serve with dinner and then a sweet loaf a couple days later for breakfast.  Getting started on this challenge more than a day before the posting date was immensely helpful and I hope I can do the same thing next month.  But we shall see…I have a history of acknowledging how great it was to work on something and get it done early and yet still managing to go back to my old ways of procrastination.

The Daring Bakers’ February 2012 host was – Lis! Lisa stepped in last minute and challenged us to create a quick bread we could call our own. She supplied us with a base recipe and shared some recipes she loves from various websites and encouraged us to build upon them and create new flavor profiles.

This jalapeño bread was a big hit.  I made a meal of barbecued chicken, creamed corn and cole slaw (all recipes I’d never used before and all of which were flops) and then this bread.  My husband told me the bread was the best part of the meal, and he was right.  I used a sharp cheddar cheese, pickled jalapeños, crumbled bacon and a bottle of Shiner.  We ate it with dinner warm from the oven and the next couple of mornings toasted with butter. I’m bummed it’s all gone, so I’ll probably have to make another loaf.

Jalapeño, Bacon and Cheese Beer Bread

Ingredients

  • 3 cups flour
  • 3 tablespoons sugar
  • 2 teaspoons baking powder
  • 1 teaspoon coarse salt
  • 1/2 cup chopped pickled jalapeños
  • 1/2 cup bacon, cooked and crumbled
  • 1 cup grated cheese
  • 12 ounces beer
  • 1/4 cup butter, melted

Directions

  1. Preheat oven to 375°F and grease a 9×5 loaf pan.
  2. Measure and then sift the flour, baking powder, sugar and salt into a mixing bowl.
  3. Mix in the the chopped jalapeños, cheese and bacon.
  4. Pour one can of beer into the mixing bowl and mix until blended.
  5. Pour mixture into the loaf pan, then pour half of the melted butter over the top.
  6. Bake for 30 minutes, then pour remaining butter on top of the loaf.  Bake for another 20-30 minutes or until golden brown.
  7. Cool for 5-10 minutes, then remove from the pan and cool an additional 10 minutes.

The blueberry almond bread recipe came from Joy the Baker.  She used raspberries in her bread, and I might try that next time, or maybe a mix of berries.  I used frozen blueberries that I’d thawed out and drained, and dried as much as I could on paper towels.  I added a buttery almond streusel to the top of this bread that was so delicious, sweet and crunchy.  It might have been my favorite part of the loaf.

Blueberry Almond Streusel Bread

Streusel

Ingredients
  • 1/3 cup flour
  • 1/4 cups sliced almonds, toasted
  • 1/4 cup cold butter, cut into small chunks
  • 1/4 cup brown sugar
  • 1/4 cup sugar
Directions
  1. Mix together all ingredients except for almonds and butter.
  2. Cut butter into flour mixture with a pastry blender or two knives until the butter pieces are mostly the size of small pebbles with some larger pieces, then mix in the almonds.  Refrigerate until ready to use.
Bread

Ingredients

  • 2 cups flour
  • 1 teaspoon baking powder
  • 1 teaspoon baking soda
  • 1/2 teaspoon salt
  • 1/2 cup (1 stick) unsalted butter, room temp
  • 1 cup sugar
  • 1/2 teaspoon pure almond extract
  • 2 eggs
  • 2 tablespoons sour cream
  • 1 cup blueberries, fresh or thawed and drained if frozen
  • 1/3 cup slivered almonds, toasted

Directions

  1. Preheat oven to 325°F.  Grease and sugar a 9×5 loaf pan.
  2. In a medium bowl, whisk together the flour, baking powder, baking soda and salt. Set aside.
  3. In a large bowl, using an electric mixer, cream the butter, sugar and almond extract until light and fluffy, about 3 minutes. Beat in the eggs one at a time, beating well after each addition. Mix in the flour and sour cream. Fold in the crushed fruit and almond slivers.
  4. Spoon the batter into the prepared pan, then top with streusel.  Bake in the center of the oven for 55 to 60 minutes, or until a cake tester inserted into the center comes out clean.
  5. Cool the bread in the pan for 20 minutes, then invert onto a wire rack, turn right side up and cool completely.

Barbecue Quesadillas

When it rains it pours when it comes to leftovers in our house.  Last night, for example, we had 3 different choices for dinner using leftovers.  It can get a little boring when its the same meal that’s just been reheated.  Leftovers are a lot more bearable when you can make something new out of them.  This is what I did with some leftover turkey from Rudy’s BBQ.  Mmm.  Rudy’s.

Along with the turkey I had barbecue sauce, tortillas, shredded Mexican blend cheese, half of a red onion, and half of a red bell pepper, all left over from other meals.  Since this was kind of a last minute dinner and I wasn’t sure exactly how it was going to turn out, I didn’t really measure anything.  If you’re not comfortable with that kind of cooking, this is a great way to start.  The best way to get better at cooking without a recipe is to practice.  Just use your judgement and use what you like.  If you have barbecued brisket or chicken instead, then use those.  I used a Mexican blend of shredded cheese, but cheddar, monterey jack, or pepper jack would all work.  If you don’t like onions, don’t use them.  If you like green bells instead, use those.

I’ve learned that when making quesadillas, like pizza, do not overdo it on the fillings (toppings for pizza).  It can be a mess to flip over, and if the filling to crunchy tortilla ratio is off, they aren’t as tasty.  Also, make sure to get your pan hot and use some kind of fat (butter is best in my opinion) even if its just a little bit.  It makes for a much crunchier exterior.  Enjoy!

Barbecue Quesadillas

Serves 3-4

Ingredients

  • 6 flour tortillas
  • 2-4 tablespoons butter
  • 1 1/2-2 cups chopped barbecued turkey (brisket or chicken)
  • 3-5 tablespoons barbecue sauce
  • 1/2 red onion, thinly sliced
  • 1/2 bell pepper, thinly sliced
  • 1-2 cups shredded cheese
  • sour cream (optional)

Directions

  1. Mix the turkey with the barbecue sauce, adding 1 tablespoon at a time until the meat is lightly coated. (Add more if you like.)
  2. Heat a skillet over medium heat.
  3. Lay out half of your tortillas and begin evenly layering cheese, turkey, onions, bell peppers and more cheese.  Top with another tortilla.
  4. Melt some butter (I use between 1/4 and 1/2 tablespoon) in the hot skillet.  Carefully transfer one quesadilla to the skillet and cook for 3-4 minutes until the bottom is nicely browned.
  5. Spread a little more butter on the top tortilla before flipping, being careful not to let too many toppings escape.
  6. Cook for another 3-4 minutes until the other side is browned and the cheese has melted.  Transfer to a plate.
  7. Repeat with the other quesadillas.  You can keep these warm in a 200°F oven on a cookie sheet.
  8. Cut into quarters and serve with sour cream if desired.

Grilled Cheese with Apple & Bacon

These sandwiches made for such an easy dinner.  Grilled cheese is always delicious, but the addition of tart apple slices and yummy bacon make it extra tasty.  I usually add sliced tomato to grilled cheese sandwiches, but I might make these apple & bacon grilled cheeses my new go-to sandwich.

I used white cheddar cheese, granny smith apple, thick sliced bacon and sourdough bread spread with dijon mustard for the sandwiches.  You could make these in a skillet, or in a panini press (which is what I chose to use).  Serve along side a bowl of tomato soup or a green salad.

Grilled Cheese with Apple & Bacon

Serves 2

Ingredients

  • 4 slices of sourdough bread
  • Dijon mustard
  • 8-10 slices good cheddar cheese
  • 4-6 slices cooked bacon
  • 8-10 slices tart green apple
  • butter

Directions

  1. Spread bread with Dijon mustard, then layer cheese, bacon, apple and cheese.  Top with second slice of bread.
  2. Butter outside of the bread and grill on hot skillet or panini press.
  3. Eat!


Tomato Pie

You may not have a great reaction to this combination; tomato and pie.  Ben didn’t either when I told him what we were having for dinner.  When all was said and done though, he had three helpings last night and we finished off the rest of this today for lunch.

This recipe is from Simply Recipes.  Here is the link. Her picture is so much prettier than what came out of my oven, but it still tasted great.  I will admit to being a little impatient when it comes to eating these days, so maybe if I had let it cool a bit longer I would have had better luck in removing whole pieces instead of chunks of pie.

I get really hungry and excited about eating, and I just cannot wait to eat sometimes!  I’m pregnant, so I’m using that as my excuse.  Only 6 more weeks to use that one.

While Ben was slightly disappointed that there was no meat in our meal, he put on a happy face and eat it anyway.  If you wanted to add meat, I think some crumbled cooked bacon on top of the sautéed onions would be nice.

I will make this simple meal again and I would definitely think about serving it at a ladies lunch or brunch as a whole pie or in little tart shells.

The fresh basil with the tomatoes is a lovely match as always.  I used 2 cups of chopped red tomatoes and 1 cup of chopped yellow tomatoes from the rest of my tomato plant’s crop.  I used a combination of mozzarella and swiss cheese with good results, but some nice sharp cheddar in there would also be tasty.  The Tabasco gives a nice spicy punch, but you could leave it out if you are not a fan of that kick.  Enjoy!

Tomato Pie

Courtesy of Simply Recipes

Ingredients

  • 1 9-inch pie shell
  • 1 yellow onion, chopped and sautéed in olive oil or butter
  • 3-4 tomatoes, cut in half horizontally, squeezed to remove excess juice, roughly chopped, to yield approximately 3 cups chopped tomatoes
  • 1/2 cup sliced basil
  • 2 cups grated cheese (any combination you choose)
  • 3/4 cup mayonnaise (light or regular)
  • 1 teaspoon (or more to taste) of Frank’s Hot Sauce (or Tabasco)
  • Salt and freshly ground black pepper

Directions

  1. Preheat oven to 350°F. Place pie shell in oven and cook for 8-10 minutes or longer until lightly golden. If you are starting with a frozen crust, you’ll need to cook it a little longer. If you are using a homemade crust, freeze the crust first, then line the crust with aluminum foil and pre-bake it for 20 minutes, then remove the foil and bake an additional 10 minutes.
  2. Squeeze as much moisture as you can out of the chopped tomatoes, using either paper towels, a clean dish towel, or a potato ricer.
  3. Sprinkle the bottom of the pre-cooked pie shell with onion. Spread the chopped tomatoes over the onions. Sprinkle the sliced basil over the tomatoes.
  4. In a medium bowl, mix together the grated cheese, mayonnaise, Tabasco, a sprinkling of salt and freshly ground black pepper. The mixture should be the consistency of a gooey snow ball. Spread the cheese mixture over the tomatoes.
  5. Place in oven and bake until browned and bubbly, anywhere from 25 to 45 minutes.

Calzones and Cake

My birthday and our wedding anniversary are exactly one week apart.  This makes the dates easy to remember, but its hard to have  two celebrations so close together.  For my birthday, Ben took me to Boot Hill Saloon in Vega, Texas.  It was a really fun experience and we had a great meal.  If you live in the Amarillo area and haven’t yet been there, then I encourage you to make the trip to Vega.

For our anniversary, we couldn’t decide what to do.  We figured we’d eat at home, so I decided to make something a little out of the ordinary.  I made two different kinds of calzones, and they were both pretty delicious.

The meaty version was a Philly Cheese Steak Calzone.  I grilled a strip steak, sliced it up thinly, sauteed onion and green peppers and topped it all off with provolone cheese.

The veggie version was spinach, cheese and mushroom.  I sauteed the spinach with some garlic and squeezed it dry.  Then I mixed the spinach with ricotta, mozzarella and Parmesan cheese.  These ingredients alone would be perfect, but I added some sauteed mushrooms.

I tried a new recipe for dough, and I liked it a lot.  It rose well and was incredibly easy to roll out and make the calzones.  The only issue we had was that we had to break out the steak knives to cut through the bottom of the calzone.  Other than that, the dough had a good chew and good flavor.

I doubled the dough recipe and only baked 6 calzones for dinner and for leftovers this weekend.  I made the other 6 dough balls into calzones and froze them to thaw out and eat later.  It is so nice to have homemade meals in the freezer.  As long as you can remember to put them in the fridge the morning before you plan to enjoy them, kitchen time is cut to a minimum….as is clean up!

The recipe for the dough came from My Kitchen Cafe.  It is a French dinner roll recipe used as calzone dough, so I will probably try it for rolls at some point.  You make the dough as you would for the rolls, but divide the dough into about 6 pieces after the first rise for the calzones.

The Philly calzones recipe is also courtesy of  My Kitchen Cafe and the spinach and cheese came from Tyler Florence, although I did make a few changes.  All the recipes are at the bottom of this post.

Now, on to the cake.  I had planned for us to eat my Daring Bakers July dessert for our anniversary.  But when Ben got home from work he had a lovely pink box with him that contained this beautiful cake!

It was such a great surprise.  The cake was made by Cara Linn Cakes in Amarillo.  I took a cake decorating class from her a few months ago.  She is a great teacher, and is incredibly talented.  I am so pleased to have someone like her in Amarillo.  If you are a fan of the Food Network challenges, then you may have seen Alisa Strauss on a few of the cake challenges.  Cara interned for her in New York, before opening her own store.  If you’re not impressed by this, you should be!

The cake not only looked beautiful, it tasted even better.  The cake itself was a dense vanilla that was sweet and delicious, but not a fake sweet like cake mixes and most bakery cakes.  The buttercream was strawberry, that had actual pieces of strawberry in it.  Yum.  The fondant that covers the cake is unique in that it looks smooth and beautiful and it tastes good!  Cara changed my opinion of fondant.

If you are in need of a cake, cupcakes, or other sweet treats, please call Cara.  She was a huge help to my husband when he ordered the cake and she does an incredible job.  The cake classes are well worth your time and money.  I had such a fun time and I learned a lot.  You also get to take your cake creation home!

Read on for the calzone recipes.

(more…)

BLT Mac and Cheese

This obsession I have with macaroni and cheese may never end.  It is just too good.  How can you not love it?

My most recent mac and cheese adventure was a BLT version with bacon, leeks, tomatoes, colby jack cheese, and a toasted bread crumb topping.  While this did not quite live up to the deliciousness of other macs, it was still very tasty.  I liked the subtle flavor of the leeks, juicy tomatoes, salty bacon and creamy cheese.

The inspiration for this dish came while I was perusing recipes and found a BLT pizza that used arugala as the “lettuce” in the BLT.  I thought it could be changed a bit to make mac and cheese.  I searched BLT mac and cheese and found quite a few recipes, the top result being one from Rachel Ray.  It sounds pretty tasty, and I will probably try it sometime and see how it compares to this one.  She uses cream cheese in her recipe, and does not make a roux at all.  I like making the cheese sauce with the roux, milk and cheese, but maybe she’s on to something with the cream cheese.  I’ll let you know once I try it out.

All the recipes I found had a few basics in common.  All used bacon and tomatoes, of course, most used leeks, and arugala was the lettuce in most recipes that I found.  I could not find arugala at the grocery store, so my leeks became the “L” in this BLT.

Bacon, Leek and Tomato Macaroni and Cheese
  • 1 lb. short tubular pasta, such as penne
  • 12 slices of bacon
  • 4 tablespoons unsalted butter
  • 2 tablespoons flour
  • 1 cup whole milk
  • 12 ounces shredded cheese, cheddar, Monterey jack, etc
  • 1-2 garlic cloves, minced
  • salt & pepper to taste
  • 2 medium leeks, white and light green parts
  • 4 roma tomatoes
  • ¾ to 1 cup fresh bread crumbs
  • 3 tablespoons butter
  1. Preheat oven to 350 degrees.
  2. Cook the pasta according to package directions, drain and place cooked pasta in a large bowl; set aside.
  3. Cook bacon in a skillet over medium-high heat 8-10 minutes or until crisp. Remove bacon from skillet, leaving drippings in the pan, to paper towel-lined plate to drain and cool.  Chop bacon into ½ inch pieces then place in the large bowl.
  4. Slice leek in half lengthwise, then submerge halves in cold water to rinse out any dirt.  Remove from water, pat dry and slice into ½ inch pieces.  Saute the leeks in the skillet with bacon drippings over medium heat. Cook, uncovered, just until it softens up and place in the large bowl.
  5. Cut tomatoes into ¼ inch slices.
  6. In a sauce pan, melt 4 tablespoons butter. Once it’s completely melted, add the flour and whisk to create a roux.  Allow to just come to a boil and then slowly stir in the milk, then the garlic. Allow the milk to come to a simmer and thicken, whisking frequently to avoid clumps. Once it thickens up to coat the back of the spoon, turn off the heat. Carefully stir in the cheeses until melted. Add the garlic powder and salt & pepper to taste.
  7. Pour the cheese sauce over the pasta and other ingredients in the large bowl and mix well to combine.
  8. Spread half the pasta mixture into a pan, then layer half the tomato slices on top.  Cover with the rest of the pasta, then the rest of the tomatoes.
  9. In a small skillet, melt the 3 tablespoons of butter over medium high heat.  Add the bread crumbs and stir until the crumbs are slightly golden brown.  Sprinkle the bread crumbs on top of the casserole.
  10. Bake for 20 minutes until bubbly and the top has browned slightly.  Let rest for 5-10 minutes before serving.

Manchego Wrapped Olives

Olives.  A lot of people either love them or hate them.  I am not in either group.  I like them in certain dishes, but not others.  I like some kinds of olives, but not others.  I like some raw, and others I prefer to be baked on a pizza.  I am a mystery.  There is just no predicting which olive will please me, and which will cause me to turn up my nose in disgust.

With that little preface you are wondering, “Why did she even try this recipe?”  Well, I knew I had some olives that needed to be used, and I needed a snack that would be relatively easy and quick.  I found this recipe for olives wrapped in a cheesy dough and then baked on Allrecipes.com.  I have tried my hand at deep frying, and while it does create delicious, crunchy and greasy food, it makes my house smell and dealing with that oil is a pain.  So the baking aspect appealed to me.

I switched the cheddar cheese out for Manchego, added more seasoning to the dough, and used two kinds of stuffed olives: green olives stuffed with garlic and green olives stuffed with sun-dried tomatoes.  As I was writing out a shopping list I had a thought. Is it Ben who is not a huge fan of olives?  I sent him a text about what I was planning for dinner to find out.  His response was “Sounds great!”  He is such a sweet man.  Turns out he is in fact not a huge fan of olives.  But, get this…he actually LIKED them!  I guess if you wrap anything in a dough of butter, flour, Manchego cheese and paprika you can expect people to be pleased.

I liked these little bites of crispy, buttery cheesiness wrapped around the salty olive.  The only issue I faced in the preparation was getting the dough to come together.  It seemed way too crumbly.  If you just keep working, then it will become the smooth consistency you need to wrap the olives. 

Preparing these is a little time consuming since you must wrap each olive individually, but you can definitely wrap them ahead of time, chill them in the fridge, then bake them a half hour before you plan to serve them.  Since these were good even at room temperature they would be a great party food.  

Manchego Wrapped Olives

Adapted from Allrecipes.com

Ingredients
  • 1/2 pound Manchego cheese, shredded
  • 4 tablespoons butter, softened
  • 1/2 teaspoon paprika
  • 1/4 teaspoon black pepper
  • 2/3 cup all-purpose flour
  • 20 green olives, pitted, or stuffed
Directions
1. Allow cheese to sit out until it is at room temperature. In a large bowl, mix together the cheese, butter and paprika using a pastry blender. Gradually mix in flour, first using the pastry blender, then using your hands. Mix until the dough pulls together. It should form a solid ball with a smooth appearance, but have a crumbly texture when pulled apart. If dough appears too dry, add more shredded cheese.
2. Preheat the oven to 375 degrees F (190 degrees C). Pinch off a small piece of dough, and cover an olive with it. Roll gently between your palms to smooth and seal the olive inside the ball. Place onto an un-greased cookie sheet and repeat with remaining dough and olives. Place the tray of covered olives into the refrigerator for 10 minutes to firm up.
3. Bake for 20 to 25 minutes in the preheated oven, or until browned. Serve hot or at room temperature.


Photo courtesy of Bettycrocker.com

Easy Mac and Cheese with Chicken

There is something to be said for Kraft Mac and Cheese.  That’s right.  I said it.  Come on people.  You know you love it.  It’s the cheesiest and it doesn’t stick to your cookware like real cheese does.  I honestly and truly like, and sometimes I even crave the unnatural orange colored pasta dish in its blue box of goodness.  However, there are times when a girl needs to eat mac and cheese made from scratch.  This macaroni and cheese recipe comes from the Better Homes and Gardens website.

mac14

I loved the crunchy breadcrumbs on top of this dish.  The sauteed onions and garlic mixed with tomato paste give the sauce a richer flavor that is more than just milk and cheese.  I used 2% milk and half swiss, half sharp cheddar with a great resulting flavor.  I cooked the chicken in chunks, but ended up kind of shredding it into smaller pieces before adding it to the cheese.  The recipe calls for penne or similar pasta, but I used traditional elbow macaroni.

(more…)