Desserts

Dessert Recipes

Brownie Laced Peanut Butter Cookies

I was underwhelmed with these cookies.  Don’t get me wrong, they tasted like a fine peanut butter cookie.  However, I really wanted something amazing to happen in my mouth as a result of the chunks of brownie I mixed in, but no.  No explosions of flavor.  Just mediocrity.  Ok, I might be being a little hard on this recipe.  They really are a good cookie.  I would probably skip the brownie next time and just add chocolate chips instead.  I doubled the recipe that I found on bakingbites with no problems.  I bought an 8×8 package of pre-made brownies at the grocery store.  There were plain brownies and brownies with walnuts.  I said to myself (in my head of course) “That would be weird to use the ones with walnuts since the cookies are peanut butter!”.  I get home and realize that I’d BOUGHT the walnut brownies!  I am a smart one.  It turned out not to be an issue at all since you can’t really taste the brownie.

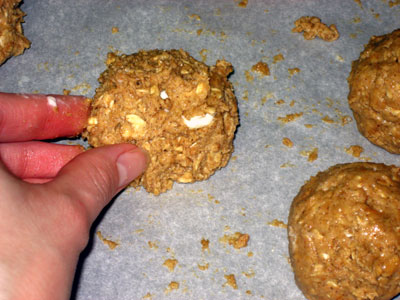
Here is the dough after mixing in the brownies.  The brownie bits break up quite a bit and distribute themselves through the dough.

I used a small cookie scoop, about 1 tablespoon, and 10 minutes was a good baking time.  It creates a crispy outer edge with chewy centers.  They will look undercooked, but take them out anyway.  Unless you like a thoroughly crispy cookie, in which case I would go for 12 minutes.  I always rotate my cookie sheets half-way through because my oven cooks quicker in the back.  Ok, so nothing spectacular here, but a comforting cookie nonetheless.

Brownie-laced Peanut Butter Cookies (adapted from Baking Bites)

2 2/3 cups all purpose flour
1 teaspoon baking soda
1 teaspoon salt
1 cup butter, slightly softened
1 cup brown sugar
1 cup white sugar
2 large eggs
2 tsp vanilla extract
1 cup chunky peanut butter
2 cups brownie chunks, in 1/4-inch pieces

  • Preheat oven to 375F and line a baking sheet with parchment paper.
  • In a small bowl, whisk together flour, baking soda and salt.
  • In a large bowl, cream together butter and sugars until light and creamy.
  • Beat in eggs one at a time, followed by the vanilla and chunky peanut butter.
  • Gradually add flour and mix until just combined.
  • Stir in brownies by hand.
  • Drop by rounded tablespoons on prepared baking sheets.
  • Bake for 10-12 minutes, until cookies are golden around the edges.
  • Cool for 3-5 minutes on baking sheets, then transfer to a wire rack to cool completely.

Makes about 3 dozen cookies.

The Antidote for a Bad Day

This is the name a woman at work used to describe the caramel stuffed brownies I brought to school today.  Of course every woman knows that chocolate is the cure for many common maladies.  The addition of caramel, pecans and chocolate chips…well that could pretty much cure anything.  Ok, so maybe not anything, but they will definitely cure your need for something sweet.  Rebecca Rather of Rather Sweet Bakery has done it again.  I haven’t made anything from her cookbook, The Pastry Queen, that hasn’t received praise and adoration from those who have been lucky enough to indulge in their sugary, buttery goodness.  I cut these brownies into about 1 inch squares and they were plenty rich and satisfying.  If they were any bigger you’d need a tall cold glass of milk as an accompaniment.  Ben could barely choke down one of them without going into a sugar coma.  The texture if very fudgy.  The caramel in the center is creamy and it oozes out the sides of the brownie like a glorious sugary waterfall.  The pecans and chocolate chips create a balance of texture that makes them irresistible.

I poured half of the batter into a foil lined and very well greased pan and baked it first.  Here is my first layer fresh from the oven.

The hardest part of the recipe is spreading the top brownie layer on top of the caramel.  You can tell from this picture that when I spread the brownie layer over the caramel I didn’t do the best job of spreading, so some of the caramel mixed with the brownie.  I don’t think it made a huge difference though, so don’t go crazy when you get to that step, it’s not a life or death kind of baking issue.  


After baking I chilled the brownies in the pan overnight and cut them as soon as I took them out of the fridge.  Even in the 10 minutes that it took me to cut them I noticed the caramel start to soften and come out of the sides of the brownie, so if they hadn’t been cold I’m sure I would have had a pretty nice mess on my hands!

Here is the recipe from The Pastry Queen cookbook.  These are a real treat, decadent and delicious.  With the weather cooling off, these are a good fall and winter dessert.

1 1/2 cups pecan halves
1 cup (2 sticks) unsalted butter
12 ounces bittersweet chocolate, coarsely chopped
1 1/2 cups sugar
4 large eggs
1 tablespoon vanilla extract
1 1/4 cups all-purpose flour
1/2 teaspoon salt
1 package (14 ounces) individually wrapped caramels, unwrapped
1/3 cup whipping cream
1 cup semisweet chocolate chips

Preheat oven to 350 degrees. Arrange pecans on a baking sheet in a single layer and toast until a rich brown, 7 to 9 minutes. Coarsely chop nuts and set aside. Line bottom and sides of a 9- by 13-inch baking pan with aluminum foil, leaving several inches hanging over short ends of pan. Grease foil with butter or cooking spray; be sure to coat sides thoroughly or caramel will stick.

Put butter and chocolate in a medium-sized heavy saucepan and cook over low heat, stirring occasionally, until melted and smooth. (Watch carefully so it does not burn.) Transfer chocolate to a large bowl, add sugar, eggs, and vanilla, and mix until thick and glossy. (This takes 1 to 2 minutes using a wire whisk or about 1 minute using a mixer fitted with a paddle attachment on medium-high speed.) Whisk or stir in flour and salt. Transfer half of batter (about 2 cups) to baking pan and spread evenly; bake for 20 minutes. Let cool for about 20 minutes.

Put caramels and cream in a medium-sized heavy saucepan and stir over low heat until melted and smooth. Remove from heat and stir in half of pecans. Immediately spread caramel mixture over baked brownies (if you let it sit, it will harden). Pour remaining brownie batter evenly over caramel mixture and spread gently to cover (do not pour either the caramel or the brownie batter all in one place or it will be difficult to spread without messing up the layers). Sprinkle chocolate chips and remaining pecans on top and bake for 20 minutes. Cool completely in pan (for quicker cooling, put pan in the freezer for 30 minutes).

To remove from pan, grasp overhanging foil and lift up. Cut brownies into squares. Individually wrapped in plastic, they will keep for 1 week unrefrigerated or for 1 month in the freezer. Makes 2 dozen bars.

Pics of Cream Cheese Stuffed Oatmeal Cookies

My wonderful husband managed to get our finicky computer to turn on tonight, so I was finally able to download my camera full of food photos and post them.  Woohoo!  Looking at these is making me hungry.  I’ve already made brownies tonight, so I cannot allow myself to bake anything else today…maybe tomorrow.  Here is the step by step process I used to stuff the cookies and a final product photo.  Yum.


Oatmeal Chocolate Chip Cookies

This afternoon I made the cream cheese stuffed oatmeal cookies, AGAIN, for the third time in a week!  I wasn’t in the mood to stuff them, so I decided to see how they fared without the filling.  I thought about just doing oatmeal, then I thought oatmeal and coconut, but in the end I decided to use Guittard Milk Chocolate Chips.

 These milk chocolate chips are by far my favorite in an oatmeal cookie.  They’re bigger than normal chips and are beyond delicious.  I eat them like Hershey’s Kisses sometimes.  No unwrapping required!  Anything that gets me to the chocolate quicker is a good thing.


Anyway, the last batch is in the oven as I type this post.  I had one that was the perfect temperature and it was good.  Next time I might add coconut and I will have to try it with raisins sometime.  Ben’s favorite is oatmeal raisin and so I’m always trying to improve on the Vanishing Oatmeal Raisin Cookie from Quaker.  I like the texture of this oatmeal cookie.  Not too soft, not too sweet, just right.  I think it will be a good base for an oatmeal raisin cookie.  I’ll fill you in once I go for batch number four of these cookies.

Cream Cheese Stuffed Oatmeal Cookies

As some of you may know I really like the idea of stuffed food, especially desserts.  It’s a lovely little surprise!  I have stuffed a cake with twinkies, brownies with peanut butter, and a cake with oreos all with OK results.  But when I came across this recipe I knew that I was in for something special.  An oatmeal cookie, in and of itself a delicious treat, stuffed with sweet cream cheese.  Does life get any better?  Well, yes, of course it does.  However, this is close to heaven as far as cookies go.  I found this recipe on The Oatmeal Cookie Blog.  He calls these cookies “Golden Girls”.  Another first was the use of ground graham crackers in the dough.  It actually makes a difference!  Not a huge flavor difference, but a more sturdy cookie.  The filling process was a little messy, but worth it.  I did not follow the instructions that Oatmeal Cookie guy gives.  I flattened the entire dough ball into a disk first.  Then I placed the cream cheese ball in the center of the disk.  To wrap the cream cheese in the cookie dough I folded the sides up around the cream cheese.  I rolled the filled dough back into a nice even ball.  I let the cookies chill in the freezer for the recommended 5 minutes, then flattened them a bit with the palm of my hand before baking.  90% of the finished cookies had a nice amount of cream cheese smack dab in the middle.  However, I did open one cookie to discover that the ball of cream cheese was not only off center but still very much in ball shape making for one big ole bite of cream cheese…not the best ratio of cookie to cream cheese.  These cookies are delicious and I will make them again.  Here is the recipe from the Oatmeal Cookie Blog.  I love the way this guys writes his recipes!  A table to list ingredients…genius.  Oh, how I love organization.

Cream Cheese Stuffed Oatmeal Cookies (aka Golden Girls)

Filling

8 ounces room-temperature cream cheese

4 tablespoons sugar

2 teaspoons vanilla

Creamables

2 sticks butter

1 1/2 cups brown sugar

1/2 cup white sugar

1 tablespoon cinnamon

Wet Ingredients

3 eggs

2 teaspoons vanilla

Dry Ingredients

2 cups finely ground graham crackers

1 1/2 cups flour

2 1/2 cups oatmeal

1 teaspoon baking soda

1/2 teaspoon salt

1 tablespoon cinnamon

  1. Add the filling ingredients to a medium bowl and mix well.  Let the mixture cool and solidify in the refrigerator until step 7.
  2. Preheat oven to 350º.
  3. In your Kitchen Aid or a large mixing bowl, cream together the creamables.
  4. In a small bowl, whisk together the wet ingredients and then add to the creamables. Mix together until smooth.
  5. In another large mixing bowl, add the dry ingredients. Using a spatula, fold together until evenly distributed. Slowly add the dry ingredients to the creamables and wet ingredients. Mix until evenly combined.
  6. Shape dough into balls—about 2 tablespoons each.
  7. Remove the filling mixture from the refrigerator and stuff each dough ball with 1 teaspoon of the mixture.  Put the stuffed dough balls in the freezer for five minutes to firm up.
  8. Place chilled dough balls about 2 inches apart on Silpat- or parchment paper-lined cookie sheets.
  9. Bake at 350º for 10-12 minutes or until golden brown. Remove the cookie sheets from the oven and let stand for 2 minutes. Then place cookies on wire racks to cool.
    Mandy…pictures are coming!!  My compter with the pictures is still sick and getting sicker 🙁

Chocolate Malt Cake

In general people should be modest about their accomplishments.  Modesty will not be a character trait of mine today because this is one of the best looking cakes I have ever made!  It was also pretty great in the flavor department.  I didn’t find this cake to be too overwhelming in malt flavor despite the use of a good amount of malt powder and chopped Whoppers.


The cake wasn’t too chocolately, but had a subtle chocolate flavor and wasn’t too sweet.  It had a good texture on its own, but with the frosting it was perfect.  I love this frosting.  This is a recipe I will keep in the “Favorites” folder.  I will definitely make it again and try pairing with other cakes.  I got the recipe from cookiemadness who got it from Chowhound.  One day people will be getting recipes from my blog…one day.


I took the advice of cookiemadness and used the Chocolate Malt Frosting recipe she’d posted from Dorie Greenspan.  The ingredients seem normal enough, but the way the frosting comes together is interesting but it works incredibly well.  The brown sugar adds a depth of flavor that compliments the cake.  You can find the cake recipe on Chowhound (linked above) and here is the frosting.


Malted Chocolate Frosting (adapted from a Dorie Greenspan recipe)

6 ounces bittersweet chocolate, coarsely chopped
1/3 cup (packed) light brown sugar
1/4 cup malted milk powder (such as Carnation, Ovaltine or Horlick’s)
1 tablespoon unsweetened natural cocoa powder
1/4 cup boiling water
2 sticks (8 ounces) unsalted, butter, at room temperature
Pinch of salt
3/4 teaspoon pure vanilla extract
2 1/4 cups confectioners’ sugar

Melt chocolate and half of the brown sugar together in a heat-proof bowl set over a pan of barely simmering water or in top of a double boiler. Let cool slightly.

Stir remaining brown sugar, malted milk powder, cocoa powder and boiling water together in a small bowl or glass measuring cup.

Beat butter in bowl of a standing mixer. When creamy, beat in melted chocolate, followed by malted milk powder mixture. Beat in vanilla. Stir in the powdered sugar; beat until it is well mixed.

Chill mixture for 30 minute to hour or until it is good and cold. Return bowl to stand mixer and beat chilled icing until it becomes light and fluffy.

Mom’s Three-Layer Bars

I love this dessert.  It’s rich, delicious and easy.  The combination of the shortbread-like crust, sweet pecan and coconut filling and creamy frosting bring back great memories for me.  My mom still makes these as well as a truly decadent chocolate mint brownie at Christmas.  They keep really well in the freezer for weeks so you can make a batch and just take a few out at a time.  There aren’t any secret tricks to this recipe.  Just make sure that you let the bars cool completely before frosting them.  I also put them in the fridge for an hour or so before cutting them.

1st Layer

½ pound butter slightly softened and cut into 1-inch pieces

½ cup sugar

2 cups AP flour

½ cup cornstartch

pinch of salt

Blend all ingredients with a pastry blender in a large bowl until butter is in pebble sized pieces.  Press into a 12×16 pan.  A jelly roll pan works well, but a 9×13 is ok.

Bake @ 350 for 15 minutes.  Let cool.

2nd Layer

4 large eggs at room temp

2 cups brown sugar

4 tablespoons AP flour

½ teaspoon baking powder

2 teaspoons vanilla

2 cups chopped pecans

2 cups shredded coconut

Mix eggs and sugar.  Add flour, baking powder and vanilla.  Stir in pecans and coconut.  Pour over first layer. 

Bake @ 300 for 15-20 minutes.  Cool to room temperature.

3rd Layer

1 stick softened butter 

8 oz. softened cream cheese

4 cups powdered sugar

1 teaspoon vanilla

Beat butter and cream cheese in a stand mixer.  Add in vanilla.  Add sugar one cup at a time, scrape sides of the bowl as needed.  Spread onto cooled bars.  Cut into squares.  These bars may be frozen between layers of wax paper.

Tropical Carrot Cake

Courtesy of The Pastry Queen

Cake

1 cup macadamia nuts, toasted and coarsely chopped

3 cups flour

3 cups sugar

1 tablespoon baking soda

1 teaspooon salt

1 tablespoon cinnamon

1 1/2 cups shredded  coconut

4 eggs

2 tablespoons vanilla

1 1/2 cups vegetable oil

1 1/2 cups shredded carrots

1 1/2 cups crushed pineapple, drained

1/2 cup sweetened cream of coconut

In a large bowl stir together flour, sugar, baking soda, salt, cinnamon, coconuts and nuts.

In a seperate bowl whisk eggs, oil, vanilla, carrots, pineapple and cream of coconut.

Pour egg mixture into flour and stir until combined.  

Pour batter into three 9-inch cake pans that have been greased, floured and lined with parchment.

Bake at 350 degrees for 35 minutes.  Cool for 5-10 minutes then invert onto cooling racks.  

Cool completely then frost with cream cheese frosting.

Super Simple Cream Cheese Frosting

1 stick of softened butter

8 ounces softened cream cheese

1 pound of powdered sugar

Cream butter and cream cheese.  Scrape down sides of the bowl.  Add a teaspoon on vanilla is you’d like to.  Add sugar and mix until smooth.

Cake Catastrophe


I’ve had a tropical carrot cake recipe marked with a bright pink sticky note in my Pastry Queen cookbook for weeks now.  I bought the ingredients a week ago.  It was time to just buckle down and bake the cake already! I was really excited about this cake so I postponed grading 5th grade math papers and decided that there was no time like the present.  I kinda like carrot cake, but this recipe just sounded so much better than regular old carrot cake.  It has macadamia nuts, cream of coconut, lots of pineapple and is smothered in a coconut cream cheese frosting.  

I needed 3 9-inch cake pans, but I only have two 9-inch pans…I should have seen fate trying to stop me!  I buttered and floured the two 9-inchers and one 8-inch pan.  The batter came together easily and beautifully.  When I filled the cake pans I didn’t think anything was off…the batter in each pan looked fine.  I baked the cakes for 20 minutes then checked on them, and rotated the pans in the oven.  5 minutes later I took the 8-inch cake out as the “tester inserted in the center came out clean.”  10 more mintes (we’re at 35 now, the max time in the recipe) and the cakes looked done on the outside edges and on top, but the tester inserted in the center was covered in batter goo.  5 more minutes…goo…5 more minutes…goo is gone!  45 minutes in all ladies and gentelmen…keep this in mind.

 I’d been letting the 8 inch cake cool, so I decided to take it out of the pan.  It had fallen in the center…crater cake.  Ok.  No problem.  It doesn’t have to be pretty to be tasty.  The other cakes sunk a bit, but not too much.  I take them out of the pans and peel the parchment from the bottoms.  One cake was fine.  The other cake, however, upon removal of the parchment revealed a center of completely uncooked cake batter.  I cannot explain this.  It will forever be a mystery to me.  Obviously I didn’t bake it enough, but the outer edges were on the brink of burning…it just doesn’t add up.  I will not be bringing this cake to share with my wonderful co-workers.  I hate to waste food.  I had to do something.  Of course, some of the cake had to be thrown away, but some could be saved…

I decide to make the best of the situation.  I made a simple cream cheese frosting.  I put the OK cake on a platter.  It had developed quite a deep Manicouagan-like crater by this time, so I filled part of it with frosting, then used pieces of the half-baked cake placed in the center to make it even.  I inverted this onto another platter.  Ta-da!  It looked like a mediocre, even cake layer.  I frosted the cake and was fairly pleased with the looks of it.  

Maybe this cake wasn’t appealing to the eye, but it tasted delicious.  Moist, dense and full of carrot, pineapple and macadmia in every bite.  I like the plain frosting with this cake since the cake itself has so much flavor.  I didn’t try the coconut cream cheese frosting this time.  I think it would have competed too much with the cake.  I will defintitely make this cake again.  To redeem myself and to share its greatness with the world.

My New Favorite Loaded Chocolate Cookie

Milk chocolate chips and Oreo cookie chunks in a cookie…pure genius.  These cookies came out like the perfect combination of brownie and chocolate cookie.  The outer edges were crunchy, the exterior slightly crispy and the interior wonderfully rich and soft.  The texture was also quite harmonious.  The cookie itself is soft, the chocolate chips were creamy and the oreo chunks provided just the right amount of soft yet crunchy contrast.  This is the kind of cookie I want to bake, keep a few, and give the rest away because I would otherwise eat them all!  Oh, and these cookies truly require a tall glass of ice cold milk.  I have no complaints about these cookies.  Sinfully delicious.  Chilling the dough really helps, so don’t skip that step.  Here is the recipe.  I tripled the recipe from cookiemadness and used milk chocolate bars for the melted chocolate and milk chocolate chips instead of the chunks.  Enjoy!

Milk Chocolate Oreo Chunk Cookies

1/2 cup all-purpose flour
1/4 cup unsweetened Dutch-process cocoa powder
1/4 teaspoon baking soda
1/4 teaspoon coarse salt
4 ounces milk chocolate — divided use (2 ounces coarsely chopped and 2 ounces cut into 1/4-inch chunks)
4 tablespoons unsalted butter
3/4 cup granulated sugar
1 large egg
1/2 teaspoon pure vanilla extract
3 Oreos (optional)

Preheat oven to 325 degrees.

Stir flour, cocoa powder, baking soda, and salt together in a bowl; set aside.
Melt 2 ounces milk chocolate with the butter in a small heatproof bowl set over a pan of simmering water; let cool slightly.

Beat together sugar and egg until light. Beat in vanilla and melted chocolate mixture. Add flour mixture and stir until mixed. Stir in Oreos and remaining milk chocolate chunks. NOTE: at this point, I chilled the dough for 30 minutes.

Using a 1 1/2-inch ice cream scoop or a tablespoon, drop dough onto parchment-lined baking sheets, spacing 2 inches apart. Bake until cookies are flat and surfaces crack, about 15 minutes (cookies should be soft). Let cool on parchment on wire racks. Cookies can be stored between layers of parchment in airtight containers at room temperature up to 3 days.

Makes about 13-15 depending on how big. I got 13, but some of mine were very large.