Happy Halloween! I was super pleased with the way these turned out. Very creepy over-sized and a bit disproportioned spiders on top of purple spiderweb pumpkin cupcakes! I love them. They looked so great all together on the platter when I brought them to school this morning. No picture of that unfortunately. This picture I like because it looks like an army of chocolate spiders. Yummy.
The cupcakes are pumpkin and use a cake mix…gotta love that. The flavor was good and the cake was moist. The tops of the cupcakes were easy to frost, not too rounded and not too flat.
Here is the recipe:
1 package yellow cake mix
1 cup solid pack pumpkin
3/4 cup water
2 tablespoons oil
3 eggs
1 teaspoon cinnamon
1 teaspoon pumpkin pie spice
Preparation:
Preheat oven to 350°F. Line 24 standard (2-1/2-inch) muffin pan cups with paper liners or spray with nonstick cooking spray.
Beat cake mix, pumpkin, water, eggs, oil, cinnamon and pumpkin pie spice in large bowl with electric mixer at medium speed 3 minutes or until well blended.
Spoon batter into each muffin cup. Bake about 20 minutes or until toothpicks inserted into centers come out clean. Cool in pans 10 minutes. Remove cupcakes to wire racks; cool completely.
I frosted the cupcakes with cream cheese icing which I’d colored purple.
To make the spiderwebs:
1. Melt semi-sweet chocolate chips and transfer the chocolate to a piping bag.
2. Pipe a spiral of chocolate from the center of the cupcake out to the edge.
3. Use a toothpick to drag a few evenly spaced lines from the center to the edge of the cupcake. Tada!
I found a recipe that used black gumdrops to make the spiders, but I wasn’t too thrilled with that idea. I decided to use whoppers as the spider body and then make little legs from molding chocolate, like almond bark.
To make the spider legs:
1. Melt the chocolate according to the package directions.
2. Transfer to a piping bag or plastic bag with a SMALL corner cut off.
3. Pipe legs onto parchment paper and let dry.
Tip: Make more legs than you need as they will break easily.
To assemble the cupcakes:
1. Place one whopper on the top of the cupcake.
2. Arrange 8 legs, 4 on each side of the whopper pressing slightly into the icing.
I am a fan of plain cheesecake. Just the creamy filling and buttery crumbly graham cracker crust. That is all I need. No fruit, no chocolate, no caramel and absolutley NO fake strawberry goo. What is that stuff anyway? I do happen to like pumpkin cheesecake, so when I found this recipe I was pretty excited. This recipe is a Betty Crocker prize winner for 2008 and uses a Betty Crocker oatmeal cookie mix in the base.
Other than that everything else is from scratch. A drizzle of caramel ice cream topping and fudge makes the bars more special and delicious. I didn’t warm up the hot fudge before drzzling, so it came out of my ziploc bag in globs instead of a nice stream. Oops!
I ate one before I chilled the bars and it was good. I ate another little bite after a few hours in the fridge, and it was much better. These would be a good alternative to pumpkin pie…or a good addition! You can’t have too many desserts this time of year, right?
I took the bars out of the oven after 30 minutes and it was definitely done. I think any longer, in my oven anyway, would have overcooked them.
The streusel topping is very good. I like the addition of pecans and gingersnaps a lot. They give a great flavor and extra crunch to the cookie base.
Heat oven to 350°F. In large bowl, stir together cookie mix, crushed cookies and pecans. Cut in butter, using pastry blender or fork, until mixture is crumbly. Reserve 1 cup mixture for topping. Press remaining mixture in bottom of ungreased 13×9-inch pan. Bake 10 minutes. Cool 10 minutes.
2.
Meanwhile, in large bowl, beat cream cheese and sugar with electric mixer on medium speed until smooth. Add remaining filling ingredients; beat until well blended. Pour over warm cookie base. Sprinkle with reserved topping.
3.
Bake 35 to 40 minutes or until center is set. Cool 30 minutes. Refrigerate about 2 hours or until chilled.
4.
Before serving, drizzle with chocolate and caramel toppings. For bars, cut into 6 rows by 4 rows. Store covered in refrigerator.
This challange, like the last, allowed quite a bit of creativity and freedom on the part of the bakers. I was excited to try this recipe for a few reasons.
1. I love pizza and any excuse to make my own.
2. I have never tried an overnight rise in the refridgerator before.
The dough is easy to make and using the stand mixer makes it even easier. The next day when it came time to toss I knew I was in for trouble! The dough doesn’t seem like it NEEDS to be tossed. I picked up one of the dough balls and turned it a few times and it practically prepared itself. It was thin and circular in no time. I knew that I had to at least try to toss at least one dough ball for the sake of the Daring Bakers, so I did.
I not only dropped it on the floor but poked a big hole in the dough and argued with my husband while he was trying to take pictures of the whole ordeal. I may not be tossing dough again. I like my method of stretching the dough with my hands. Much safer. No pizza dough casualties! The dough that survived the tossing turned into great pizzas. I like my pizza crust thin and crunchy with just that right amount of chew in the crust so this was perfect. I’ve had trouble getting a good thin crust with other dough, so I will be using this recipe from now on. Scroll to the bottom for the recipe!
I usually make margherita pizzas because I completely satisfied with the simplicity of the mozzarella, tomato and fresh basil. Last summer I ate at Asti with my family to celebrate my sisters graduation from college. I had their white pizza and thought that I would try to recreate it. The Asti pizza had mozzarella, fontina and provolone cheeses with fried sage leaves. I also chose to add slices of proscuitto di Parma which was a great decision. The crust was thin and crispy. I didn’t totally recreate this pizza, but this combination of mozzarella, ricotta, goat cheese and parmesean was simple and very tasty. I fried sage leaves to go with this pizza and it really made the pizza special.
Here are the toppings!
The second pizza was based on a recipe I found in an NPR article called Tapas Pizza. I used manchego cheese, proscuitto, green olives, roatsed red and yellow peppers, red onion and parsley. It was also a very delicious pizza and I was pleased with the way it turned out.
~ BASIC PIZZA DOUGH ~
Original recipe taken from “The Bread Baker’s Apprentice” by Peter Reinhart.
Makes 6 pizza crusts (about 9-12 inches/23-30 cm in diameter).
Ingredients:
4 1/2 Cups (20 1/4 ounces/607.5 g) Unbleached high-gluten (%14) bread flour or all purpose flour, chilled
1 Tsp Instant yeast
1/4 Cup (2 ounces/60g) Olive oil or vegetable oil (both optional, but it’s better with)
1 3/4 Cups (14 ounces/420g or 420ml) Water, ice cold (40° F/4.5° C)
1 Tb sugar
Semolina/durum flour or cornmeal for dusting
DAY ONE
Method:
1. Mix together the flour, salt and instant yeast in a big bowl (or in the bowl of your stand mixer).
2. Add the oil, sugar and cold water and mix well (with the help of a large wooden spoon or with the paddle attachment, on low speed) in order to form a sticky ball of dough. On a clean surface, knead for about 5-7 minutes, until the dough is smooth and the ingredients are homogeneously distributed. If it is too wet, add a little flour (not too much, though) and if it is too dry add 1 or 2 teaspoons extra water.
NOTE: If you are using an electric mixer, switch to the dough hook and mix on medium speed for the same amount of time.The dough should clear the sides of the bowl but stick to the bottom of the bowl. If the dough is too wet, sprinkle in a little more flour, so that it clears the sides. If, on the contrary, it clears the bottom of the bowl, dribble in a teaspoon or two of cold water.
The finished dough should be springy, elastic, and sticky, not just tacky, and register 50°-55° F/10°-13° C.
3. Flour a work surface or counter. Line a jelly pan with baking paper/parchment. Lightly oil the paper.
4. With the help of a metal or plastic dough scraper, cut the dough into 6 equal pieces (or larger if you want to make larger pizzas).
NOTE: To avoid the dough from sticking to the scraper, dip the scraper into water between cuts.
5. Sprinkle some flour over the dough. Make sure your hands are dry and then flour them. Gently round each piece into a ball.
NOTE: If the dough sticks to your hands, then dip your hands into the flour again.
6. Transfer the dough balls to the lined jelly pan and mist them generously with spray oil. Slip the pan into plastic bag or enclose in plastic food wrap.
7. Put the pan into the refrigerator and let the dough rest overnight or for up to thee days.
NOTE: You can store the dough balls in a zippered freezer bag if you want to save some of the dough for any future baking. In that case, pour some oil(a few tablespooons only) in a medium bowl and dip each dough ball into the oil, so that it is completely covered in oil. Then put each ball into a separate bag. Store the bags in the freezer for no longer than 3 months. The day before you plan to make pizza, remember to transfer the dough balls from the freezer to the refrigerator.
DAY TWO
8. On the day you plan to eat pizza, exactly 2 hours before you make it, remove the desired number of dough balls from the refrigerator. Dust the counter with flour and spray lightly with oil. Place the dough balls on a floured surface and sprinkle them with flour. Dust your hands with flour and delicately press the dough into disks about 1/2 inch/1.3 cm thick and 5 inches/12.7 cm in diameter. Sprinkle with flour and mist with oil. Loosely cover the dough rounds with plastic wrap and then allow to rest for 2 hours.
9. At least 45 minutes before making the pizza, place a baking stone on the lower third of the oven. Preheat the oven as hot as possible (500° F/260° C).
NOTE: If you do not have a baking stone, then use the back of a jelly pan. Do not preheat the pan.
10. Generously sprinkle the back of a jelly pan with semolina/durum flour or cornmeal. Flour your hands (palms, backs and knuckles). Take 1 piece of dough by lifting it with a pastry scraper. Lay the dough across your fists in a very delicate way and carefully stretch it by bouncing it in a circular motion on your hands, and by giving it a little stretch with each bounce. Once the dough has expanded outward, move to a full toss.
NOTE: Make only one pizza at a time.
During the tossing process, if the dough tends to stick to your hands, lay it down on the floured counter and reflour your hands, then continue the tossing and shaping.
In case you would be having trouble tossing the dough or if the dough never wants to expand and always springs back, let it rest for approximately 5-20 minutes in order for the gluten to relax fully,then try again.
You can also resort to using a rolling pin, although it isn’t as effective as the toss method.
11. When the dough has the shape you want (about 9-12 inches/23-30 cm in diameter – for a 6 ounces/180g piece of dough), place it on the back of the jelly pan, making sure there is enough semolina/durum flour or cornmeal to allow it to slide and not stick to the pan.
12. Lightly top it with sweet or savory toppings of your choice.
NOTE: Remember that the best pizzas are topped not too generously. No more than 3 or 4 toppings (including sauce and cheese) are sufficient.
13. Slide the garnished pizza onto the stone in the oven or bake directly on the jelly pan. Close the door and bake for abour 5-8 minutes.
NOTE: After 2 minutes baking, take a peek. For an even baking, rotate 180°.
If the top gets done before the bottom, you will need to move the stone or jelly pane to a lower shelf before the next round. On the contrary, if the bottom crisps before the cheese caramelizes, then you will need to raise the stone or jelly.
14. Take the pizza out of the oven and transfer it to a cutting board or your plate. In order to allow the cheese to set a little, wait 3-5 minutes before slicing or serving.
I have decided to dedicate this week to that great orange fruit we all know and love, member of the cucurbitaceae family…drumroll please…the PUMPKIN! I scoured through my cookbooks and found quite a few pumpkin bread and pumpkin cake recipes, and of course pumpkin pie recipes. I really wanted to find a good pumpkin cookie recipe. I found this recipe in my More from Magnolia cookbook. This cookbook had been good to me. It contains my absolute favorite banana bread recipe that has coconut and pecans in it. So, I figured it was a safe bet to try these cake-like cookies.
I liked this soft cookie, but would maybe add more walnuts. They have a soft texture and a mild pumpkin flavor. The spices are mild also, but that could be because I haven’t bought a new round of holiday season spices yet. Note to self…buy new spices. They are OK on their own, but they are incredible with the frosting! The frosting was simple; powdered sugar, milk, vanilla and butter. This is no ordinary butter, people. Before adding the butter you brown it in a saucepan and that makes all the difference. Browned butter adds this lovely nuttiness as well as little brown flecks to the otherwise boring white frosting. I did not have enough frosting for all the cookies, so I will double it next time. I am a frosting fan, so others may not see the need for more. Come on though, what could be wrong with left-over frosting? Keep it in the fridge and spread it on graham crackers, pretzels, or your finger.
Pumpkin Walnut Cookies with Brown Butter Frosting (Adapted from More From Magnolia)
Cookie
2 1/2 cups flour
1 T baking powder
1 t salt
1 t allspice
1 t cinnamon
1/2 t ground ginger
4 T softened butter
1 1/2 cups brown sugar
2 eggs at room temp.
1 cup canned pumpkin puree
2 t vanilla
1 cup chopped walnuts
Preheat oven to 375° F.
Combine all dry ingredients in a small bowl and set aside.
Cream butter and sugar until well combined. Add eggs, vanilla and pumpkin. Mix well.
Stir in the walnuts.
Drop by rounded spoonfuls onto cookie sheets.
Bake for 10-12 minutesm until lightly brown around the edges.
Let cool for a few minutes on the sheets, then remove to cooling racks to cool completely.
Brown Butter Frosting (doubled)
4 cups powdered sugar
6 T milk
2 t vanilla
6 T butter
Mix sugar, milk and vanilla in a small bowl.
In a small saucepan, cook butter over medium high heat until lightly browned.
Remove from heat and add to other ingredients. Mix until well combined, smooth and creamy.
Spread frosting onto each cooled cookie. Top with a walnut half if desired.
This is one of those things that impresses people, but in actuality is very easy. No matter how you spell it, Phyllo, filo, fillo dough is a fun thing to bake with. It is wonderfully crispy and light. It can be used in sweet and savory dishes and you can buy it frozen, so that makes life easier.
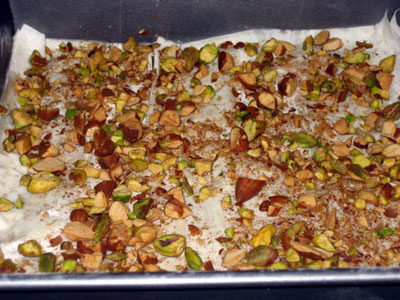
We planned a Greek dinner with friends, so I decided to bring baklava. I have made it once before with great results. I used all kinds of nuts the last time; almonds, pistachios, hazelnuts and I think I even used pecans. This time I decided to use just almonds and pistachios. I coarsely chopped them, maybe too coarsely. I would chop them into smaller pieces next time. This recipe mixes the cinnamon with the nuts.
Using phyllo dough is not hard. However, you MUST cover the dough with a damp towel while working with it. Take off the sheets you need, then cover it back up or it will dry out and break when you try to use it. Now, phyllo dough is pretty healthy. When you smother it in melted butter…well, then it becomes less healthy but significantly more delicious. Do you like my pastry brush sans handle? Nice, I know.
Cutting the baklava into diamonds before baking was hard. The dough was sticking to my knife a bit, and I kept pulling the top layer of phyllo out of place. I somehow managed to finish that step without pulling my hair out.
While the baklava bakes you are supposed to make the sugar and honey syrup. Right when the baklava is done baking you should be ready with the syrup. This helps to adhere all the layers. I was a little late in finishing the syrup. The baklava had to sit for about 10 minutes before I poured on the syrup, so I think that might have been why it wasn’t as cohesive. It still tasted delicious, so I’m not too bummed about it.
I made half of the recipe below since there would only be 5 dinner guests. I used an 8×8 pan and baked it for only about 40 minutes.
INGREDIENTS:
1 (16 ounce) package phyllo
dough
1 pound chopped nuts
1 cup butter
1 teaspoon ground cinnamon
1 cup water
1 cup white sugar
1 teaspoon vanilla extract
1/2 cup honey
DIRECTIONS:
1.
Preheat oven to 350 degrees F(175 degrees C). Butter the bottoms and sides of a 9×13 inch pan.
2.
Chop nuts and toss with cinnamon. Set aside. Unroll phyllo dough. Cut whole stack in half to fit pan. Cover phyllo with a dampened cloth to keep from drying out as you work. Place two sheets of dough in pan, butter thoroughly. Repeat until you have 8 sheets layered. Sprinkle 2 – 3 tablespoons of nut mixture on top. Top with two sheets of dough, butter, nuts, layering as you go. The top layer should be about 6 – 8 sheets deep.
3.
Using a sharp knife cut into diamond or square shapes all the way to the bottom of the pan. You may cut into 4 long rows the make diagonal cuts. Bake for about 50 minutes until baklava is golden and crisp.
4.
Make sauce while baklava is baking. Boil sugar and water until sugar is melted. Add vanilla and honey. Simmer for about 20 minutes.
5.
Remove baklava from oven and immediately spoon sauce over it. Let cool. Serve in cupcake papers. This freezes well. Leave it uncovered as it gets soggy if it is wrapped up.
This recipe is from my Rebecca Rather cookbook…yet again. I think that I might end up cooking my way through this book eventually! This cake was chocolatey and moist with just a hint of cinnamon. Rather suggests you use high quality cocoa (such as Scharfen Berger) but I had to settle for Hershey’s. I would like to do a side by side taste test sometime to see how much and what kind of a difference it would make.
The cake is baked and topped with a thick chocolate pecan glaze. I found my glaze to be a little too thick and overwhelming. I would probably cut back on it next time, or try to thin it out. I’d also try not mixing the pecans in the glaze, but sprinkling them on top of the glaze instead.
Here is the cake! The first one was taken right after pouring the glaze on, hence the glassy sheen! The second was taken the morning after. This dessert does look as beautiful in the morning as it did the night before. I sprinkled a few extra toasted pecans on top. It was just so monotonously brown.
I always seem to have problems with bundt cakes sticking in the pan even after greasing AND flouring. Rather recommends Baker’s Joy for this cake. I have never used Baker’s Joy, so I decided to give it a try. It was great! The cake came out clean and easy. Hardly a speck of cake in the pan afterward! Lovely. I probably won’t become a constant user of Baker’s Joy because I kind of enjoy the process of greasing and flouring some pans, especially round cakes pans.
I found this recipe on epicurious also, but the glaze is a bit different. The recipe in the cookbook calls for cocoa powder while the epicurious recipe calls for chopped bittersweet chocolate. Yet another variation I will have to try someday.
Here is the epicurious recipe. I will have to type up the one from the cookbook and post it later.
Adapted from chef Rebecca Rather Rather Sweet Bakery & Café, Fredricksburg, TX
At the bakery, Rather makes both cupcakes and bundt cake with this recipe. The hint of cinnamon in the batter is a nod toward Mexican chocolate, which often contains cinnamon and spices.
Active time: 35 min Start to finish: 2 hr Makes 10 to 12 servings.
For cake
2 sticks (1 cup) unsalted butter
1/2 cup Dutch-process unsweetened cocoa powder
3/4 cup water
2 cups granulated sugar
2 large eggs
1/2 cup well-shaken buttermilk
2 tablespoons vanilla
2 cups all-purpose flour
1 teaspoon baking soda
1/2 teaspoon cinnamon
1/4 teaspoon saltFor glaze
2 cups chopped pecans (71/2 oz)
1/2 stick (1/4 cup) unsalted butter
1/2 cup half-and-half
1/2 cup confectioners sugar
5 oz fine-quality bittersweet chocolate (not unsweetened), finely chopped
1/4 teaspoon salt
Special equipment: a 9-inch tube pan or 12-cup bundt pan
Make cake:
Put oven rack in middle position and preheat oven to 350°F. Butter cake pan well and dust with flour, knocking out excess.
Melt butter (2 sticks) in a 3-quart heavy saucepan over moderately low heat, then whisk in cocoa. Add water and whisk until smooth, then remove from heat. Whisk in separately sugar, eggs, buttermilk, and vanilla. Sift together flour, baking soda, cinnamon, and salt into a bowl, then sift again into cocoa mixture and whisk until just combined (don’t worry if there are lumps). Pour batter into cake pan and bake until a wooden pick or skewer comes out with a few crumbs adhering, 45 to 55 minutes. (Leave oven on.) Cool cake in pan on a rack 20 minutes, then loosen edges with a thin knife and invert onto a plate. Make glaze:
Spread pecans in 1 layer in a shallow baking pan (1 inch deep) and bake until fragrant and a shade darker, 6 to 8 minutes. Cool pecans slightly in pan on a rack, about 5 minutes. Melt butter in a 2-quart heavy saucepan over low heat, then stir in half-and-half and confectioners sugar. Add chocolate and cook, stirring, until smooth. Remove from heat and stir in pecans and salt. Cool glaze until slightly thickened, about 5 minutes. Spoon glaze over top and sides of cake (cake will still be warm) and spread with a small offset spatula or knife to cover completely. Cooks’ note:
Cake (with glaze) can be made 2 days ahead and kept at room temperature in a cake keeper or covered with an inverted bowl.
Melt butter (2 sticks) in a 3-quart heavy saucepan over moderately low heat, then whisk in cocoa. Add water and whisk until smooth, then remove from heat. Whisk in separately sugar, eggs, buttermilk, and vanilla. Sift together flour, baking soda, cinnamon, and salt into a bowl, then sift again into cocoa mixture and whisk until just combined (don’t worry if there are lumps). Pour batter into cake pan and bake until a wooden pick or skewer comes out with a few crumbs adhering, 45 to 55 minutes. (Leave oven on.) Cool cake in pan on a rack 20 minutes, then loosen edges with a thin knife and invert onto a plate.
Make glaze:
Spread pecans in 1 layer in a shallow baking pan (1 inch deep) and bake until fragrant and a shade darker, 6 to 8 minutes. Cool pecans slightly in pan on a rack, about 5 minutes. Melt butter in a 2-quart heavy saucepan over low heat, then stir in half-and-half and confectioners sugar. Add chocolate and cook, stirring, until smooth. Remove from heat and stir in pecans and salt. Cool glaze until slightly thickened, about 5 minutes. Spoon glaze over top and sides of cake (cake will still be warm) and spread with a small offset spatula or knife to cover completely.
Cooks’ note:
Cake (with glaze) can be made 2 days ahead and kept at room temperature in a cake keeper or covered with an inverted bowl.
I live in Waco. There are not a whole lot of specialty food stores here. Our HEB has a pretty good bulk food section, and they do have some gourmet items from time to time. I usually find myself becoming a kid in a candy store when I go to Central Market or Whole Foods while visiting family in Austin. My last food treasure was discovered not in Austin, but in Amarillo. I know what you’re thinking, and I was thinking the same thing! But yes, it is true. I found a chocolate bar in Amarillo, Texas at the World Market there. This chocolate bar is made by Vosges. I’ve tried some of the more “normal” flavors from Vosges like Coconut Curry and I think I tried one with chiles in dark chocolate. When I saw this flavor I knew it was fate. Some friends and I have been debating on whether or not bacon can successfully be incorporated into desserts and confections. I am of the opinion that salty bacon is a natural partner for sweetness. Think about it. Ever had your bacon and maple syrup mingle together at breakfast? Delicious. A friend of mine, however, was disgusted at the idea of carmelized bacon ice cream. So I had to buy this to prove my point. The exotic chocolate is called Mo’s Bacon Bar.
My husband and I tasted it last night, and thought it was great. You can taste the bacon and the smokiness of the salt and bacon. The creamy milk chocolate pairs wonderfully with the strong flavors. The bacon is crunchy and, in my opinion, the right size for a chocolate bar. Anything bigger would be overwhelming, and anything smaller wouldn’t make the texture difference as pleasing.
As with most of these fancy chocolates, I would not eat an entire bar at once. A little square is all you need. So, the cost of $6.99 isn’t as bad when it lasts you a week. This is chocolate to be savored, not devoured.
The answer is both “Yes!” and “Uh, not really.” The ingredients and process is ridiculously easy and simple. A monkey could make this. A stupid monkey could make this. Cake mix, a can of crushed pineapple, a can of cherry pie filling and a stick of butter.
Dump it all in a 9×13 pan and…bake. Crazy easy. Sorry about this picture! I was having fun with photoshop.
I took a little corner of the cake and ate it plain and it was tasty. Then I made myself a plate with a scoop of dump cake and a scoop of Bluebell Homemade Vanilla Ice Cream. A yummy and nostaligic dessert, but probably not something I will make very often in the future. Dump cake is a good dessert for a crowd since it is cheap, easy, quick and I can’t really think of anyone who wouldn’t like it, unless they don’t like pineapple. I thought about adding coconut and pecans to the topping, but I wanted to make the simple dump cake that I remember having when I was younger. I found a lot of variations for this recipe…different fruits, different types of cake mix, and various toppings. I may try those sometime.
The verdict on dump cake…fine. A 7 out of 10. I think my tastebuds prefer from scratch baked goods more than a dessert which uses cake mix as one of its main ingredients. I will always like cake mixes, but when given the option I will go for a homemade dessert.
Dump Cake
1 package yellow cake mix
1 20 oz. can crushed pineapple
1 can cherry pie filling
1 stick of butter cut into slices
Preheat oven to 350 F
Pour pineapple and pie filling in a 9 x13 pan and mix together
I was underwhelmed with these cookies. Don’t get me wrong, they tasted like a fine peanut butter cookie. However, I really wanted something amazing to happen in my mouth as a result of the chunks of brownie I mixed in, but no. No explosions of flavor. Just mediocrity. Ok, I might be being a little hard on this recipe. They really are a good cookie. I would probably skip the brownie next time and just add chocolate chips instead. I doubled the recipe that I found on bakingbites with no problems. I bought an 8×8 package of pre-made brownies at the grocery store. There were plain brownies and brownies with walnuts. I said to myself (in my head of course) “That would be weird to use the ones with walnuts since the cookies are peanut butter!”. I get home and realize that I’d BOUGHT the walnut brownies! I am a smart one. It turned out not to be an issue at all since you can’t really taste the brownie.
Here is the dough after mixing in the brownies. The brownie bits break up quite a bit and distribute themselves through the dough.
I used a small cookie scoop, about 1 tablespoon, and 10 minutes was a good baking time. It creates a crispy outer edge with chewy centers. They will look undercooked, but take them out anyway. Unless you like a thoroughly crispy cookie, in which case I would go for 12 minutes. I always rotate my cookie sheets half-way through because my oven cooks quicker in the back. Ok, so nothing spectacular here, but a comforting cookie nonetheless.
Brownie-laced Peanut Butter Cookies (adapted from Baking Bites)
2 2/3 cups all purpose flour
1 teaspoon baking soda
1 teaspoon salt
1 cup butter, slightly softened
1 cup brown sugar
1 cup white sugar
2 large eggs
2 tsp vanilla extract
1 cup chunky peanut butter
2 cups brownie chunks, in 1/4-inch pieces
Preheat oven to 375F and line a baking sheet with parchment paper.
In a small bowl, whisk together flour, baking soda and salt.
In a large bowl, cream together butter and sugars until light and creamy.
Beat in eggs one at a time, followed by the vanilla and chunky peanut butter.
Gradually add flour and mix until just combined.
Stir in brownies by hand.
Drop by rounded tablespoons on prepared baking sheets.
Bake for 10-12 minutes, until cookies are golden around the edges.
Cool for 3-5 minutes on baking sheets, then transfer to a wire rack to cool completely.
I’ll be the first to admit it. This does not look like something you’d want to eat. Kind of like chewed up food? Anyway, looks can be deceiving…this was actually very good! Ben liked it! There are a few things I would change when I make this again.
Use one lite and one fat free ricotta.
After roasting the vegetables let them drain a bit on paper towels. They were too juicy when I used them stright from the pan I roasted them in.
Do not follow the layering in the recipe. It ends with a layer of noodles and cheese…it does not work. Using the no-boil noodles requires some moisture more than cheese can provide to cook them thouroghly. I would end with noodles, half a can of tomatoes, veggies and last the mozzarella. I’d also use a little more cheese than called for on top.
Foil on top of cheese for 30 minutes? Doesn’t cheese stick to foil? Yes, it does! Don’t use the foil on top unless you see its browning too much. Or bake without the cheese with the foil for 20 minutes, then add the cheese and take off the foil for the last 10 minutes. All I know is that a lot of the cheese ended up on the foil and not on the lasgana.
Here is the recipe. I found it on Epicurious. It is a Self recipe and it pretty healthy. And it is tasty too. Healthy and delicious!
Roasted Vegetable Lasagna, SELF magazine, March 2001
ingredients
1 lb plum tomatoes, cut in 1/4-inch slices
1 lb zucchini, cut in 1/4-inch slices
1 lb yellow squash, cut in 1/4-inch slices
2 red bell peppers, cut in 1-inch strips
2 green bell peppers, cut in 1-inch strips
1/2 lb mushroom caps, cut in 1/4-inch slices
1 tsp salt
1 tbsp olive oil
Vegetable-oil cooking spray
1 egg white, lightly beaten
2 containers (15 oz each) “lite” ricotta
2 tbsp bottled pesto sauce
1/3 cup grated Parmesan
3 cans (14 1/2 oz each) diced tomatoes with garlic and onion
12 oven-ready lasagna noodles (1 package)
2cups shredded lowfat mozzarella
Preparation
Preheat oven to 475°F. Toss plum tomatoes, zucchini, squash, peppers, mushrooms, salt, and oil in a bowl. Coat a baking sheet with cooking spray and place vegetables on it; roast 30 minutes. In a bowl, mix egg white, ricotta, pesto, and Parmesan. Coat a 9″ x 12″ baking pan with cooking spray. Spread 1 can tomatoes on the bottom. Top with 3 noodles. Spoon 1 1/4 cups ricotta mix over noodles, then a layer of 3 cups vegetables, then 1/2 cup mozzarella. Repeat this layer, starting with tomatoes. Add final can tomatoes, three noodles, remaining ricotta mix and vegetables. Top lasagna with last 3 noodles and 1 cup mozzarella. Cover with foil. Bake 30 minutes.
nutritional information
Nutritional analysis per serving: 299 calories, 10 g fat (4 g saturated fat), 31 g carbohydrates, 22 g protein


