DIY Sprinkle Success & Birthday Cake…Attempt
If you have any interest in cakes (making, eating or both) and you haven’t picked up a copy of Layered by Tessa Huff yet go order it right now! It’s a truly lovely book with great cake baking and decorating tips complete with some helpful step-by-step photos. While I’ve only tried a couple cakes so far, I love it and can’t wait to try more of her recipes. Go now and order a copy. Go.
To me a birthday is not complete without a cake. Another dessert can serve as a substitute if need be, but cake! Birthdays were made for cake! I decided to make a cake for my birthday this year, and the strawberry and confetti cake from Layered was the obvious choice.
I encountered some problems when I made this, and originally I was calling this cake a “fail” but it wasn’t. After all was said and I done we stuck candles in it, sweet friends sang “Happy Birthday” and we all ate it and enjoyed it. What it was was imperfect and a good learning lesson. I am so glad I tried this cake, even though it wasn’t as amazing as I thought it would be!
The first step for this cake was making your own sprinkles. By hand. Yes. Did you even know this was possible?! I didn’t. It was time consuming, but not hard. I would do it again for sure.


There are few things that make the sprinkle process easier:
- Make sure your frosting tip isn’t too small. My hand was worn out after using a Wilton #3 tip. #4 was way easier. And if you used an even bigger one that should be fine, the size of the spinkle has more to do with how much you pipe. A bigger tip means you pipe less, a smaller tip means you pipe more. I don’t know if that makes sense now, but if you’ll know what I mean if you try it.

- If you can stand it, use up all of the sprinkle batter! I was so tired and ran out of cookie sheets, so I stopped. When I went to make the cake I didn’t have quite enough. So, make it all, even if it means you’ll have a semi-permanent claw hand.
- If you want bold colors, go a bit darker than you think you should. I felt that mine dried slightly less bright than the original color.

- Have a small bowl of water handy to dip your finger in to press down any peaks that form on the sprinkles. There is a sweet spot for the amount of water. If you get too much water they’ll ooze and take a much longer time to dry. Too little and they’ll stick to your finger. You’ll learn pretty quickly what works best.
- If you get tired of piping dots, pipe long strips, let them dry, and break them up to make jimmies! I like the look of both the circles and jimmies together, anyway.


DIY Sprinkles and Jimmies
From Layered
Ingredients
- 2 large egg whites
- 4 cups powdered sugar
- 1/2 teaspoon vanilla extract
- gel food coloring
Directions
- Fit a stand mixer with the whisk attachment and pour the egg whites in to the bowl.
- Mix on medium low until foamy.
- Gradually add the powdered sugar and gradually increase the speed until you’ve added all the sugar and the speed it at medium high.
- Whisk until the mixture has smooth, stiff and glossy peaks. Add in the vanilla and beat just to incorporate.
- Divide the sprinkle batter in to as many bowls as colors you plan to make. Color with gel color, being sure to mix completely (a small spatula is good for this).
- Place each color of icing into a piping bag fitted with a round tip.
- Line cookie sheets or your counter top (as long as no one in your household likes to climb on to the counter or pull stuff off the counter) with parchment paper or non-stick silicon mats. Pipe small circles onto the paper and use a damp fingertip to flatten down any pointy peaks that form.
- Repeat, repeat, repeat, repeat…
- Let dry for AT LEAST 2 hours (the longer the better) before using.
Now the rest of the cake had a lot of components, but I wasn’t worried about my competence in the kitchen to get it done and have it look beautiful. I read through all of the recipes, and had a good plan on how to carry it all out flawlessly. I had an entire blog post in mind to show off this cake! Hello, humility. We’ve met before…
I made everything the day before, 2 kinds of cake, strawberry puree, strawberry cream filling and an Italian meringue buttercream. Once my kids were in bed for naps on the following day, I set up my tripod in the light filled corner of my kitchen and got to work. I tinkered with the settings on my camera and had everything ready to hopefully create a lovely step-by-step assembly animated GIF. Everyone would be so impressed. Ugh. Overconfidence can kill, guys.
As I started layering the cakes with the strawberry cream I realized my dreams of perfection were dashed. The cream was oozing out the sides and on to the cake plate and the cake was beginning to tip over. 5 layers! Of course it was falling over! I am not a cake decorator. I did not think through this whole process as well as I should have. I also didn’t think to have my AC running to counteract the July heat and humidity we have here in Houston. Taking pictures in the light filled corner didn’t help, either. The cake was melting. I had a, “Well, now what?!” moment, probably cursed a little bit, and then grabbed some skewers from a drawer in the kitchen and tried to straighten everything out. From there I stuck it in the fridge and hoped for the best.
Please notice the second to the last image in this GIF. I’ve already said this, but it reminds me of the cake in Sleeping Beauty. Just about ready to topple over and be supported by a broomstick.

I’d already whipped up the frosting and folded in the sprinkles (bad call), so I had to put that all back in the fridge. I was not at all sure what back and forth from the fridge would do to an Italian meringue buttercream…but I didn’t really have another option.
Here it was it all of it’s glory, nice and white with pops of sprinkles. This is when it should have gone on to the cake but instead was sent back to the fridge.

Since we had dinner plans I had to wait until the next day to finish. I pulled the cake out of the fridge. The skewers had done the trick to straighten the cake out, and everything still held tight when I removed them. I do wish I’d done that to start, although it wouldn’t have helped the oozing strawberry cream…
Now the buttercream. I let it sit for a while, then whipped it up again, no doubt damaging many of those sprinkles and creating a nice grey hue to the icing that should’ve been white. The texture was also off. Awesome. I had an ok time getting the cake iced, even with the uneven layers. Thankfully I’d saved some icing without sprinkles for decorating the edges, and some of those precious sprinkles for the final touch.

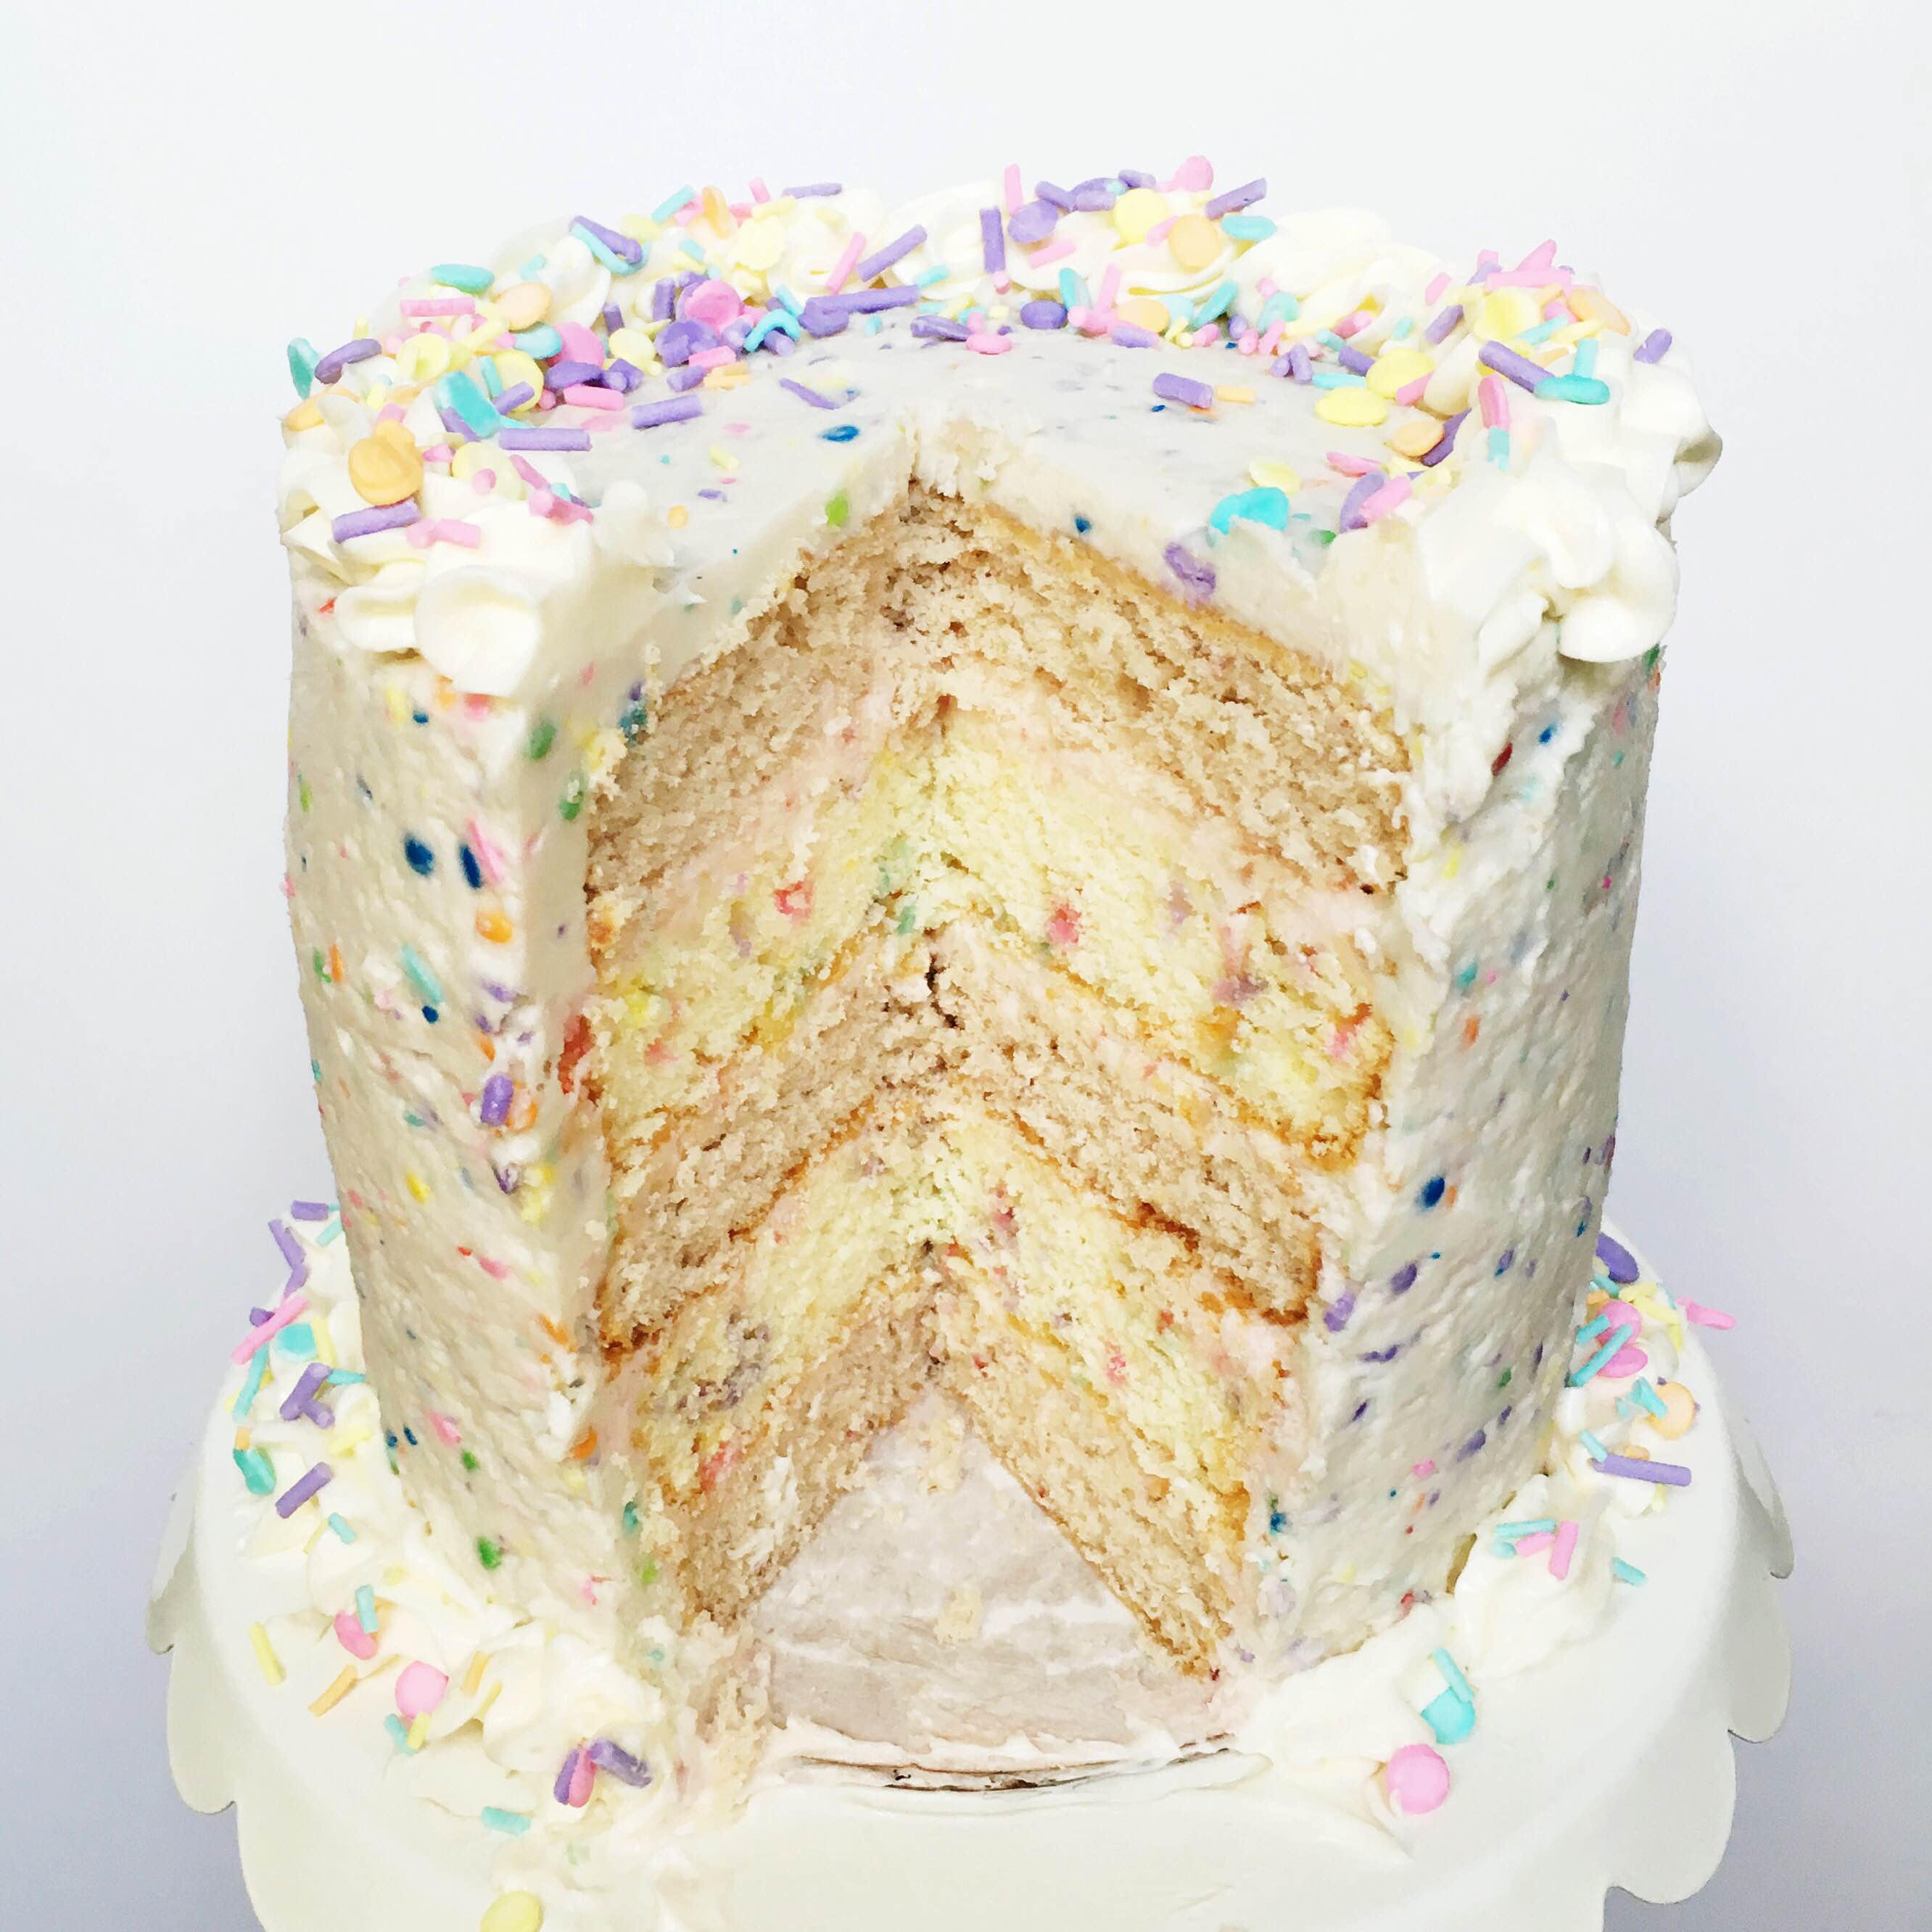
Now, what really matters is how it tasted. And it was delicious! Especially the confetti layers. My daughter turns 4 next month and I am seriously considering the confetti cake recipe for either a cake or cupcakes.
Thank you, Tessa, for getting me to try new things! Can’t wait to attempt to conquer more of your lovely cakes ; )
