Cakes

Betsy Bakes: Confetti Cake

Each of my kids has chosen a baked good that they’d like to master during our time in quarantine. Carson has brownies, Betsy has cakes and Christopher has claimed cookies.

Originally Betsy chose a Brooklyn Blackout cake. As we were writing down ingredients to add to our grocery list she says “I don’t really like chocolate”, so we went back to the cookbook, Layered by Tessa Huff, and she stopped at this one. Of course she did! It’s such a happy cake! I made this for my birthday a few years ago…back when I was making sprinkles, taking much better food pics and making animated GIFS. Ummm, where did THAT girl go?!

This time around we just made the white cake layers and I used my favorite buttercream instead of the fancier Swiss meringue buttercream she uses in the book. This frosting is my go-to. I only needed a half batch for this cake.

I did NOT make my own sprinkles this time. Not because it’s hard, but because I am just too lazy and it is time consuming! Also because I have a huge bag of sprinkles in my pantry and I wanted to seize the opportunity to use them.

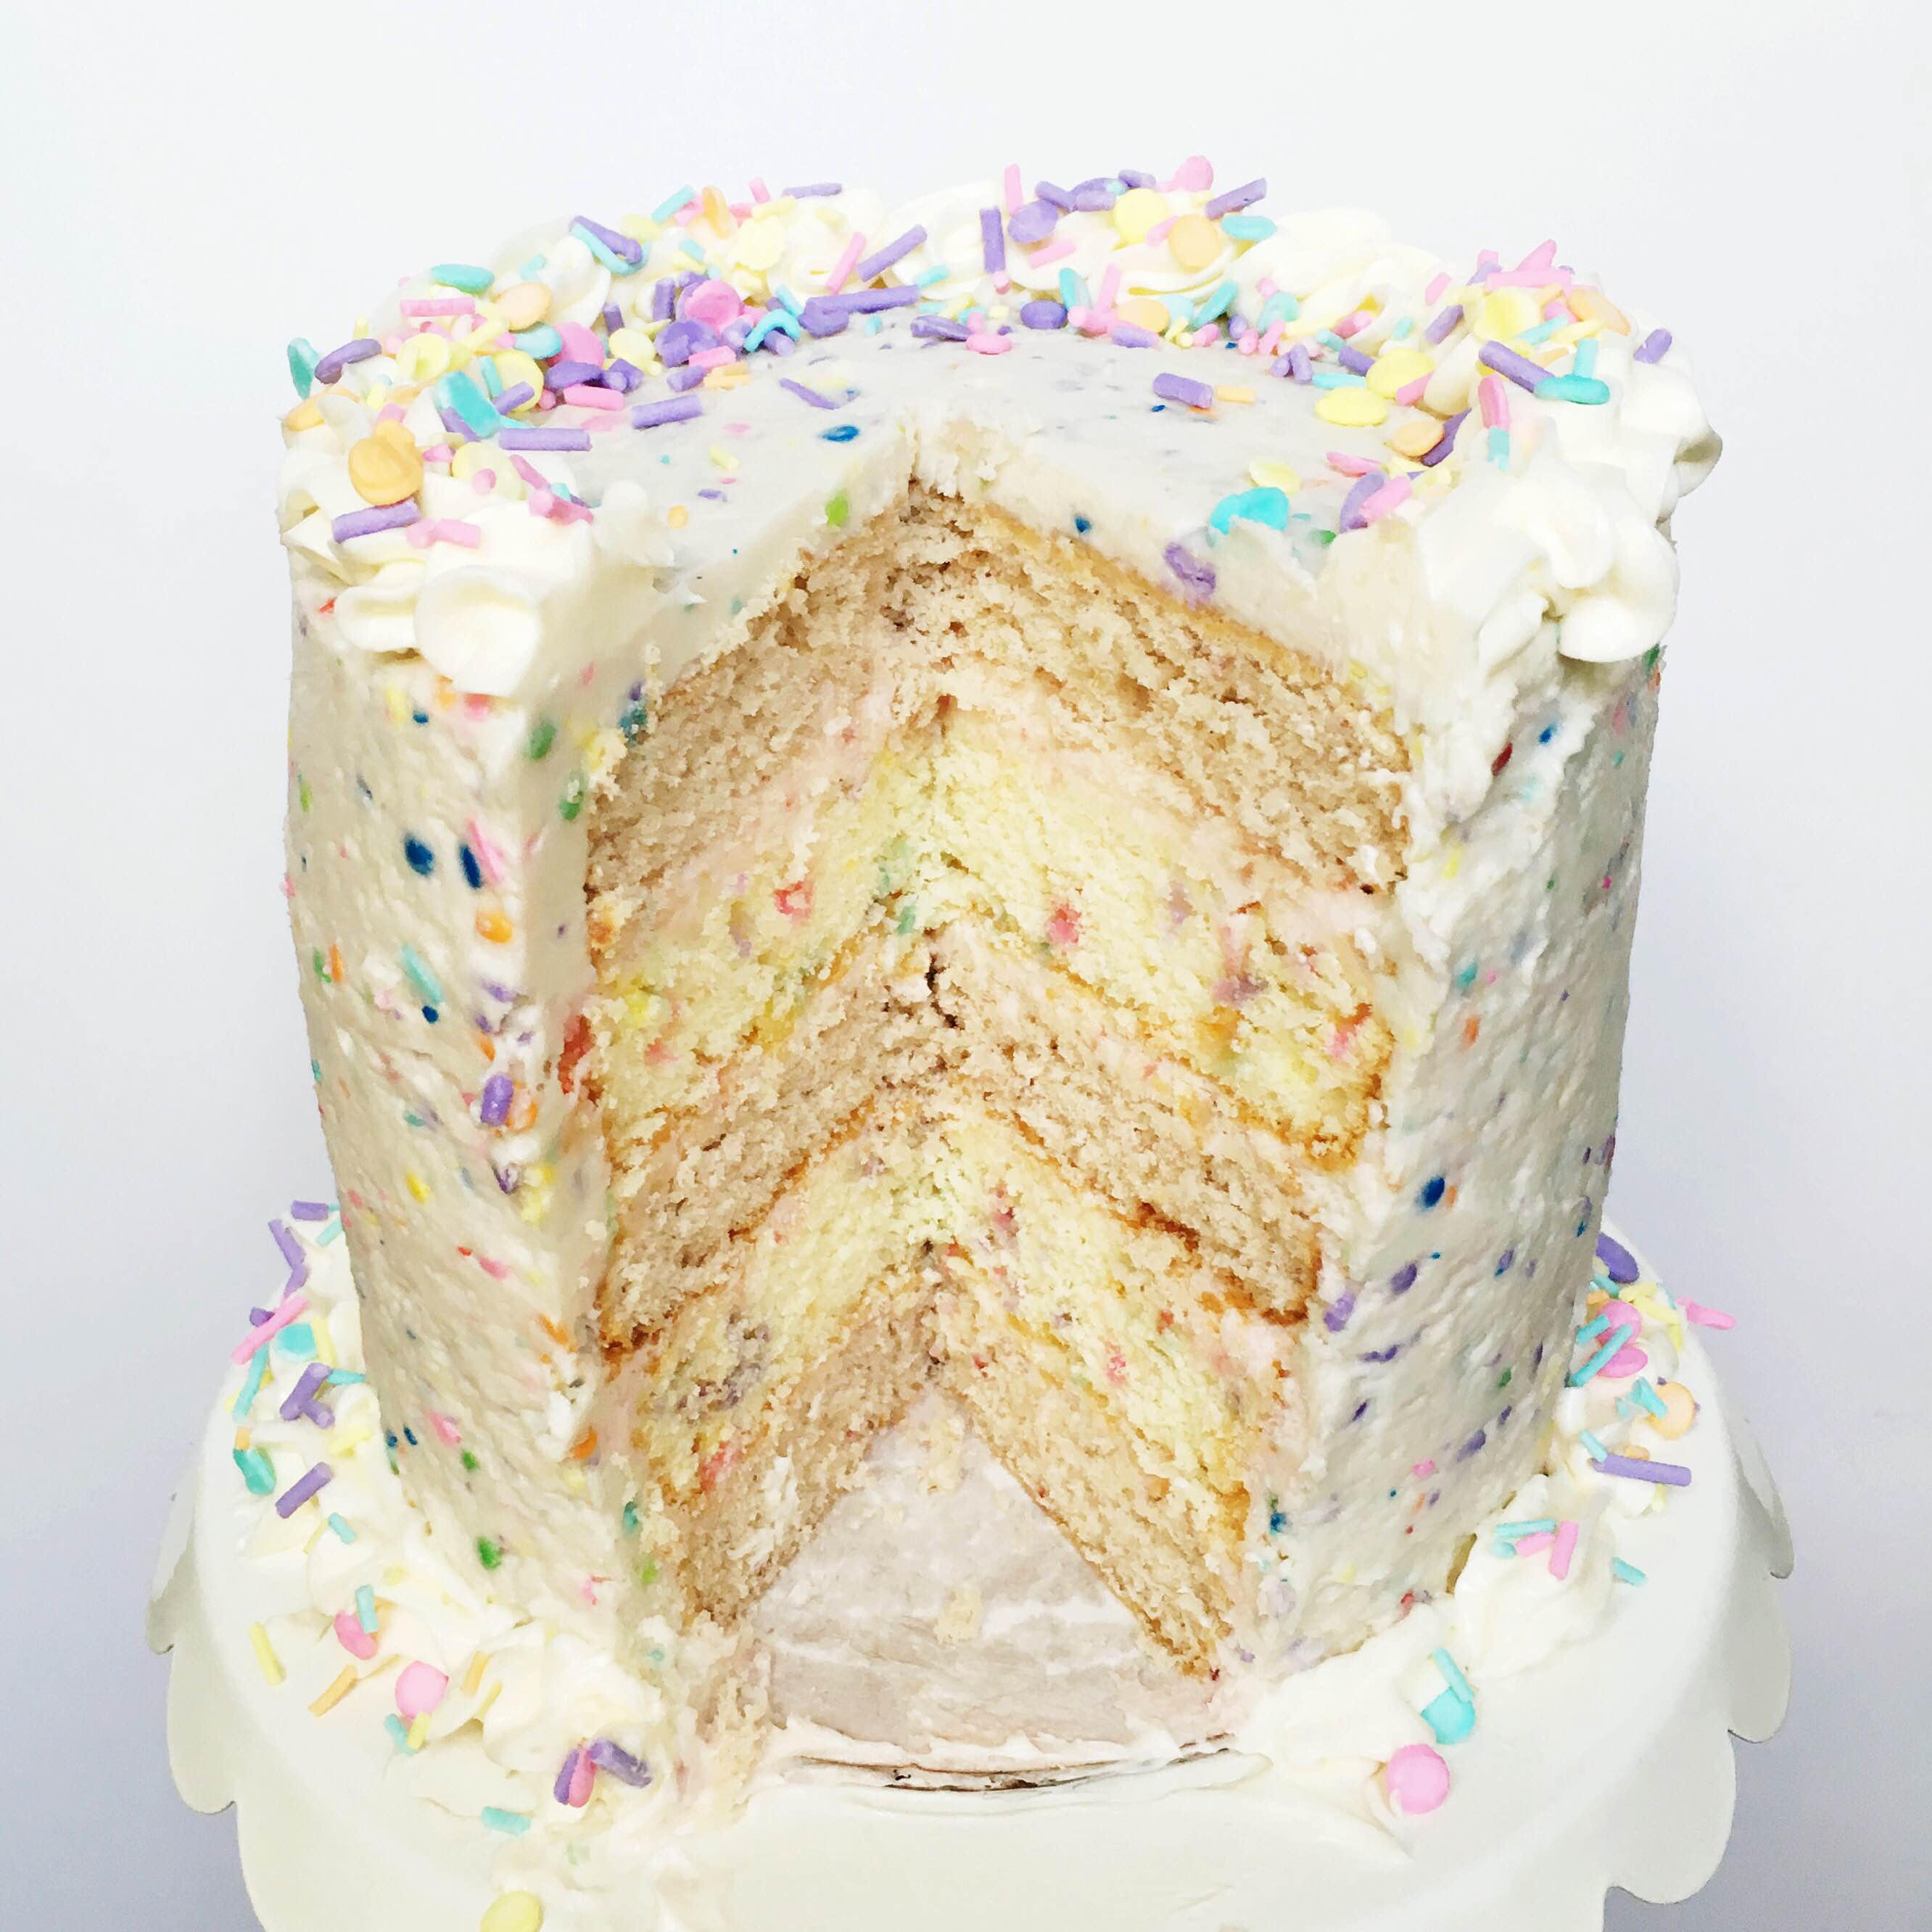
The recipe calls for 2 6-inch cake pans. I used these small cake pans and they worked perfectly for the amount of batter. Only problem with so many layers is getting everything to stand up straight…a problem I have encountered more than I care to admit. But thankfully this cake was just for us to enjoy so there was no need to make it perfect or worry about its askew angle.

This cake is solidly good. It’s substantial but not heavy, sweet but not overly so which makes it a great base for the sugary sweet frosting!

I am so glad that we got to try this cake again, and I can see myself going back to it for sure. Quite frankly I’m surprised (and embarrassed) that I haven’t made it again until now. Thanks for reintroducing me to it, Bets!

Confetti Cake

From Layered by Tessa Huff

Ingredients

  • 1 1/2 cups plus 2 tablespoons cake flour
  • 1 1/2 teaspoons baking powder
  • 1/2 teaspoon salt
  • 1 stick butter, room temp
  • 1 cup sugar
  • 1 1/2 teaspoons vanilla extract
  • 1/2 teaspoon almond extract
  • 3 egg yolks, room temp
  • 3/4 cup milk, room temp
  • 1/2 cup sprinkles

Directions

  1. Preheat oven to 350F.
  2. Grease and flour the cake pans, line with parchment if you know your pans tend to stick.
  3. Whisk together flour, baking powder and salt and set aside.
  4. Beat the butter for 2 minutes, then add the sugar and beat until light and fluffy, about 5 minutes. Scrape down the bowl a few times as you mix.
  5. Add in the egg yolks and extracts and beat to combine.
  6. Add in 1/3 of the flour mixture, beat to just combine, then pour in half of the milk and beat again just to combine. Repeat flour, milk and flour until just combined. Gently fold in the sprinkles.
  7. Divide the batter evenly among the pans and bake for 15-25 minutes depending on how deep your pans are. The thin pans I used baked up in about 17 minutes. Check for doneness by sticking a toothpick in the center of the cake, it should come out clean.
  8. Let cool in the pans for about 10 minutes, then let cool completely on wire racks.
  9. Frost with your favorite recipe or the one below!

Vanilla Buttercream

AKA My Favorite Frosting and just a half batch

From Magnolia Bakery

Ingredients

  • 1/2 cup unsalted butter, softened
  • 4-6 cups powdered sugar, sifted
  • 1/4 cup whole milk
  • 1 teaspoon clear vanilla
  • pinch of salt
  • 1/2 to 3/4 cup of sprinkles

Directions

  1. Beat the butter until creamy.
  2. Beat in 2 cups of the powdered sugar, the milk, salt and vanilla until very smooth and creamy.
  3. Add the remaining sugar, one cup at a time, beating well, until it reaches the desired consistency.
  4. Gently fold in the sprinkles.

DIY Sprinkle Success & Birthday Cake…Attempt

If you have any interest in cakes (making, eating or both) and you haven’t picked up a copy of Layered by Tessa Huff yet go order it right now!  It’s a truly lovely book with great cake baking and decorating tips complete with some helpful step-by-step photos.  While I’ve only tried a couple cakes so far, I love it and can’t wait to try more of her recipes.  Go now and order a copy.  Go.

To me a birthday is not complete without a cake.  Another dessert can serve as a substitute if need be, but cake!  Birthdays were made for cake!  I decided to make a cake for my birthday this year, and the strawberry and confetti cake from Layered was the obvious choice.

I encountered some problems when I made this, and originally I was calling this cake a “fail” but it wasn’t.  After all was said and I done we stuck candles in it, sweet friends sang “Happy Birthday” and we all ate it and enjoyed it.  What it was was imperfect and a good learning lesson.  I am so glad I tried this cake, even though it wasn’t as amazing as I thought it would be!

The first step for this cake was making your own sprinkles.  By hand.  Yes.  Did you even know this was possible?!  I didn’t.  It was time consuming, but not hard.  I would do it again for sure.

Confetti Cake-20

Confetti Cake-24

There are few things that make the sprinkle process easier:

  • Make sure your frosting tip isn’t too small.  My hand was worn out after using a Wilton #3 tip.  #4 was way easier.  And if you used an even bigger one that should be fine, the size of the spinkle has more to do with how much you pipe.  A bigger tip means you pipe less, a smaller tip means you pipe more.  I don’t know if that makes sense now, but if you’ll know what I mean if you try it.

Confetti Cake-21

  • If you can stand it, use up all of the sprinkle batter!  I was so tired and ran out of cookie sheets, so I stopped.  When I went to make the cake I didn’t have quite enough.  So, make it all, even if it means you’ll have a semi-permanent claw hand.
  • If you want bold colors, go a bit darker than you think you should.  I felt that mine dried slightly less bright than the original color.

Confetti Cake-19

  • Have a small bowl of water handy to dip your finger in to press down any peaks that form on the sprinkles.  There is a sweet spot for the amount of water.  If you get too much water they’ll ooze and take a much longer time to dry.  Too little and they’ll stick to your finger.  You’ll learn pretty quickly what works best.
  • If you get tired of piping dots, pipe long strips, let them dry, and break them up to make jimmies!  I like the look of both the circles and jimmies together, anyway.

Confetti Cake-22

Confetti Cake-23

DIY Sprinkles and Jimmies

From Layered

Ingredients

  • 2 large egg whites
  • 4 cups powdered sugar
  • 1/2 teaspoon vanilla extract
  • gel food coloring

Directions

  1. Fit a stand mixer with the whisk attachment and pour the egg whites in to the bowl.
  2. Mix on medium low until foamy.
  3. Gradually add the powdered sugar and gradually increase the speed until you’ve added all the sugar and the speed it at medium high.
  4. Whisk until the mixture has smooth, stiff and glossy peaks.  Add in the vanilla and beat just to incorporate.
  5. Divide the sprinkle batter in to as many bowls as colors you plan to make.  Color with gel color, being sure to mix completely (a small spatula is good for this).
  6. Place each color of icing into a piping bag fitted with a round tip.
  7. Line cookie sheets or your counter top (as long as no one in your household likes to climb on to the counter or pull stuff off the counter) with parchment paper or non-stick silicon mats.  Pipe small circles onto the paper and use a damp fingertip to flatten down any pointy peaks that form.
  8. Repeat, repeat, repeat, repeat…
  9. Let dry for AT LEAST 2 hours (the longer the better) before using.

Now the rest of the cake had a lot of components, but I wasn’t worried about my competence in the kitchen to get it done and have it look beautiful.  I read through all of the recipes, and had a good plan on how to carry it all out flawlessly.  I had an entire blog post in mind to show off this cake!  Hello, humility.  We’ve met before…

I made everything the day before, 2 kinds of cake, strawberry puree, strawberry cream filling and an Italian meringue buttercream.  Once my kids were in bed for naps on the following day, I set up my tripod in the light filled corner of my kitchen and got to work.  I tinkered with the settings on my camera and had everything ready to hopefully create a lovely step-by-step assembly animated GIF.  Everyone would be so impressed.  Ugh.  Overconfidence can kill, guys.

As I started layering the cakes with the strawberry cream I realized my dreams of perfection were dashed.  The cream was oozing out the sides and on to the cake plate and the cake was beginning to tip over.  5 layers!  Of course it was falling over!  I am not a cake decorator.  I did not think through this whole process as well as I should have.  I also didn’t think to have my AC running to counteract the July heat and humidity we have here in Houston.  Taking pictures in the light filled corner didn’t help, either.  The cake was melting.  I had a, “Well, now what?!” moment, probably cursed a little bit, and then grabbed some skewers from a drawer in the kitchen and tried to straighten everything out.  From there I stuck it in the fridge and hoped for the best.

Please notice the second to the last image in this GIF.  I’ve already said this, but it reminds me of the cake in Sleeping Beauty.  Just about ready to topple over and be supported by a broomstick.

cakelayers

I’d already whipped up the frosting and folded in the sprinkles (bad call), so I had to put that all back in the fridge.  I was not at all sure what back and forth from the fridge would do to an Italian meringue buttercream…but I didn’t really have another option.

Here it was it all of it’s glory, nice and white with pops of sprinkles.  This is when it should have gone on to the cake but instead was sent back to the fridge.

Confetti Cake-28

Since we had dinner plans I had to wait until the next day to finish.  I pulled the cake out of the fridge.  The skewers had done the trick to straighten the cake out, and everything still held tight when I removed them.  I do wish I’d done that to start, although it wouldn’t  have helped the oozing strawberry cream…

Now the buttercream.  I let it sit for a while, then whipped it up again, no doubt damaging many of those sprinkles and creating a nice grey hue to the icing that should’ve been white.  The texture was also off.  Awesome.  I had an ok time getting the cake iced, even with the uneven layers.  Thankfully I’d saved some icing without sprinkles for decorating the edges, and some of those precious sprinkles for the final touch.


IMG_6786

Now, what really matters is how it tasted.  And it was delicious!  Especially the confetti layers.  My daughter turns 4 next month and I am seriously considering the confetti cake recipe for either a cake or cupcakes.

Thank you, Tessa, for getting me to try new things!  Can’t wait to attempt to conquer more of your lovely cakes ; )

IMG_6461


Baking Through Fika: Mini Victoria Sandwich Cakes

So far in Baking through Fika I’ve not done anything beyond the stated recipe.  But every other recipe has been pretty straightforward without much room for creative license.  This is a simple sponge cake with lots of ways to play!  So I decided to do a Victoria sandwich type cake, but in mini form.  I blame by recent binge of The Great British Baking Show during which I cried more than once.  It’s so wonderful.  Go watch it now.

These sweet little cakes were a great way to come back from the disappointment I experienced with my first attempt with this sponge cake.  See instagram post for those beauts…

Mini Victoria Sponge-20

There is little doubt in my mind that my sponge cake was imperfect.  I don’t know what perfect sponge cake should be like, but having made it only twice I am certain that I do not have the skills to make it perfectly.  Should it have all those bubbles?  Should it have risen more?  Should I have baked it longer?  Or less?!  How’s the flavor?  I would love (and at the same time hate) to have Mary and Paul in my kitchen telling me what I’ve done wrong and how to fix it.  But this cake certainly tasted delicious, and for me that’s what matters most.

With sweet quick breads like banana and zucchini I like to grease and sugar my pans instead of greasing and flouring them.  I like the bit of sweet crunch from the sugar.  I decided I’d try that with my jelly roll pan for the sponge cake and it worked very well.  The cake rounds were easy to cut and remove from the pan with only a few bits that stuck.  But would Paul and Mary approve?!?

Mini Victoria Sponge-2

This one pan of sponge gave me 35 1 1/2 inch diameter rounds.  If you don’t have a set of biscuit cutters, go get some.  They have many uses beyond biscuits!

Mini Victoria Sponge-3

So what is a Victoria Sandwich?  It is simply two layers of sponge cake with raspberry jam in the middle dusted with powdered sugar.  It became popular in England during the reign of Queen Victoria, and I’ve read that it was her favorite tea time treat.  But I’ve also read that that is not in fact true.  So who knows.  Not sure when cream cake in to the mix, but I am happy it did.

Mini Victoria Sponge-5

Since my sponge cake wasn’t very tall I made three layers instead of the two that I’ve seen in a Victoria sandwich.  I like the way they look with the three layers, but if you want to stretch the number of these you can make from one batch of cake, then two layers would be perfectly fine.

I used raspberry jam, but any kind would work.  I also played it safe with the amount of jam, just a thin layer.  It could’ve used a bit more, but I would rather them have too little jam than to have it oozing down the sides.

Mini Victoria Sponge-6

Mini Victoria Sponge-7

After the layer of jam another cake layer is added and sweetened whipped cream is piped on.  I add a little powdered sugar, a little almond and a little vanilla extract to mine just because that’s how my mom does it.  But go unsweetened, or without either of the extracts of you’d like.

Mini Victoria Sponge-8

Mini Victoria Sponge-9

Mini Victoria Sponge-10

Atop the cream goes one last sponge layer.

Mini Victoria Sponge-11

Mini Victoria Sponge-12

Mini Victoria Sponge-13

Pardon all the pics!  I kind of loved taking pictures of these photogenic little bits of sweetness.

Mini Victoria Sponge-14

Now dust generously with powdered sugar and serve to your lucky guests!

Mini Victoria Sponge-15

If you plan to refrigerate these don’t do the powdered sugar.  Save that for right before serving.  It will soak into the cake and make it kind of gooey.  Still delicious, just not as lovely.

Mini Victoria Sponge-16

Mini Victoria Sponge-17

I’m kind of hoping my daughter will want a tea party for her 4th birthday because I can see these being a terrific addition to the spread.

Mini Victoria Sponge-19

Mini Victoria Sponge-18

Mini Victoria Sandwiches

From FIKA

Sponge Cake

Ingredients

  • 2 eggs
  • 3/4 cup sugar
  • 1 1/4 cup flour
  • 2 teaspoons baking powder
  • pinch of salt
  • 1 3/4 ounces melted butter
  • 1/2 cup milk (2 % is fine)
  • 1 teaspoon vanilla extract
  • 1/4 teaspoon almond extract

Directions

  1. Grease and sugar a jelly roll pan (rimmed baking sheet) and preheat oven to 350°F.
  2. Beat eggs and sugar until pale, about 5 minutes.
  3. In a separate bowl whisk flour, baking powder and salt.
  4. Combine milk, melted butter and extracts in a small bowl.
  5. Add flour mixture to the egg and sugar mixture, stirring just to combine.  Add the milk mixture and fold together into an even batter.
  6. Spread into pan and bake for 10-15 minutes.  It will be light in color and when pressed lightly in the center should spring back.
  7. Let cool slightly before cutting in to rounds, then let rounds cool completely before moving on.

Assembling Sandwiches

Ingredients

  • rounds of sponge cake (since I had 35 total rounds I used 33 and ate the others!)
  • raspberry jam
  • sweetened whipped cream
  • powdered sugar

Directions

  1. Arrange 1/3 of the rounds on a cookies sheet.
  2. Spread each with a thin layer of jam.
  3. Top with another layer of cake.
  4. Pipe on a nice bit of sweetened cream.
  5. Top with another layer of cake.
  6. Dust with powdered sugar.
  7. Eat.

Baking Through Fika: Radio Cake

With any cookbook you are going to encounter some duds and some stand outs.  I’ve made a couple of duds from Fika that I don’t see myself ever making again.  But then there are the stand outs, and there are two types of stand out recipes.  Some are delicious but take so much work that you’re unlikely to repeat them.  Other stand outs are delicious and not overly complicated which makes them much easier and enjoyable to make again.

Raadio Cake-2

This radio cake didn’t seem like it would fall into either stand out category, really.  It just seemed safe.  It looked easy (a big plus for me!) and like it would be ok in the flavor department.  Turns out this is a true stand out that I can easily see myself repeating since it is simple to prepare, delicious, and lovely to look at.  It’s also unique, something I’d never made or eaten before.

Raadio Cake-9

You can keep this simple or dress it up.  A plain slice of this would be fine to enjoy as an afternoon treat by yourself.  Or you can add some whipped cream and cookie crumbs and serve it to your dinner guests.  Speaking of dinner guests, you can make this hours before if not a full day before you need to serve it, making it an even better choice to serve guests for dessert.

Raadio Cake-8

This is pretty rich and can be changed based on the type and quality of chocolate you use.  I used Ghiradelli bars, one 60% and one 70% cacao.  It was rich, a thin slice was plenty for me.

The recipe calls for Marie butter cookies.  I couldn’t find those, so I used a digestive biscuit cookie that I hadn’t tried before.  I finished the package I bought for the cookies and went back and bought two more just for snacking.  It has an almost graham cracker-like taste with a hearty texture that pairs well with the chocolate and cream (if you’re wise enough to add a dollop).  These cookies were too big to fit three in a row in my loaf pan on the bottom layer, so I broke them in half to fit.

As you can see in these photos, I didn’t do a great job of putting the plastic wrap in the loaf pan.  There are all kinds of creases in the chocolate.  In my defense, plastic wrap is a pain to keep smooth so I was lucky to get it in there at all!  I placed one sheet horizontally and a second vertically.  I guess there’s a way to smooth the top after you’ve inverted  it on to a platter, but I’m not sure what that is.  I’d probably make it look worse if I tried to make it better, though, so leaving it alone was a better choice for me!

To slice this I thought at first of using a large chef’s knife, but then thought that a bench scraper would be a better choice to make one nice clean cut.  I warmed it underneath hot water, dried it, then cut straight down on the cake for a nice clean slice.  Not a beautiful serving tool, but a functional one.

Raadio Cake-10

Raadio Cake-11

Now.  Those eggs.  I’m not sure if they’re warmed enough by the addition of the melted butter/chocolate mixture.  To be safe they need to be warmed to 160°F.  I did not check that they were.  Bad.  I know.  Grab a thermometer and check them after mixing.  If it’s not warmed enough you could set it over simmering water and whisk away until it does.  I escaped without any issues, but will check next time for sure.

I loved that the wonderfulness of this “cake” was such a surprise!  I just thought I was checking off another Fika recipe, and it wound up being terrific.  Looking forward to seeing what the next recipe holds.  Here’s hoping it’s another pleasant surprise!

Radio Cake

From Fika

Ingredients

  • 8 ounces butter
  • 8 ounces dark chocolate (roughly chopped)
  • 2 eggs
  • 3/4 cup powdered sugar
  • 1 tablespoon good cocoa powder
  • 1/2 teaspoon vanilla
  • Marie cookies (about 25) or large digestive cookies (12-18) extra cookies crushed for garnish
  • sweetened whipped cream for garnish

Directions

  1. Line a loaf pan with plastic wrap and set aside.
  2. Melt the butter and chocolate together in a bowl either in a double boiler or in the microwave in 30-45 second increments stirring in between until melted and smooth.
  3. In another bowl beat eggs, powdered sugar, cocoa powder and vanilla until light.  Add in the melted chocolate mixture and beat to fully combine.
  4. Spread a layer of chocolate in the pan, then lay cookies down in a row on top.  Cover with chocolate, then cookie, repeat until you have 3-4 cookie layers and end with chocolate.
  5. Chill for at least an hour.
  6. Invert on to a platter and peel off the plastic wrap.
  7. Slice and serve with whipped cream if desired.

Sparkling Princess Castle Cake

My daughter turned 3 last week.  She requested a princess birthday party, and I was happy to oblige.  We didn’t have a full blown birthday party this year, but we did have grandparents over for lunch, cake and presents.  It was a great low-key party and she loved it.

Castle Cake-19

When I started looking at cakes for this princess party I found so many beautiful and some truly over the top cakes that I knew I did not have the time nor the skill for.  Like this and this.  But then I found some castle cakes that looked great and actually do-able for the amateur cake maker.  Here are the links to the cakes that inspired the cake I wound up making for Betsy.  This and this for the cake itself and then this for the towers.  As you can see I pretty must combined a bunch of great ideas others had to put this together.  Thank you, internet, pinterest and all of those creative types who share your great ideas with the rest of us!

To make the towers I brushed melted almond bark on to cake cones, I made more than 10 but 10 is all I used.  After it dried I used a little more of it to stick them together.  For shorter towers simply use one cone.

Castle Cake-8

Castle Cake-3

I also used the almond bark to coat 5 sugar cones (again, I made more than 5 just in case which was good since I did knock one on to the floor and it shattered) that I then covered in pink sugar.

Castle Cake-4

With the left over almond bark I dipped the ends of both large and small marshmallows and then dipped them in pink and white sugar.  I did a bunch of these and did not use them all.

Castle Cake-2

I also piped what I thought might be windows or doors out of some of the almond bark and sprinkled them with pink sugar.  I did not have a set decorating plan, as you can tell.  I only ended up using one of them.

Using 2 boxes of cake mix I baked up a 9×13 cake, an 8-inch square cake and 2 round 4-inch cakes.  Cake mix for the win!

I whipped up a batch of this frosting.  It was just enough to frost everything.

I bought a cake board at a local cake shop in Sugar Land that I just found out existed thanks to my friend Katie, Cake Craft Shoppe.  I see many more trips there in my future.  They have decoarting classes, too…

After leveling all of the layers using this handy tool, I started layering the cakes and put on a crumb coat.  First the 9×13.

Castle Cake-9

Then the 8×8.

Castle Cake-11

Then the two rounds.

Castle Cake-15

After chilling it all I put on another coat of frosting.  Then I started decorating.  I used plain mini marshmallows, white sugared minis and white sugared large marshmallows.  When we were shopping one day Betsy saw these pink sprinkles and had to have them.  They’re bubble gum flavored and taste terrible (unless you’re 3) but I loved the way they looked on the cake.

I pressed the bottoms of the towers into the very top and corners of the 9×13 cake.  I left off the top sugar cones since I had to store this overnight and my fridge would not accommodate the height.

Castle Cake-21

Castle Cake-22

When it was time to have cake I simply placed the sugar cones on top and walked very carefully to bring the cake to Betsy.  She loved it, as you can probably tell.

Castle Cake-30

Castle Cake-32

Castle Cake-16

At some point after the candles were blown out someone (I think it might have been me?) knocked one of the cones off.  So, if you want a more sturdy ice cream cone tower then I suggest sticking them together with some icing.

Here’s a list of what you need to make the cake.

  • 2 boxes of cake mix and ingredients called for
  • 1 recipe vanilla buttercream (this is my favorite)
  • 10 cake cones (plus a few more just in case)
  • 5 sugar cones (plus a few back ups)
  • almond bark (1 package was more than enough)
  • mini and large marshmallows
  • pink and white decorating sugar
  • piping bag and tip (for door or windows)
  • pink decorating candy (I got these at Target)

And just in case you cared, here are some more photos of the birthday girl and the fam.

Castle Cake-35

Castle Cake-29

Castle Cake-28

Castle Cake-27


Happy birthday, Betsy!  We love you.


Baking Through Fika: Strawberry Rulltårta

It has been a solid 2 months since I last posted anything here.  Not because of anything in particular, just because of life in general.  I have taken two trips this summer, but I’ve also been home a lot, enough to have been blogging at least a little.  But I didn’t.  It amazes me sometimes when I look back on the blog and see that I posted frequently during an especially busy time and now, when things aren’t really that busy, it takes me this long to post and I miss June and July Daring Bakers after not missing a challenge for over a year, during which time I had a baby.  How did I have the time then?!  Hopefully this new project will give me some incentive to blog more regularly.  I’m pretty excited about it!  These posts will also be featured on Alpaka Van!  Something else I am pretty excited about.

If you’ve been to IKEA and you’re in to food, then there is a good chance you’ve noticed this cookbook before.  I bought it because it was a cookbook, of course, but it was also very visually pleasing.  Every recipe includes a photo of the ingredients similar to this one.  Isn’t is great?

20150807_133004000_iOS

The title, Fika, is a Swedish tradition which kind of translates to “to have coffee”.  It’s a time when you gather in the afternoon and enjoy coffee (or tea) and sweet treats, typically with company.  I had the pleasure of enjoying fika in Sweden when I visited with my mom and sisters 8 years ago.  I am in full support of bringing the tradition home.

I’ve decided to bake my way through Fika.  I love the simple recipes and the clean and creative images of the ingredients.  Another reason I was drawn to bake through this book is that my sisters and I have grand plans to open up a shop together (one day…*sigh*) and my role would be to do the baking, so I have to get some practice with Scandinavian style baked goods.

Starting with a simple rulltårta or jelly roll seemed like a good choice.  I’d never made a jelly roll before, but how hard could it be?  Turns out that it can be tricky.  The first time I used a non-stick silpat…but it stuck terribly.  The next time I used parchment which, while much better, still did not release the cake cleanly.  Any tips?

DSC_0736

Before turning the cake out onto a clean dish towel you sprinkle it with sugar, which makes for a beautiful and sweet exterior.

DSC_0768

I filled the cake with strawberry jam, Bonne Maman is my go-to.  I thought about other jams, and even a nice spread of Nutella, but in the end strawberry just seemed right.  It really needs nothing more, but a dollop of whipped cream never hurt a soul…

The cake is light and sweet, and the tart jam is a good contrast.  The slight crunch of the sugar is also a nice contrast against the soft cake and filling.

This is best made and served the same day, but can be kept in the fridge for a few days and still taste wonderful.  It just starts to get a little soggy as the cake absorbs the jam.

I am so looking forward to this project and can’t wait to try another recipe from Fika!

DSC_0792

Strawberry Rulltårta

From Fika

Ingredients

  • 3 eggs
  • 3/4 cup sugar + extra for dusting the cake
  • 3/4 cup flour
  • 2 teaspoons baking powder
  • pinch of salt
  • 1/4 cup milk
  • 1/2 teaspoon vanilla extract (optional)
  • 1/4 teaspoon almond extract (optional)
  • 3/4 cup strawberry jam or fruit puree

Directions

  1. Heat the oven to 475°F.  Line a large baking pan with parchment and move oven rack to the bottom third.
  2. Beat the eggs and sugar on high for 4-5 minutes, until light and fluffy.
  3. Combine flour, baking powder and salt in a small bowl.  Add in to the egg mixture, gently fold a couple times, then add the milk and extracts.  Continue to gently fold together until combined, but not overly mixed.
  4. Spread the batter evenly onto the prepared pan.  Bake for 4-5 minutes.
  5. Remove from the oven and sprinkle the cake with sugar.  Place a large, clean dish towel over the cake and carefully but quickly invert it.  Peel off the parchment carefully.
  6. Spread the jam over the warm cake, then roll it up and place seam side down on a cutting board.  Let sit for a few minutes, then slice and serve.


Daring Bakers: Mini Esterhazy Torte

Right now I am in a dreamy state after sampling and photographing this incredible cake!  If you need a special dessert and you’re a hazelnut fan, you should seriously consider taking the time to whip this up.  You will thank me for the rest of your life.

esterhazy10

For the month of January Jelena from A Kingdom for a Cake invited us to start this year with a dreamy celebration cake. She challenged us to make the Esterhazy cake a.k.a the Hungarian dream. What better way to start the year than with a sweet dream?

(more…)

Daring Bakers: Sachertorte Fail

The making of this month’s Daring Bakers challenge was a comedy of errors.  I can truthfully say that I laughed more than I cried through this process and I couldn’t wait to share my Sachertorte tale.  So here’s how it all went down.

The October Daring Bakers’ challenge was brought to us by Korena of Korena in the Kitchen. She took us to Austria and introduced us to the wonders of the Sachertorte.

sacher7

sacher2

It sure is nice that to kids cake is cake no matter how it looks!  Mine enjoyed having some chocolate cake in the middle of the afternoon for no reason.

I’ve never wanted to make or eat Sachertorte.  Sorry.  But I typically don’t like fruit with my chocolate.  I do like raspberry, maybe strawberry, but other fruit and chocolate pairings are not hard for me to turn down.  A Sachertorte is chocolate cake glazed with apricot and then dark chocolate.  I wasn’t thrilled at this month’s challenge, but I’m only 3 challenges away from completing a full year of The Daring Bakers, so I couldn’t turn it down.  Also, this was an opportunity to broaden my baking horizons, and that’s always a good thing.

I had everything I needed and planned to whip this up on a Friday.  Since the cake can be made ahead I had what I thought was a good plan of getting that done in the morning, letting it cool, and then tackling both the apricot and chocolate glazes and the assembly during afternoon naps.  My kids typically have about an hour of nap time that overlaps.  And it’s not like I’m not used to juggling kitchen and kid duties.  I thought I had this thing under control.  That’s when you know you don’t.

My youngest had a couple of vaccines given at his 4 month well check the day before and while I’m not confident that his fussiness was due to the shots I am confident that something was not right with him.  He is a happy baby who can deal with being put in the bouncer in the kitchen and being content while I cook.  Typically.  Today was not typical.  He hardly napped all day.  I’d just get him to sleep, get back downstairs to try to bake and he’d start crying again.  Did I mention we also had a Halloween event that night?  I needed to get the kids fed early and in their costumes by the time my husband got home.  I felt like a crazy person going from the kitchen to the crying baby upstairs, to the kids, to the kitchen, to the crying baby in the bouncer, to the sink full of dirty dishes, to the pirate costumes, to the crying baby on his exercise mat to the Sachertorte.

You don’t need me to tell you that the opportunities for disaster were countless.  While whipping egg whites with my hand mixer (something that seemed to take forever) my two boys were crying because they didn’t like the noise.  Take a moment now and try to imagine a 4 year old crying and tugging at you, a 4 month old screaming, and the metal beaters hitting the sides of your glass bowl as the little motor on your mixer whirs.  I should’ve given up right then.  But I soldiered on.  And amazingly the cake itself was fine.

Cake got baked, cooled and sliced ready for glaze.

sacher10

Glaze got made and right when I got ready to use it my sweet baby woke up from his 30 minute nap and I had to feed him.  But the apricot glazing went well.  (Note: put parchment or wax paper under your rack when glazing.)  Right about then my older son woke up.

sacher11

The baby seemed ok after eating and I really needed to get this cake done.  I’d read the directions for the glaze, knowing it to be both temperature and time sensitive.  I decided I’d go for it.  Curious George Halloween special on the TV and kids on the couch with snacks and drinks.  Baby on the mat playing with toys.  This would be fine…

Once you start the glaze you have to finish.  No stopping points.  You have to cook the sugar to 234°F, mix in the chocolate, pour it on the cake and smooth it all without taking a second to neglect your duties.  My sugar was at about 215°F when sweet baby boy started to scream.  I tried putting him in the bouncer in the kitchen and making silly faces and noises at him while I tended to the boiling sugar.  He wasn’t fooled.  He knew he wasn’t number 1 in my book at that moment.  But I had to keep going.  He screamed for about 5 minutes, then discovered one of the toys in front of him and settled down.  I whisked in the chocolate and my glaze was thick and clumpy.  The recipe says that you can return the pan to the heat and add “a few drops” of water to get it to a pour-able consistency.  I did that and then proceeded to glaze the cake.  I went on nice at first.  I had my offset spatula at the ready and was spreading as I poured.  I got to the other side of the cake and it basically hardened up and became not only not spreadable but clumpy and when I tried to fix it it started pulling up cake with it.  So this is what I had on my hands.

sacher13


I was watching the temp of the sugar carefully and turned it off right at 234°F, but I guess that could’ve been the problem.  Or maybe I didn’t add enough water, although it did seem pourable enough.  Regardless of what went wrong, this chocolate glaze was a bust.

My baby had started to cry again and my oldest son was now in the kitchen asking for more snacks and milk because he’d spilled his on the rug.  At this point everything just had to be funny.  No point in getting upset about it.  Thankfully I wasn’t planning to serve this at a dinner party.  I had told a friend I’d bring dessert to a casual lunch on Saturday, but thankfully she’s the kind of friend who doesn’t love you any less for bringing ugly cake!

I completed the cake with the required “Sacher” but didn’t spend too much time worrying about how well that turned out.  Obviously.  I’m pretty sure I was snickering about this whole debacle when I took this picture.

sacher9

Now, the cake itself wasn’t bad.  I liked it, actually.  The chocolate glaze also tasted fine, but I will never make it again.  I’ll look for a different chocolate glaze or ganache recipe the next time I want to try to glaze a cake.  Now the apricot.  I just can’t get on board with the apricot and chocolate together.  If I am ever in Austria I will definitely order myself a slice of Sachertorte, but I won’t be making it again.  I might try the cake with a caramel glaze and chocolate ganache.  Or maybe just keep it all chocolate.  But there will be no traditional Sachertortes coming out of this kitchen.  The end.

sacher4 sacher3

 Sachertorte

Ingredients

  • ¾ cup (4 1/2 ounces) good quality bittersweet chocolate, chopped
  • 9 tablespoons unsalted butter, softened
  • 1 cup powdered sugar
  • 6 large eggs, separated, at room temperature
  • 1 teaspoon vanilla extract
  • ½ cup granulated sugar
  • 1 cup all-purpose flour
  • pinch fine grain salt

Directions

  1. Preheat oven to 375˚F with a rack in the center of the oven. Butter and flower the sides of a 9-inch springform pan, then line the bottom with a circle of parchment paper.
  2. Place the bittersweet chocolate in a heat-proof bowl and heat over a small saucepan of barely simmering water or you can melt it in the microwave, heating in 30 second increments, stirring in between each, until just melted. Set aside to cool completely, stirring often.
  3. Place the butter in a large mixing bowl and beat with the paddle attachment of a stand mixer or electric mixer on medium speed until very light and creamy. Add the confectioners’ sugar on low speed, then increase to medium speed and beat again until light and creamy.
  4. Beat in the egg yolks, one at a time, scraping down the sides of the bowl.
  5. Add the cooled chocolate and vanilla and beat until well-mixed and very light and creamy, scraping down the sides of the bowl.
  6. In a clean bowl using the whisk attachment, beat the egg whites with about one tablespoon of the granulated sugar on high speed until foamy. Gradually add in the rest of the granulated sugar and continue beating the whites until they form soft, shiny peaks – they should hold their shape but flop over on themselves.
  7. Vigorously stir about 1/3 of the whipped egg whites into the chocolate mixture to lighten it, then gently fold the remaining egg whites into the chocolate mixture with a spatula until just a few wisps of egg white remain. Do this carefully so as not to deflate the egg whites.
  8. Stir together the flour and salt and sift half of it over the chocolate mixture. Fold in with a spatula until almost incorporated. Sift over the remaining flour and fold to combine completely.
  9. Spread the batter evenly in the prepared springform pan.  Bake in the preheated oven for 35-45 minutes until a toothpick inserted in the middle comes out clean. The cake will crack and dome in the middle as it bakes but will flatten out as it cools.
  10. Cool completely, then slice in half.  Glaze middle, top and sides with warm apricot glaze (recipe below).  Let glaze set, then finish with your favorite chocolate ganache.

Apricot Glaze

Ingredients

  • 1 1/4 cups apricot jam or preserves
  • 2 tablespoons water

Directions

  1. Boil the jam and water in a small saucepan over medium heat.
  2. Cook, stirring often, until the mixture thickens and drips slowly from the spoon, about 2-3 minutes.
  3. Strain through a wire mesh sieve, pressing firmly on the solids. You should have about 1 cup of glaze. Use warm.

Here are some recipes for chocolate ganache that you could use.

Pourable Ganache

Sachertorte Chocolate Glaze


Kitty Cat Cake

For my daughter’s 2nd birthday I wanted to make a cake that she’d appreciate not only for its sugar content but for its appearance.  This kitty cat cake was perfect for my animal loving girl!

cake8

All you need for this cake are 2 8-inch round cakes, no need for a uni-tasking cat shaped pan.  And you don’t have to do much cake shaping, either.  Leave one cake whole and cut the other in to a head, ears and tail.

cake12 cake10

This next step is the hardest.  Using your favorite frosting recipe, this is mine, stick the pieces together and then frost the cake, being careful around the cut edges.  This first coating of frosting is your crumb coat, so a few crumbs are ok and it doesn’t need to be totally covered.  You’ll do that next.

cake13 cake11

Put the cake in the fridge for an hour or two, then frost another time to get a pretty, smooth and crumb-free layer.

Now you can decorate!  I colored some of my vanilla frosting pink and then I just bought a tube of black icing (this one from Wilton) because making your own black icing can be tough.

She was so excited when we put this cake in front of her.  Thankfully at 2 she didn’t care that it wasn’t perfectly frosted or that it kinda looked like a rabbit 🙂  Happy Birthday, sweet Betsy!

cake6 cake5 cake3 cake4

Daring Bakers: Surprise Inside Checkerboard Cake

This challenge couldn’t have come at a better time!  July is my birthday month.  Having to bake a special cake for the Daring Bakers was the perfect excuse to bake myself a birthday cake. cake29 cake30 For the July Daring Baker’s Challenge, Ruth from The Crafts of Mommyhood challenged us to bake a cake. But not just any cake; she asked us to add in a special surprise for our eyes as well as our taste buds! cake19 When I saw this challenge I immediately got on Amazon and bought the Surprise Inside Cakes cookbook, which is amazing.  But after looking through it I decided I couldn’t commit to one of her cakes right now.  I figured I’d fail at the first attempt and have to try again (or a dozen times) to get it right.  And I just couldn’t justify taking the time and energy to make multiple cakes when most of my time and energy has to go toward my kids.  So I opted to make something a little simpler, and something I’d seen before and been anxious to try. cake22 cake23   cake26 This checkerboard cake is impressive without being quite as involved as something like this.  Amazing, right?!  And something I’d like to try someday, just not today.  A lot of these kinds of cakes involve baking cake, crumbling it up and mixing it with icing, carving into other baked cake layers and then filling to space with the cake-frosting mixture.  I wasn’t even going to pretend I was brave enough to try that.  This cake just involves some cutting and layering.  I could handle that. I used cake mix for this challenge because if it didn’t turn out I did not want to throw a scratch cake away, and, let’s face it, scratch cake is easier and always reliable.  Start by baking two boxes of cake mix into 8-inch rounds.  I used a dark chocolate and funfetti cause it’s my birthday!  Wrap them in plastic and chill them in the fridge for at least a couple hours or overnight. cake1Now you want to level them to all the same height.  I used one of these.  It’s a favorite cake tool of mine.  You can also use a serrated knife. cake2 Now cut each layer using a 5-inch circle and a 3-inch circle.  I tried to center them perfectly but they weren’t quite perfect.  It turned out fine.  Also, as you can see below, I had my knife at a slight angle when I cut the first circle.  Try to keep it straight, but know that if you have the same problem as I did, it will still work out.cake3 cake4 cake5 cake6 Then do the same with the chocolate layers.  Be very careful when moving the rings!  They become very fragile. cake7 Now would be a good time to chill or freeze the layers.  I didn’t and wish I had.  They would’ve been easier to move if they were cold.  Whip up a batch of frosting, I used this one.  Place one large vanilla ring on a cake plate.  Spread some frosting around the inside of the ring. cake8 Place a chocolate ring inside of this one. cake9 Frost the inside of this ring and then place a small vanilla circle in the center.  NOTE: Your icing is going to get full of chocolate crumbs.  Try to keep the big bowl of frosting relatively crumb free.  I scooped frosting into a smaller bowl as I needed it. cake10 Top this layer with frosting.  Then repeat with the rest of the cake layers, alternating chocolate, vanilla, chocolate.  Frost the entire cake with a crumb coat and put in the fridge to set, at least a couple hours. cake11 cake12 cake15 Now you may need to make another batch of frosting, depending on how much you made the first time around.  Finish off the cake with the final coat of frosting. cake16 Place the cake in the fridge until you’re ready to cut in to it.  These kinds of cakes cut more cleanly when cold. Stick some candles in and celebrate! cake18 cake25