potato

Simple & Satisfying Potato Soup

The forecast for this past week boasted 3 days in a row of cool and rainy weather.  Time to make some soup!  I started looking around for a potato soup recipe but most looked so heavy, full of sour cream and cheese.  I wanted a soup that would leave us full and satisfied without being totally weighed down.  I finally found a terrific recipe from The Pioneer Woman (are you at all surprised?).  Instead of cups and cups of whole milk and sour cream, there are cups and cups of chicken broth, with a little dairy to round out the soup and add creaminess.  It is heavenly.

potato-soup-1

I was immediately excited about the celery, onion and carrot in this soup.  Made me feel like I was eating even healthier with those extra vegetables.  And they add such wonderful flavor.  I used shallot instead of onion because I didn’t have one.  Next time, though, I will use a regular onion.  Less peeling and chopping.  Everything else in the recipe is unchanged.  I might cook a few extra pieces of bacon because, if you are anything like me, having some of those crunchy bits on top is necessary.  The 6 pieces aren’t enough for the entire pot of soup.  Maybe this says something about our love of bacon.  I’d say 10 pieces would be good, and if you have extra, well, there is not a thing wrong with extra bacon bits.

After cooking the soup you puree about half of it in the blender.  This creates a nice balance of smooth and chunky so that every bite has something to chew on, which is what I like in a soup.  I used a sharp cheddar on top of the soup, but a sharp white cheddar would also be delicious, or whatever cheese you like on a baked potato.

Top this soup with a little bacon, cheese and green onion and you have all the flavor of a hearty baked potato soup but without the bulk of it.  This is definitely a recipe I’ll be making again.

Note:  When reheating you might need to add some chicken broth or milk to thin it out since it does thicken as it sits in the fridge.

potato-soup-2

Potato Soup

From The Pioneer Woman

Feeds 6-8

Ingredients

  • 6 – 10 slices of bacon, chopped
  • 1 whole medium onion, diced (I used 4 large shallots)
  • 3 carrots, diced (I used about 20 baby carrots)
  • 3 celery stalks, diced
  • 6 whole small russet potatoes (or 3 large) peeled and diced
  • 8 cups chicken or vegetable broth
  • 3 tablespoons flour
  • 1 cup milk (I used 2%)
  • 1/2 cup half and half (or heavy cream)
  • 1/2 teaspoon salt, more to taste
  •  Balck pepper to taste
  • 1/2 teaspoon seasoning salt (I used Lawry’s)
  • 1 tablespoon fresh parsley, minced
  • 1 cup grated cheese
  • 4 green onions, sliced thin

Directions

  1. Heat a large pot over medium high heat.  Add in the chopped bacon and cook until crispy, being careful not to burn it.  Remove from the pot and place on a paper towel-lined plate and wipe out some, but not all, of the bacon fat.
  2. Over medium high heat cook onion, celery and carrots for a couple minutes, until they begin to soften.  Add potatoes and cook, stirring things around a little, for about 5 minutes.  Season with salt, pepper and seasoning salt.
  3. Add the broth to the pot and bring it to a simmer.  Cook for 10 minutes, until potatoes are fork tender.
  4. In a bowl whisk flour and milk and add to the pot.  Stir together and cook for about 5 minutes.
  5. Puree about half of the soup in a blender (I filled my blender almost full).  Be sure to remove the center piece from the top of the blender and cover with a dish towel.  If you don’t, you could make a big mess since you’re pureeing hot liquid.
  6. Pour the puree back into the pot, taste and season as needed.  Add in the cream or half and half, and the parsley.
  7. Serve with cheese, bacon bits and green onion.


Bacon, Potato & Blue Cheese Tart

A good friend of mine made this when we met up for a playdate at her house a while back.  I say “a while back” because it feels like just a few months ago but I think it might have been over a year ago, which reminds me just how quickly a year goes by.  I can’t believe it’s almost 2014.

photo 3 (12)

Candace paired this rich and savory tart with a spinach salad loaded with berries, which made for a well balanced lunch.  I’m still amazed that she fixed this lunch for us since she’d recently had a baby.  My meal of choice when having people over for a playdate is Chick-fil-A…or goldfish and raisins.

The recipe is from Smitten Kitchen and is something I can definitely see myself making again, especially for a lunch or brunch.  It’s impressive but not too time or skill intensive.  It’s also fine served room temp, so you can make it hours ahead or even the day before and re-warm it.  I added bacon to the original recipe because I don’t see anything wrong with adding bacon to pretty much everything.  Maybe my new motto for 2014 will be, “Put some bacon on it!” inspired by Portlandia… But of course it’s amazing without the bacon and fits into a vegetarian diet that way.

Other than the bacon, the rest of the recipe is unchanged.  You can use a tart pan or pie plate for this.  I had planned to use a tart pan because it’s just prettier than a pie plate.  Something about that fancy fluted edge.  But the dough recipe provided wouldn’t fit in my 10 inch tart pan, so I used a 9-inch pie plate.  Thankfully the lovely filling makes up for the unimpressive pie plate.  The dough wasn’t impossible to work with, but it was a little crumbly so I had to do some patching up in places.  It was delicious and not hard to whip up in the food processor, so I’d definitely recommend it over a store bought crust.

photo 1 (23)

Ingredients

If you don’t like blue cheese you probably haven’t read to this point in the blog post, and if for some reason you have I can pretty much guarantee that you won’t be a fan of this tart.  Which makes me sad, because it’s delicious…if you like blue cheese.  I think you could use goat cheese, but haven’t tried it so I’m not sure how that will effect the final product.  Let me know how it turns out if you try it!

A few tips:

  • Refrigerate your crust before filling to minimize shrinking during baking.
  • For making ahead, you can prep everything, store it in the fridge and assemble right before baking.
  • If using bacon, this cold oven method of cooking it has become my new favorite.  No greasy pan to clean and your house won’t smell like bacon for days.
  • Make sure to let the tart cool or otherwise the filling won’t have time to thicken and could be runny.

photo 2 (22)

Pre-baked Tart

Bacon, Potato & Blue Cheese Tart

From Smitten Kitchen

Ingredients

Tart

  • 1 Savory Tart Shell, recipe below, in a 9-inch tart or pie pan and ready to use
  • 1 pound small red potatoes, scrubbed and cut into 1/4-inch slices
  • 4-8 slices of good bacon, cooked and crumbled
  • 1 cup heavy cream
  • 1 large egg yolk
  • 1/4 pound blue cheese, crumbled (about 3/4 cup)
  • 1 tablespoons finely chopped thyme and rosemary
  • Fine sea salt for sprinkling

Tart Shell

  • 1 and 1/4 cups flour
  • 1 tablespoon plus 2 teaspoons cornstarch
  • 1/4 teaspoon salt
  • 6 tablespoons butter, diced
  • 1 large egg

Directions

For Tart Shell

  1. Combine flour, cornstarch and salt in the bowl of your food processor.  Pulse a few times to combine.
  2. Add in butter chunks and pulse until butter is in pea sized pieces.
  3. Add egg and pulse until dough comes together.  It will still be slightly crumbly.
  4. Dump the dough onto a lightly floured surface and knead it a few times so that it comes together.  Flatten into a disk.
  5. Roll out into a 12 inch circle then transfer to your 9-inch tart pan or pie plate.  Press out any air bubbles and trim or crimp edges as desired.  Refrigerate for at least 30 minutes before filling.

For Filling

  1. Preheat oven to 350°F
  2. Cook potatoes in a medium sized saucepan, just covered in water, over medium heat.  Simmer until tender, 8-10 minutes.  Remove from the water and drain.  Lay the slices out on a clean dishtowel and gently pat dry with another clean towel or paper towels.
  3. Arrange potatoes in concentric circles on the bottom of the crust, overlapping slightly, covering the crust entirely.
  4. Sprinkle cheese over potatoes, followed by bacon and herbs.
  5. Whisk egg and cream in small bowl and pour over everything.
  6. Sprinkle with sea salt.
  7. Bake tart for 45 to 50 minutes until bubbly and browned.  Cool on wire rack.  Serve the tart warm, room temp or cold.

Potato Cinnamon Rolls

This recipe has been bookmarked in my Pastry Queen cookbook for a couple years at least.  The photo of these always makes me pause and swoon a little whenever I’m flipping through the pages.  You’ll have to buy the cookbook to see it.  My photo doesn’t come close.

I find it hard to resist the sweet, bready, ciannamony, yeasty goodness of a cinnamon roll.  My favorite rolls are at The Upper Crust Bakery in Austin, Texas.  They’re a totally different type of cinnamon roll with a crunchy cinnamon sugar coating instead of a gooey frosting.  If you’re ever in Austin, you must go get one.

The problem with me and cinnamon rolls is the commitment (and the mess).  Make the dough, let it rise, make the filling, roll and fill, cut and place in the pans, rise again, bake, frost or glaze, then enjoy…if you even have the energy at that point.  And if you want to make these fresh for breakfast you have to either get up at a ridiculous hour or use some time management skills to get them ready for a morning rise and baking.  So much work!  But these are well worth the effort.  You can even freeze them for later, which does require some work on the front end, but you get yummy cinnamon rolls straight from the oven without having to touch a bit of flour.

For some reason (could have been the 2 lonely potatoes on the counter) I just felt compelled to commit to these last week and am so very glad I did.  I baked 2 pans of these rolls and there are 3 more in my freezer that are a mere overnight thaw and hour rise away from being enjoyed.  Yes, this recipe makes 5 pans of cinnamon rolls.  So make sure you either need to feed a hungry army, give these away as gifts or have room in your freezer and save them for later.  Oh, and make sure you have 2 good sized bowls for rising.  The recipe says to let the dough rise in one bowl and then divide it in half.  Well, I do not have a bowl big enough for that and I don’t know who does…except for maybe my mother-in-law.  So I divided the dough in half before rising and still had to use 2 of my biggest bowls.

The pecans are optional.  I made one half of the rolls with and the other half without.  If I’d really been thinking I would have baked one pan of the with and one pan of the without, but I wasn’t thinking.  So all of my rolls with pecans are in the freezer.  I am sure they’ll be delicious since most baked goods are better with pecans.

Using mashed potato in these rolls gives them a lighter texture than your normal roll.  They don’t taste like potato.  They are just slightly sweet, unless you drench them in frosting (like I do).  If you bake and don’t eat all the rolls in the same day, cover and refrigerate the rolls.  Warm in the microwave for 10-15 seconds to recreate the fresh-from-the-oven flavor.  Store for 3-4 days at most in the fridge.  They’re just not as good after that.

Jailhouse Potato Cinnamon Rolls

From The Pastry Queen by Rebecca Rather

Ingredients

Dough

  • 2 medium russet potatoes, peeled, quartered, boiled and mashed
  • Reserve 3 cups of potato water
  • 1 oz active dry yeast (4 pkgs.)
  • 3/4 cup plus 1 tsp sugar
  • 2 sticks butter, melted and slightly cooled
  • 3 eggs
  • 2 tsp salt
  • 9 cups flour

Filling

  • 4 cups toasted pecans, optional (I used 2 cups and made half with and half without pecans)
  • 4 cups firmly packed brown sugar
  • 2 tablespoons cinnamon
  • 2 sticks butter, melted

Icing

  • 2 1/2 cups powdered sugar
  • 1/4 cup milk
  • 1/2 teaspoon vanilla
Directions
  1. Grease two 9X13 disposable foil pans (you will probably need more pans, depending on how many rolls you end up with. I used 5).
  2. Wash, peel and quarter the potatoes and boil until fork tender, 10-15 minutes.  After boiling the potatoes, set aside 3 cups of the potato water and let cool to 110 degrees using a candy thermometer, or to the temp of hot water coming out of the faucet.
  3. Mash potatoes in a large bowl, set aside.  Sprinkle yeast over the water, stir until dissolved, add 1 tsp. sugar.  Allow to rest for 5 minutes until foamy.
  4. Whisk the mashed potatoes and 3/4 cup sugar together.  Add the melted butter, eggs , salt and potato water and mix until smooth.  Switch to a wooden spoon, and add the flour 3 cups at a time, mixing until combined.  Mix until all the flour is incorporated.
  5. Place the dough in 2 large greased bowls.  Cover with a damp cloth and leave in a warm place until the dough is doubled in size, about 1 to 1 1/2 hours.
  6. Leaving the dough in the bowl, flour your hands and punch it down until it deflates.  Cover the bowl with plastic wrap. At this point the dough can be refrigerated until the next day.  You can proceed from here, but it is easier to handle the dough after it has chilled.
  7. With floured hands, remove one batch of the dough from the bowl onto a well floured surface.  Using a rolling pin, roll into a 1/4 inch thick rectangle. About 20 X 10.  Spread the rectangle with half the butter, then half the brown sugar mix, then half the chopped pecans.
  8. Starting with the long side, carefully roll the dough.  Using a very sharp floured serrated knife, cut each roll crosswise in 2 to 3 inch slices. Place the slices, cut side down, in the foil pans spacing about one inch apart so they have room to expand. Make sure the end flap of each roll is set snugly against a side of the pan.  Repeat with the other bowl of dough.
  9. At this point the rolls can be tightly wrapped in plastic wrap and a layer of foil and frozen up to 3 weeks.  Defrost in the refrigerator overnight or for one hour at room temperature and continue following the directions from this point.  Leaving them covered, set the rolls in a warm draft free place and let them rise until they get puffy, about 1 hour.
  10. Preheat oven to 375°F.  Remove covering and bake the rolls for 20 to 25 minutes or until light brown.
  11. Combine icing ingredients with a whisk and drizzle over warm rolls.


You Can Make Your Own: Potato Gnocchi…But I Can’t

My gnocchi fell apart between boiling  and pan searing with browned butter.  It made for a gooey mess of a meal.  They tasted good.  But what wouldn’t after being tossed in butter and fresh thyme and topped with freshly grated Parmesan cheese?

After my failure I started reading a little more about gnocchi and came across an article by Tom Colicchio that includes a nice little video of the chef at Craft making gnocchi.  I was very encouraged to read that the first time you make gnocchi you will probably not get it right.  Thank you, Mr. Colicchio.

I used this recipe from Giada (like how I just use her first name like we’re old pals?) for the proportions and this article and instructions from Fine Cooking for the method.  Maybe mixing the two was one of my problems.  I will probably try the Colicchio method, but it strikes me as one of those things you have to do a lot to get the feel for.  Good thing potatoes are cheap because I think this is going to take me a while.

Honestly the process is not a long or arduous one, but getting the right feel for the dough seems to be the tricky part.  It’s kind of like bread baking.  My mom and I went out to my great aunt’s once to have her teach us how to make her incredible Swedish rye bread.  She didn’t use a recipe, didn’t use times for rising or baking, she just knew what it was supposed to look and feel and smell like.  While mom and I came prepared with pencil and pad in hand, we weren’t able to go home and recreate the bread with our notes.  So I’m not going to be down on myself about this, I’m just going to have to keep doing it if I want to get it right.

Next time I will do the following things differently.

  1. Bake instead of boil my potatoes.
  2. Cut open and rice the potatoes right onto my work space right after baking.
  3. Make and shape the gnocchi right before I want to cook them. (I let them sit our for a couple hours…)
  4. Boil just until they float to the surface to avoid overcooking.
  5. Ice them down before saucing.
I will let you know how batch #2 comes out.  I’m going to try to convince my sister to make some with me.  Cooking is always more fun with someone else, especially when you’re unsure about what you’re doing and someone else can laugh about it with you when it turns into a big mess.
Dough Before Rolling
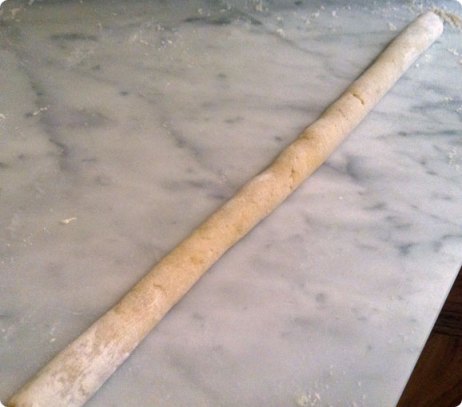
Dough Rolled Out
Cute Little Gnocchi