butter

Cornflake, Marshmallow and Chocolate Chip Momofuku Milk Bar Cookies

My sister gave me the Momofuku Milk Bar cookbook for Christmas and once we got home and unpacked everything I started browsing through it.  I’ve never actually been to Milk Bar, but have heard about their legendary cereal milk soft serve, compost cookies and crack pie.  My husband and I have grand plans to make a trip (maybe child-free!) up to New York City sometime in the next year to visit my sister and her family.  If we really do make it, then Milk Bar will be one of the places we have to go.

The cookbook is totally accessible with recipes for yummy things like confetti cookies, cinnamon bun pie, and brownie pie and ingredients you can buy at the grocery store like ritz crackers, corn flakes, fruity pebbles and ovaltine.  But it is intimidating in some ways.  Pretty much every recipe calls for a component that you have to make separately.  This almost always makes me steer away from a recipe.  But this time I found one that seemed doable, even with the extra steps.  These cornflake, chocolate chip, marshmallow cookies are worth every second of time they take to make.

Cornflake, Marshmallow and Chocolate Chip Momofuku Milk Bar Cookies | Hottie Biscotti Cornflake, Marshmallow and Chocolate Chip Momofuku Milk Bar Cookies | Hottie Biscotti

The component you have to make before you make the cookies is cornflake crunch.  It’s simple, really.  Crushed cornflakes, sugar, butter, milk powder and salt.  Mix it all together and toast it in a low oven.  Other crunches in the book include fruity pebble, pretzel and ritz, all similar to the cornflake crunch.  With my new found love of the cornflake crunch I see a day in my future where I make big batches of the stuff and store it all in my freezer so I can add them to all of my cookies.

These cookies are sweet, salty, rich and buttery.  They are crunchy on the edges and soft and chewy in the center.  I usually prefer a puffier cookie, but these are flat and have earned a spot as some of the best cookies ever to come out of my oven.  They are HUGE.  Like the size of your face.  And amazing.  These are so amazing.

Cornflake, Marshmallow and Chocolate Chip Momofuku Milk Bar Cookies | Hottie Biscotti

The cornflake crunch really makes these cookies special and unlike any cookie I’ve made.  I am a believer in the momofuku crunch.  And in milk powder.  It’s magical stuff.

I’ve tried to add marshmallows to cookies before, but they’ve never quite acted like the marshmallows in these cookies.  They provide a sweet, sugary, gooey, chewiness but you don’t get too much marshmallow since they kind of melt into the cookie and join with everything else is perfect baked good harmony.

Mini chocolate chips are the way to go here.  Larger ones would be too overwhelming both in appearance in the cookie and in taste.  Stick with the minis.

Cornflake, Marshmallow and Chocolate Chip Momofuku Milk Bar Cookies | Hottie Biscotti

I am so excited to try more recipes in this cookbook!  Now that I know how worthwhile it is to make the special ingredients, I’ll be much more likely to make that incredible looking birthday cake on page 104.  Drool.

Cornflake, Marshmallow and Chocolate Chip Cookies

From Momofuku Milk Bar Cookbook

Cornflake Crunch

Ingredients

  • 5 cups cornflakes
  • 1/2 cup milk powder
  • 3 tablespoons sugar
  • 1 teaspoon kosher salt
  • 9 tablespoons butter, melted

Directions

  1. Preheat oven to 275°F and line a baking sheet with parchment paper or a silpat.
  2. In a large bowl crush cornflakes with clean hands then mix in milk powder, sugar and salt.  Toss to combine.
  3. Add in the melted butter and toss to coat evenly.
  4. Spread out onto the prepared sheet and bake for 20 minutes, let cool.

Cookies

Ingredients

  • 2 sticks of butter, room temperature
  • 1 1/4 cups sugar
  • 2/3 cup brown sugar
  • 1 egg
  • 1/2 teaspoon vanilla
  • 1 1/2 cups flour
  • 1/2 teaspoon baking powder
  • 1/4 teaspoon baking soda
  • 1 1/4 teaspoon salt
  • 3 cups cornflake crunch
  • 2/3 cup mini chocolate chips
  • 1 1/4 cups mini marshmallows

Directions

  1. Beat butter and sugars on medium high for 2-3 minutes.  Scrape down the bowl and add the egg and vanilla.  Beat for 7-8 minutes.  Scrape down the bowl.
  2. Whisk together the flour, powder, soda and salt, then add to the butter mixture.  Mix on low until just combined, no longer than 1 minute.
  3. Mix in the cornflake crunch and chocolate chips on low speed just to combine, 30-45 seconds.  Then mix in the marshmallows just to combine.
  4. Using a large cookie/ice cream scoop or a 1/4 measuring cup scoop out dough into balls and place on a parchment or silpat lined cookie sheet.  You should have between 15 and 20 cookies.  No need to spread the dough balls out on this sheet.  Place the sheet into the fridge for at least 1 hour.  If you plan to refrigerate them for more than a couple hours, cover the sheet with plastic wrap.
  5. Preheat oven to 375°F.
  6. Arrange dough balls on a parchment or silpat lined cookie sheet (4 or 5 cookies per sheet) with 3-4 inches room for spreading.  Bake for 15-18 minutes until edges are beginning to brown and centers are just set.
  7. Let cool for a few minutes on the sheet, then move to a cooling rack.  Cool completely.

Rosemary and Brown Butter Pecan Blondies

Did anyone else have the post-Thanksgiving blues?  I got home after a week with family and had a rough time adjusting back to normal life.  I wanted to stay in my pajamas and in bed all day.  I scoured the freezer for meals, bought groceries to make pot pies but when it came time to make them I just didn’t want to do it so we ordered pizza, and one night I ate salad straight from the plastic container it came in instead of using a plate.  Keeping it classy, y’all.  I am back from my hiatus and have even cooked a couple of proper meals this week.  Hopefully my post-Christmas blues don’t find me in this same predicament…

Christmas is fast approaching and while my shopping is mostly completed and our tree and lights are up I feel like I have a lot of cooking still to do.  I’m excited to make some of the nostalgic cookies that bring me right back to my childhood, but I always like to try my hand at something new.  So along with some reliable and time-tested recipes, I’ll also share some new ones that would be perfect for the holiday season.

I have a thing for rosemary.  An herb that is lovely in savory dishes but really gets along well with sweet flavors, rosemary is also incredibly easy to grow.  In fact, the rosemary plant I thought was dead and moved to the side yard to die a slow death is doing better than the one I have been caring for on the back porch.  That should give you an idea of my gardening skills.  The blog is already full of sweets that feature rosemary, but that isn’t stopping me from sharing another one with you!

rosemaryblondies

These blondies were a big hit with my husband, who prefers his sweets more on the savory side.  My 4-year-old was not a fan.  My 2-year old ate them up happily, a girl after my own heart.  It has butter and sugar in it?  We are in.

Brown butter and dark brown sugar make these blondies quite rich.  Add pecans and rosemary to the mix and the flavors are all warm and rich.  The cranberries are a welcomed sweet-tart addition that make these blondies more balanced and super delicious.

I went heavy on the salt and rosemary, but realize that not everyone has my taste buds.  Opt for less salt and less rosemary if you’re skeptical.  Then if you think it needs more you can adjust the next time.  I usually say it’s better to have too much than not enough, but that’s not the case with those ingredients.

rosemaryblondies2

 Rosemary and Brown Butter Pecan Blondies

Adapted from Tasty Kitchen

Ingredients

  • 1 3/4 cup flour
  • 2 1/2 teaspoons baking powder
  • 1-2 teaspoons chopped, fresh rosemary
  • 1-2 teaspoons salt
  • 8 tablespoons butter
  • 2 1/4 cups dark brown sugar
  • 1 teaspoon vanilla
  • 2 eggs
  • 1 cup toasted pecans, roughly chopped
  • 1 cup dried cranberries

Directions

  1. Brown butter: Place butter in a small saucepan and heat over low-medium heat until butter begins to sizzle and spit.  Reduce heat to low, watch closely and swirl the pan occasionally just until butter smells nutty.  Pour into a bowl and let cool slightly.
  2. Preheat oven to 325°F and butter a 9×13 pan.
  3. Whisk flour, baking powder, salt and rosemary together in a small bowl.
  4. Beat cooled butter and brown sugar together.  Add eggs and vanilla and beat well.
  5. Mix in flour mixture and then the pecans and cranberries.
  6. Spread batter into the pan and bake for 20-25 minutes.
  7. Cool before cutting and serving.

Carrots in Pistachio Herb Butter

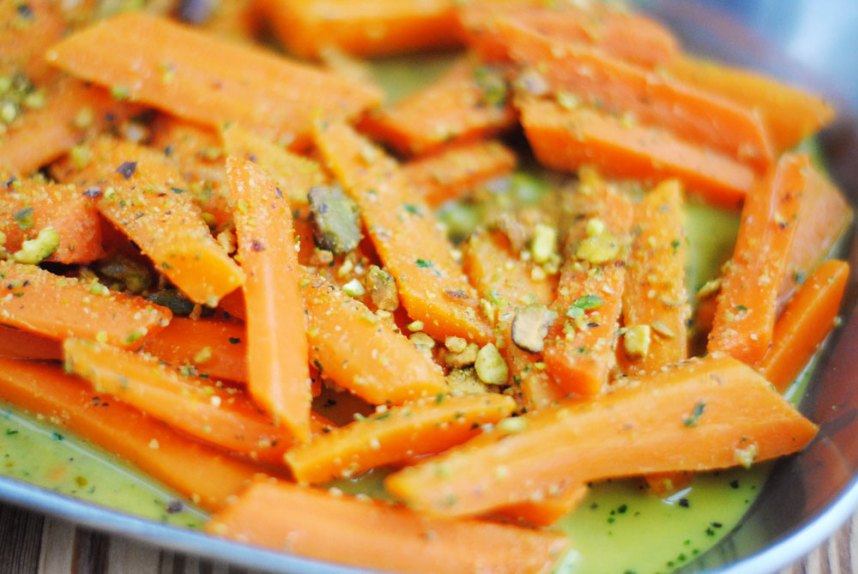
I whipped this butter up a month ago and after making a batch of these carrots I stashed it in the freezer.  Today I made another batch to serve 2 people, and next week I could use what remains of the butter to serve at least 8.  After making the butter all you have to do it cook the carrots, in small or large batches.  This is a terrific semi-make-ahead side dish.

pistachiocarrots4

The herb butter can be made well in advance which, if you’re a good planner, makes this a super simple side dish to serve at a holiday meal or on a busy weeknight.  I stored mine in the freezer for over a month and it was still great.

pistachiocarrots3 pistachiocarrots1

In addition to making the butter ahead you can prep the carrots up to two days in advance and store them in the fridge.  That makes finishing these a breeze, taking no more than 15 minutes.

I personally loved the flavors, but my husband wasn’t crazy about the combination of herbs and pistachio.  I’m still going to recommend this dish, though.  I found the flavors to be a nice change from the typical flavors in cooked carrots.  There is a slight bit of heat thanks to the hot sauce.  The crunch of the chopped pistachios on top is really nice and adds great texture contrast.  The herbs brighten things up, instead of weighing them down like brown sugar and butter do.

pistachiocarrots2

After cooking the carrots you drain the water, reserving some of it, and return the carrots to the pot.  Then you add in your desired amount of butter and some of the water to make a sauce.  The original recipe uses all of the butter for 3 pounds of carrots, but I used less and it was fine.  Add less than you think you need, stir with a little water (less is more here as well) taste and add more butter if you desire.  You may also want to season with salt.  Once in their serving dish sprinkle with the reserved pistachios.

Carrots in Pistachio Herb Butter

From Fine Cooking

Ingredients

  • 1/2 cup salted, roasted, shelled pistachios
  • 1/2 cup lightly packed fresh flat-leaf parsley leaves
  • 1 tablespoon packed fresh mint leaves
  • 1/2 stick (4 tablespoons) unsalted butter, softened
  • 1/2 ounce finely grated Parmigiano-Reggiano (1/2 cup)
  • 1 teaspoon finely grated lime zest
  • 4 to 6 drops Sriracha
  • Kosher salt
  • Carrots, peeled and cut into pieces about 2 inches long and 1/2 inch wide (1 pound serves 2-4. 3 pounds serves 6-10)

Directions

Make the Butter

  1. Coarsely chop the pistachios in a food processor. Set aside half of the nuts. Pulse the remaining nuts until they are very fine but not pasty.
  2. Add the parsley and mint, and pulse again until the herbs are finely chopped.
  3. Add the butter, cheese, zest, hot sauce, and 1 tsp. salt; pulse until well blended.
  4. If working ahead, scrape the butter onto plastic wrap, shape into a log, wrap, wrap in foil or parchment and freeze.  Seal the reserved pistachios in a small zip-top freezer bag or other airtight container and freeze.

Make the Carrots

  1. Put the carrots in a pot, add enough water to just cover them, and add a pinch of salt.
  2. Bring to a boil, cover, then reduce to a simmer and cook for 4-5 minutes until desired tenderness.
  3. Drain carrots, reserving 1/4 cup of the water.  Return to the pot and add butter (a chunk at a time adding a little water as you stir) until carrots are coated to your liking. Taste and season with salt if needed.
  4. Transfer to a serving dish and sprinkle with reserved pistachios.


Fall Vegetable Tart with Goat Cheese and Prosciutto

Fall is coming! Here in Southeast Texas we enjoyed a “cold front” this past weekend.  The mornings were slightly chilly and the days incredibly pleasant.  This week it’s humid and hot again.  But the promise of cooler weather is near.  And cooler weather means comfort food and cute coats and sweaters for my kids.

This fall tart recipe comes from the latest issue of Fine Cooking which I received last week and I’ve already made this twice.  I can see it appearing in our dinner rotation many more times in the coming months.  I love roasted vegetables.  I love goat cheese.  I love savory pie crust.  And so naturally, I love this tart.  It is incredible.

veggietart6

You can make this from start to finish in a couple of hours, or you can make the vegetables ahead of time and simply assemble and bake the tart when you’re ready.  I’ve done it both ways now.

The combination of vegetables (butternut squash, carrot, cauliflower and red bell pepper) is great.  The recipe calls for leeks, but I decided to use a yellow onion instead.  I didn’t make a great grocery list and ended up using my only onion in another dish so I left out the onion entirely.  The tart didn’t suffer a bit.  The measurements in the recipe below are from the magazine, but I didn’t really measure.  I’m sure I used a bit more, maybe heaping amounts of those listed here.

After roasting the vegetables you mix in a bunch of chopped proscuitto.  That’s magic right there.  Magic.

veggietart11

The dough is simply flour, butter, cream cheese and a pinch of salt.  It comes together in a food processor in no time and doesn’t need to be chilled before being rolled out.  However, this means you absolutely must roll it out onto parchment paper.  I made the mistake of rolling it out on the counter the first time and won’t do that again.  Since this is a rustic tart you don’t need to worry too much about how neat the edges of your dough are.

veggietart8

After you roll out your dough you spread some softened goat cheese on it.  Again, there’s magic happening in your kitchen right about now.  Be sure the goat cheese is room temperature or it will pull too much on the dough and rip it.  I know from experience.

veggietart10

On top of the cheese goes the vegetables.

veggietart1

Fold up the edges, brush with a beaten egg and bake.  I baked mine on a pizza stone the second time with great results, but a cookie sheet works well, too.

veggietart12

After cooling for a few minutes, slice and serve and enjoy.  It’s so amazing warm, but I ate a slice cold from the fridge as I was running out the door at lunchtime and it was still delicious.  As far as reheating goes you need to be prepared for a slightly soggy bottom crust.  But again, still delicious.  If you’re serving this to at least 4 people you probably won’t need to worry about leftovers, though.

veggietart9

Fall Vegetable Tart with Goat Cheese and Prosciuttio

From Fine Cooking

Ingredients

Dough

  • 6 ounces (1 1/3 cups) flour
  • 6 ounces (1 1/2 sticks) cold butter cut into chunks
  • 6 ounces cold cream cheese (low fat is fine) cut into chunks
  • 3/4 teaspoon salt
  • 1 beaten egg for egg wash

Filling

  • olive oil
  • 1 1/2 cups butternut squash cut into 1/2 inch cubes
  • 3/4 cup sliced carrots (1/2 inch thick half moons)
  • 3/4 cup sliced leek (optional)
  • 3/4 cup chopped red bell pepper
  • 3/4 cup chopped cauliflower
  • 1 tablespoon finely chopped fresh rosemary
  • 2 teaspoons chopped fresh thyme
  • kosher salt and pepper
  • 4 ounces thinly sliced prosciutto, cut in to bite sized pieces
  • 4 ounces goat cheese, room temperature

Directions

Filling

  1. Preheat oven to 375°F.
  2. Toss the vegetables together with rosemary, thyme 3/4 teaspoon salt and 1/2 teaspoon pepper and a drizzle of olive oil.
  3. Transfer to a 9×13 pan, cover tightly with foil and roast for 30-40 minutes until just fork tender.
  4. Let cool for 10-15 minutes then add in the prosciutto.

Dough

  1. Put flour, butter, cream cheese and salt in the bowl of a food processor and pulse until the dough just begins to come together.
  2. Place a large piece of parchment on the counter and sprinkle with a little flour.  Turn dough out onto the parchment and bring together with your hands, sprinkling with more flour if needed.
  3. Roll dough out onto the parchment into a roughly 16-inch round.

Assemble

  1. Preheat oven to 400°F.
  2. Transfer parchment to a cookie sheet or pizza stone and trim any excess parchment that hangs off the sheet or stone.
  3. Spread goat cheese onto the dough leaving a 1 1/2 inch border.
  4. Pile vegetable evenly on top of the goat cheese.
  5. Fold edges of the dough over the vegetables, then brush with beaten egg.
  6. Bake for 35-45 minutes.  Let cool for 10 minutes before slicing and serving.


Chocolate Chip Chickpea Cookies with Raisins and Pecans

A dear friend gave me her copy of “Deceptively Delicious” , the cookbook by Jessica Seinfeld, when I complained about my kids not eating certain foods.  Vegetables being our main problem.  While perusing the cookbook I came across some really yummy looking recipes.  The great thing is that almost every one sneaks veggies into foods that kids love (macaroni and cheese, spaghetti and meatballs, chicken nugget, etc .)  I came across a chocolate chip cookie recipe that has an entire can of chickpeas in it.  Well, we all know what I had to do that very day.

Chocolate Chip Chickpea Cookies | Hottie Biscotti

I changed a few things about the recipe, using butter instead of tub margarine, one egg and one egg white instead of two egg whites, and white whole wheat flour instead of all purpose.  I also mashed up the chickpeas instead of adding them whole, just to avoid biting into a big ol’ chickpea, which didn’t sound super appealing.

The results were not bad!  You can’t taste the chickpeas.  Ben actually took one off of the cooling rack when he got home, ate it and declared it good before I told him they were semi-healthy.  I didn’t even tell him about the chickpeas.  He’s finding out now via the blog…

Chocolate Chip Chickpea Cookies | Hottie Biscotti

The cookies are cakey and bake up in mounds with very little spreading.  I left some in mounds and flattened others.  You can flatten them with your hand, the bottom of a glass or the back of a fork.  Eaten the same day they’re baked they are really tasty.  After storing them in a container for a day they stick together a bit and are very soft.  BUT still quite delicious.

Chocolate Chip Chickpea Cookies | Hottie Biscotti

I used milk chocolate chips, but I think semi sweet or dark would be better.  The raisins are optional, but I really liked them in these cookies.  I used pecans, because that’s what I had.  But, and I know this is out of character, I think walnuts would be better.  I don’t think the white whole wheat flour made much of a difference in these since they’re already very hearty in texture, I used it because I had some and it made me feel like I was making these even healthier!  Healthier cookies means I can eat more of them!  And I feel better about giving them to the kids.  Both of the big kids, almost 4 and almost 2, really liked these.  So while I won’t be making these cookies every time I want chocolate chip cookies, I will be making these again.

Chocolate Chip Chickpea Cookies | Hottie Biscotti

Chocolate Chip Chickpea Cookies

From Deceptively Delicious

Makes 2 dozen

Ingredients

  • 1 cup brown sugar
  • 3/4 cup (1 and 1/2 sticks) butter, softened
  • 1 egg and 1 egg white
  • 2 teaspoons vanilla
  • 2 cups flour (all purpose or white whole wheat)
  • 1 teaspoon baking soda
  • 1/2 teaspoon salt
  • 1 15-ounce can chickpeas, rinsed and drained
  • 1 1/2 cups chocolate chips
  • heaping 1/2 cup pecans
  • heaping 1/2 cup raisins
  • 1/2 cup oats

Directions

  1. Preheat oven to 350°F.
  2. Place chickpeas in a bowl and mash with a potato masher or a fork, until mixture is coarse, just a few larger pieces, but not perfectly smooth.
  3. Beat butter and brown sugar in a large bowl of a stand mixer, or with a hand mixer.  Beat for 2  minutes, then scrape the bowl.
  4. Add in egg and egg white and beat well, then ass in vanilla and scrape bowl.
  5. Mix in flour, baking powder and salt until just combined.  Then mix in oats.
  6. Mix in chickpeas, chocolate chips, pecans and raisins until evenly mixed.
  7. Scoop by rounded tablespoons onto a cookie sheet lined with parchment.  Bake for 10-12 minutes, until tops are beginning to brown.  Let cool on the pan for a minutes, then move to a wire rack.

Toasted Oat Scones

After having a baby (2 weeks and 3 days ago) I am anxious to have a semi-predictable life again and get back to some of the things I was doing before he was born, like baking, cooking and blogging.  And sleeping, that’d be nice.  However, I have been consistently reminded that life with kids, and especially life with a newborn, is anything but predictable.  I tried and failed to make some coffee cake muffins earlier this week.  I blame sleep depravity, the speed at which I tried to put everything together, not totally thinking through my plan, and holding a screaming baby while filling muffin cups with batter and streusel!  Thankfully they only looked ugly but tasted delicious!

muffins2

I was frustrated with myself.  But I realize my expectations for getting back to blogging were set a little high.  It’s just not going to happen like it used to, at least not for now.  I am no longer guaranteed a time in the afternoon where all the sweet children are tucked away in their beds and I can cook, bake, take pictures and type away.  So I’m going to be a little more realistic with blogging and be happy with whatever I can manage for the next couple of months!  And remember to cherish this time with the babies, like so many people who have kids that are now grown, tell me to.  After all, the days are long but the years are short.

This morning I found myself up at 7am with my two older kids while the little man slept in until almost 9:30!  I took advantage of the time and baked up some super simple scones.  This recipe sits right next to the coffee cake recipe I attempted yesterday and is in the ATK Family Cookbook.  I figured it was a sign.

Toasted Oat Scones | Hottie Biscotti

It took me less than 20 minutes to mix these up and get them in the oven.  They’re done baking in 15 minutes and ready to eat in 10.  The ingredient list couldn’t be simpler which yields a simple and satisfying scone with nothing extra to take away from the hearty oats and rich butter.

Toasted Oat Scones | Hottie Biscotti

Eat these plain, warm or at room temperature.  Spread with a little extra butter and jam.  Have one for breakfast, one for mid-morning snack and one in the afternoon with some tea or coffee for a little pick-me-up.  The scones aren’t too sweet, which is nice.  They’re almost like a biscuit, just with more texture and a bit more dense.

Toasted Oat Scones | Hottie Biscotti

I am so glad I stumbled across this recipe, and thankful for the cooperative children who made this blog post possible!

Toasted Oat Scones

From ATK Family Cookbook

Ingredients

  • 1 1/2 cups oats, old fashioned or quick cooking
  • 1/2 cup half and half (plus 1 tablespoon for brushing on the scones)
  • 1 egg
  • 1 teaspoon vanilla
  • 1 1/2 cups flour
  • 1/3 cup sugar (plus extra for sprinkling on the scones)
  • 2 teaspoons baking powder
  • 1/2 teaspoon salt
  • 10 tablespoons butter, cold, cut into chunks

Directions

  1. Preheat oven to 375°F.
  2. Spread oats out onto a rimmed baking sheet lined with parchment.  Toast the oats for about 8 minutes, just as they begin to brown.  Let cool.
  3. Increase oven to 450°F.
  4. In a small bowl, whisk half and half, the egg and vanilla together and set aside.
  5. In the bowl of a food processor combine flour, sugar, salt and baking powder and pulse a few times.
  6. Add in the butter and pulse until butter is in pieces no larger than the size of a pea.
  7. Pour flour mixture into a large bowl and fold in the milk mixture until it just comes together.  Flour your hands and bring the dough together in the bowl.
  8. Turn out onto a floured surface and pat into a round about 1 inch thick.  Transfer to a parchment lined baking sheet and cut into 8 wedges.
  9. Brush the tops with half and half, then sprinkle with sugar.
  10. Bake for about 15 minutes, until golden.  Cool on the baking sheet for 10 minutes, then transfer to a cooling rack.

Sweet Potato and Rosemary Biscuits

I want to be good at biscuit making.  Really good.  So good that someday my kids or grandkids will say, “These aren’t as good as Mom’s biscuits.” when they have someone else’s.  But I’ve only made biscuits a handful of times, and you can’t get really good at something unless you do it a lot.  So I think I am going to start making biscuits more, and I’m starting with something a little out of the ordinary, but totally delicious.

sweetpotatobiscuits6

This recipe comes from The Kitchn, I just added some fresh chopped rosemary and opted not to make the maple butter, which I am sure is truly heavenly.  But I was looking for something a little more savory to serve with dinner.

sweetpotatobiscuits1 sweetpotatobiscuits2 sweetpotatobiscuits3 sweetpotatobiscuits4 sweetpotatobiscuits5

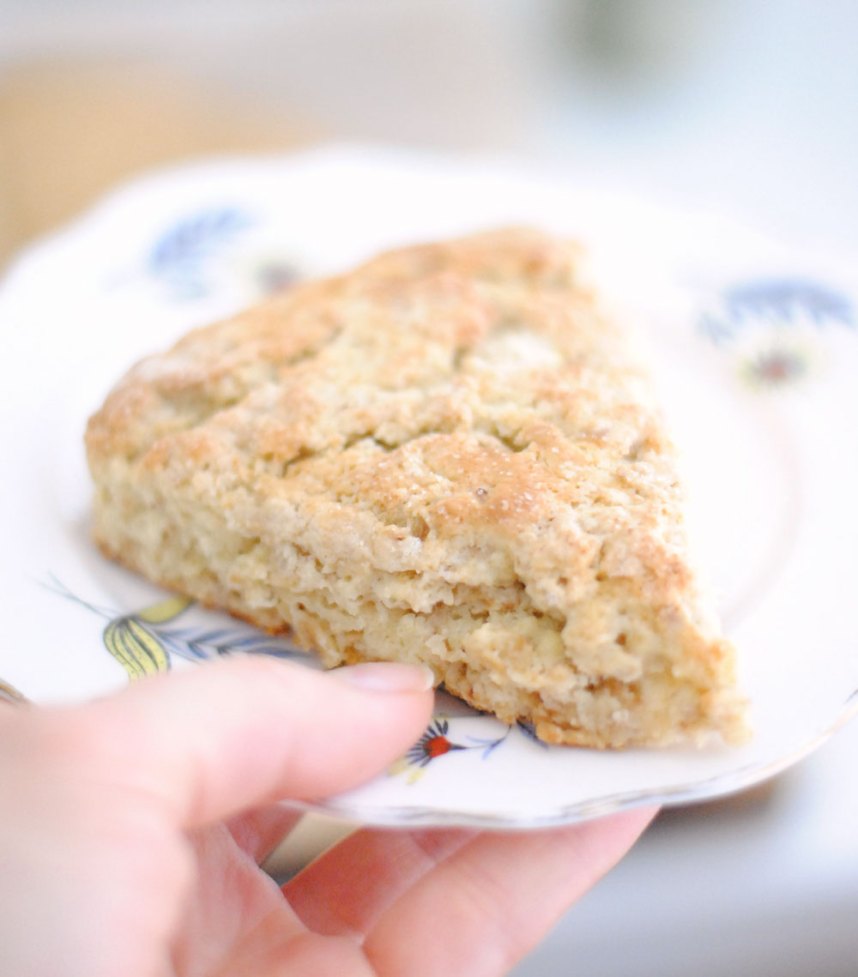
These biscuits turned out very well, although not tall and fluffy like I imagine perfect biscuits to be.  They are moist and the flavor is incredible.  The sweet potato isn’t all that noticeable, but does add a nice sweetness to the biscuit and a lovely orange hue.  The rosemary is just present enough without being overwhelming.

sweetpotatobiscuits7

Serve these with butter, cause you can’t ever have too much.   Enjoy them for breakfast, lunch or dinner.  I think a little bacon and egg on one of these would be a spectacular way to start the day.  With a few slices of ham they’d make nice little lunch sandwiches, and serve them along side soup or whatever you’re having for dinner.  Or just eat one as an afternoon snack.
Sweet Potato and Rosemary Biscuits

From The Kitchn

Makes 9 3-inch biscuits

Ingredients

  • 2 cups flour
  • 4 teaspoons baking powder
  • 1/2 teaspoon salt
  • 1 teaspoon fresh chopped rosemary
  • 1 cup cooked, mashed sweet potato (about 1 medium sized sweet potato)
  • 3/4 cup butter milk (you may not use quite all of this)
  • 6 tablespoons unsalted butter, cold and cut into chunks

Directions

  1. Preheat oven to 375°F.
  2. Line a baking sheet with parchment paper.
  3. Whisk together flour, baking powder and salt in a large bowl.  Set aside.
  4. Whisk sweet potato, 1/2 cup buttermilk and rosemary together in a small bowl.  Set aside.
  5. Cut butter into the flour mixture using a pastry blender, 2 knives, or your hands, until butter is a bit smaller than pea sized.
  6. Fold in the sweet potato mixture, add a little more buttermilk if mixture seems dry.  Bu it should still be a little sticky.  Chill the dough for 30 minutes.
  7. Flour a work surface and turn dough out onto it.  Pat out into a round, about 1 inch high.  Use a 2 or 3-inch round cutter and cut as many biscuits out from the dough as you can and place them on the baking sheet.  Pat the dough scraps together and cut more biscuits.
  8. Bake for 15 minutes, then let cool (or not) and enjoy.

Roasted Pumpkin Seeds

If I were a good blogger who thought more than a day in advance I would’ve posted this weeks ago so you’d have time to plan and make these when you carved your pumpkin.  I’m not a good blogger, I’m a foggy headed mommy.  So here’s a post about pumpkin seeds that no one is going to use…

You’ve likely already thrown your seeds or roasted them if you’ve already carved your pumpkin.  But if you’re carving your pumpkin today or tomorrow, then you’re in luck and you’ll have pumpkin seeds to roast!  Or you could go buy another pumpkin, scoop out the goo, carve another jack o lantern and roast some seeds.  And if you live in Houston you might need to replace the pumpkin that’s rotting on your porch anyway thanks to 80 degree temps and high humidity in OCTOBER.  Why do I live here?

pumpkinseeds

These pumpkin seeds are very simple and straightforward.  Wash and dry your seeds (preferably overnight), toss in melted butter and spices, and roast in the oven.  Nothing fancy.  I’ve seen so many variations, from buttermilk ranch to salted caramel.  People are so creative!  I thought about trying something out of the ordinary, but ultimately decided to stick with something simple and something nostalgic.  I remember roasting seeds as a kid, and this is what we’d do, although maybe with just salt a pepper or seasoning salt.  I made my own little mix of spices for these seeds.  You could easily adapt this with the spices you like.  Happy carving, happy snacking and Happy Halloween!

Roasted Pumpkin Seeds

Ingredients

  • 1 cup raw pumpkin seeds, washed and dried
  • 2 tablespoons melted butter
  • 3/4 teaspoon salt
  • 1/4 teaspoon pepper
  • 1/2 teaspoon garlic powder
  • 1/4 teaspoon paprika
  • 1/4 teaspoon dried basil
  • 1/4 teaspoon dried thyme

Directions

  1. Preheat oven to 375°F
  2. In a bowl toss pumpkin seeds with butter and spices to evenly coat.
  3. Pour the seeds out onto a rimmed baking sheet (lined wish parchment for easier clean up).
  4. Roast for 15-20 minutes, shaking the pan every 5 minutes to make sure the seeds are evenly roasted.  The seeds are done when they just begin to brown, but I like mine a little darker so I often go a minute or 2 more.
  5. Cool and store in a sealed container up to a week.

Apple Pie Bars

When it becomes seasonally appropriate I immediately start cooking and baking comfort foods.  I cannot wait until it’s cool enough to cook a pot roast!  This one.  It’s beyond terrific.  But it’s 85 in Houston today, so even though we are technically in the season of fall, it doesn’t feel like it here and the thought of having the oven on makes me uncomfortable.  I know I shouldn’t complain because it’s not totally abnormal, this is what you get in Texas (certain parts of Texas at least…I miss you, Amarillo).  But soon enough we’ll have highs in the 50s and I’ll be able to wear jeans without sweating and I’ll be able to make these for a party where everyone is in boots and scarves and sipping hot chocolate and frolicking in the leaves.

applepiebar2

These bars are simply perfect with their buttery shortbread crust, sweet apple filling and crunchy oat topping.  The ingredient list is basic and they aren’t at all difficult.  Served with some sweetened whipped cream or vanilla ice cream this is my idea of the perfect dessert.  If you have an apple pie craving but don’t have the time to make one, these are a perfect substitute.  I’ve used “perfect” three times so far.  And they truly are wonderful.  I want one right now.

I tried them a second time with cherry filling and made a half batch.  Half of them fell apart on their way from pan to plate, so I need to do some tinkering with baking time and some amounts.  But they were delicious and everyone who tried them sang their praises.  With the crust and topping you could use any kind of fruit filling, but the apple is nice for this time of year.  Please share if you try out anything spectacular!  Enjoy.

applepiebar1

Apple Pie Bars

From More from Magnolia

Ingredients

Crust

  • 1 cup unsalted butter, cut into small pieces and softened slightly
  • 1 pinch of salt
  • 2 cups flour

Topping

  • 1 1/2 cups flour
  • 1 cup packed brown sugar
  • 2/3 cup old fashioned rolled oats + 3 tablespoons
  • 1 teaspoon cinnamon
  • 1 teaspoon salt
  • 1 1/2 sticks unsalted butter, cut into small pieces, softened slightly

Filling

  • 1 can (21 ounces) apple pie filling

Directions

  1. Preheat oven to 350°F.
  2. Make the crust: Combine the butter, flour and salt in a large bowl and beat with an electric mixer until crumbly and well combined.  (You can do this with a pastry blender as well.)  Pat the dough into the bottom of a 9×13 inch pan so that it is even and firmly packed.  Bake for 20 minutes, remove from the oven, and allow to cool for at least 30 minutes.
  3. Make the topping: In the same bowl, mix together the flour, brown sugar, oats, cinnamon and salt.  Use a pastry blender to cut in the butter until mixture is crumbly and well combined, use your hands if necessary.  Set aside while the crust cools.
  4. Place the apples on top of the cooled crust, spacing them evenly and leaving about 1/4 inch edge around.  Spread any remaining sauce from the can evenly over the apples.  Gently spread the crumb topping evenly over the apples, then sprinkle with the remaining 3 tablespoons of oats.
  5. Bake for 45 minutes, remove from the oven and allow to cool before cutting into squares.

You Can Make Your Own: Potato Gnocchi…But I Can’t

My gnocchi fell apart between boiling  and pan searing with browned butter.  It made for a gooey mess of a meal.  They tasted good.  But what wouldn’t after being tossed in butter and fresh thyme and topped with freshly grated Parmesan cheese?

After my failure I started reading a little more about gnocchi and came across an article by Tom Colicchio that includes a nice little video of the chef at Craft making gnocchi.  I was very encouraged to read that the first time you make gnocchi you will probably not get it right.  Thank you, Mr. Colicchio.

I used this recipe from Giada (like how I just use her first name like we’re old pals?) for the proportions and this article and instructions from Fine Cooking for the method.  Maybe mixing the two was one of my problems.  I will probably try the Colicchio method, but it strikes me as one of those things you have to do a lot to get the feel for.  Good thing potatoes are cheap because I think this is going to take me a while.

Honestly the process is not a long or arduous one, but getting the right feel for the dough seems to be the tricky part.  It’s kind of like bread baking.  My mom and I went out to my great aunt’s once to have her teach us how to make her incredible Swedish rye bread.  She didn’t use a recipe, didn’t use times for rising or baking, she just knew what it was supposed to look and feel and smell like.  While mom and I came prepared with pencil and pad in hand, we weren’t able to go home and recreate the bread with our notes.  So I’m not going to be down on myself about this, I’m just going to have to keep doing it if I want to get it right.

Next time I will do the following things differently.

  1. Bake instead of boil my potatoes.
  2. Cut open and rice the potatoes right onto my work space right after baking.
  3. Make and shape the gnocchi right before I want to cook them. (I let them sit our for a couple hours…)
  4. Boil just until they float to the surface to avoid overcooking.
  5. Ice them down before saucing.
I will let you know how batch #2 comes out.  I’m going to try to convince my sister to make some with me.  Cooking is always more fun with someone else, especially when you’re unsure about what you’re doing and someone else can laugh about it with you when it turns into a big mess.
Dough Before Rolling
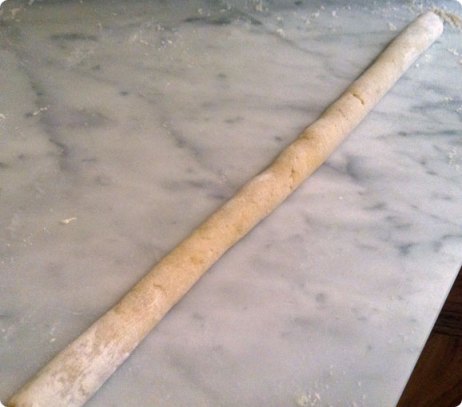
Dough Rolled Out
Cute Little Gnocchi