Pasta

Kale, Bacon and Parmesan Pasta Salad

My husband was recently gone for work for a month, making a visit home one weekend.  It was rough having him gone, but we had a ton of help from friends and family.  People have asked how I did it, and the answer is that I didn’t!  I wouldn’t have been able to do it alone.  Thank you, thank you, thank you to everyone who visited, let us invade your homes and watched my kids.

One of the things that fell by the wayside when I was home with just the kids was cooking dinner for myself.  I’d almost always have some random meal of snacks or a frozen dinner.  But when I saw this dish I knew I’d be putting it together for dinner and enjoying it for a few meals.Kale, Bacon and Parmesan Pasta Salad | Hottie Biscotti

When cooking for one I find it best to make something that is either good cold or good reheated as leftovers.  As much as I love to cook, I don’t want to prep and cook a meal every evening.  Having a couple nights a week where I can eat what I’ve already prepared is really helpful.  This pasta salad is best the day you make it, but is good cold or warm as leftovers.

This recipe comes from The Pioneer Woman.  I followed it almost exactly.  I added 6 slices of cooked, chopped bacon and then changed the cooking a little.  The reason for changing the cooking is not because I thought it would be better or easier, but because I didn’t read through the directions fully before I started…

Kale, Bacon and Parmesan Pasta Salad | Hottie Biscotti

I really like kale, but only when it’s been softened with some kind of dressing or if it’s been cooked.  It’s lightly cooked here, which makes it less bitter.  It’s also chopped into fairly small pieces, so it’s not overwhelming.  Full disclosure though, if you don’t like kale at all you probably won’t like this.  You could leave out the kale completely, but I think that it makes this dish not only lovely but also at least just a little good for me.

This garlic oil is incredible.  You could end the dish here and be good.  I’ll be using this again on other pasta dishes.

kalesalad6

The combination of pine nuts, bacon and parmesan is perfect.

kalesalad3 kalesalad4

Serve this up right after assembling and eat any leftovers either cold or heat it up a bit.

Kale, Bacon and Parmesan Pasta Salad | Hottie Biscotti

Kale, Bacon and Parmesan Pasta Salad

Slightly Adapted from The Pioneer Woman  

Ingredients

  • 12 ounces of bowtie pasta
  • 6 slices of bacon, cooked and chopped. drippings reserved
  • 1 bunch of kale, washed, dried, ribs removed and chopped fine
  • 3 tablespoons pine nuts
  • 1/4 cup olive oil
  • 4 cloves of garlic, minced
  • 1/2 teaspoon salt
  • fresh cracked black pepper
  • 3 ounces of shredded parmesan

Directions

  1. Heat a small skillet over medium heat and toast the pine nuts, shaking them frequently to keep them from burning.  Once they are golden brown remove from the pan.
  2. In the same pan heat oil over medium-low heat and add the garlic.  Cook, stirring frequently to keep the garlic from burning.  Once it begins to turn golden turn off the heat and add in the salt and pepper and set aside.
  3. Cook the pasta noodles according to package instructions, drain and rinse in cold water.  Transfer to a large serving bowl.
  4. In a large pan heat 2 teaspoons of bacon drippings over medium heat and add in the kale.  Cook until softened to your liking, 5-7 minutes, stirring occasionally.  Remove from the heat.
  5. Add garlic oil, kale, bacon, parmesan and pine nuts to the pasta and toss to combine.


One Pan Penne with Sausage, Spinach and Sundried Tomatoes

A special thanks to Andrea who introduced me to this dish and the cookbook it came from!  She made this for Ben and me when we went to visit Boston and stayed with them for a night.  After a day of traveling it was so nice to be in someone’s home for dinner and to have such a satisfying and delicious meal.

pennesausagepasta6

What originally attracted me to the recipe, before I’d even tasted it, was that everything is made in one pan!  No boiling pasta separately and adding it to another pan where you’ve made the sauce.  You get to do it all together and only have one pan to clean.  This makes me very happy (and Ben, too since he’s the one who usually does the dishes after dinner).

This recipe is from America’s Test Kitchen Family Recipes, a cookbook I bought on Amazon the same night I had this pasta.  I love the Test Kitchen.  I think I’ve mentioned this before.  The recipes are reliably good and they include tips on ingredients and methods to use in the kitchen.  They also give you the whys and hows of cooking and baking.  Included in this large ring-bound cookbook are tons of recipes for all kinds of things, appetizers to desserts.  Inside the front cover you’ll find some emergency substitutions, and inside the back cover are temps for cooking meat, equivalent measurements and conversions for baking.  Inside you’ll not only find recipes but cookware tips and food safety.  I often find myself pulling out my phone to remind myself how many tablespoons are in 1/4 cup or what temperature my pork should be, but this book has it easily accessible and I won’t get flour on my phone!  Have I sufficiently plugged the cookbook?  I should be getting paid for this…

This pasta dish is delicious and comforting, but not heavy.  There is some heavy cream and Parmesan which makes the dish just rich enough without making you feel like you’re over indulging.  You can use hot, sweet or mild Italian sausage in this dish.  The spinach and sun-dried tomatoes are the perfect additions.

pennesausagepasta7

To prep ahead you can cut the onion and garlic and store them separately.  If you have sun-dried tomato halves you can slice them and store them as well.  You can grate the Parmesan unless you bought it already grated.  I didn’t try making this completely ahead, but did have some reheated the next day for lunch and it was terrific.

pennesausagepasta5

Sausage, Spinach and Sun-dried Tomatoes with Penne

From Americas’s Test Kitchen Family Cookbook

Serves 4-6

Ingredients

  • 1 tablespoon olive oil or reserved oil from sun-dried tomatoes
  • 1 onion, finely chopped
  • 1 pound Italian turkey sausage
  • 3 garlic cloves, minced
  • 1/2 cup chopped or sliced oil-packed sun-dried tomatoes, oil drained and reserved
  • 8 ounces penne or ziti
  • 2 1/2 cups chicken broth
  • 1/2 cup heavy cream
  • 1 6-ounce bag baby spinach
  • 1/2 cup grated Parmesan
  • salt and pepper to taste

Directions

  1. Heat oil in a large skillet over medium high heat.  Add the onions and cook until they begin to soften.
  2. Add the sausage, breaking it up as it cooks, until it is no longer pink, 4-5 minutes.
  3. Stir in the garlic, then scatter the tomatoes and penne on top of the sausage.  Add the broth and the cream then cover and bring to a boil.  Lower the heat and simmer for 10-12 minutes until pasta is al dente.
  4. Add the spinach and cover for 1 minute.  Remove the lid and stir together to fully wilt the spinach.
  5. Add in the Parmesan, stir and season with salt and pepper.


Bacon and Caramelized Shallot Baked White Cheddar and Gruyere Macaroni and Cheese

If you know me or have searched around on the blog much, then it comes as no surprise that I love macaroni and cheese.  I’ve made it more than a couple of times and have tried lots of variations.  But I have two basic recipes that are my favorites, this one from Martha and this one from The Pioneer Woman.  Both are great jumping off points for creating different types of meals based on what you choose  to add in.  They are similar, creamy baked pasta dishes but Ree’s uses an egg, less milk and cheese, Martha doesn’t use an egg but uses twice as much milk and more cheese.  They have similar cooking processes and both yield tremendously tasty results.  Pioneer Woman doesn’t call for bread crumbs, but if I have them around I almost always use them.  There is just something about a crunchy topping on a creamy pasta dish that does me in.  Heaven.

macaroni1

For this macaroni and cheese I used the Martha recipe as my base and added in cooked crumbled bacon, caramelized shallots and fresh thyme.  I made 4 of these individual servings and had plenty left over to fill a 9×13 casserole.  If you don’t make any little servings it will still all fit in a 9×13.  I sometimes make two smaller casseroles and freeze one for a day when I know I won’t have time to make dinner.  If you do freeze it don’t go through with the baking step prior to freezing.  Wrap your pan in plastic wrap then foil.  Let it thaw in the fridge overnight then bake (with foil only!) for 20 minutes, then uncovered for another 20-30 depending on the size of the pan.  This macaroni can be served as a main course, which is what I usually do, paired with a green salad.  Or it can be a side dish and is a great addition to a pot luck table.

The thought of making a roux is one that may seem daunting if you haven’t done it before.  It does sound like a fancy cooking skill, but it’s really simple and kind of wonderful.  I love the way the butter and flour smell together as they’re cooking.  This whisk from Pampered Chef is the one I always use when making a roux or sauce.  It doesn’t scratch my pan and can get up next to the edges of the pan like a normal whisk cannot.  It’s also great at breaking up lumps.  But it’s a pain to clean, so soak it right after you’re done with it to avoid stress at dish washing time.  In addition to a good whisk, you also need a nice big saucepan and uninterrupted time.  You can’t go browse Pinterest or finish that episode of whatever you were watching while you make the roux and cheese sauce.  Do that while the macaroni is in the oven.  If you don’t whisk it fairly constantly you run the risk of getting a lumpy sauce or even burning it and having to start over.  It doesn’t take a terribly long time, but it is active time. The first step of cooking the butter and flour happens especially fast.  So just be attentive.

macaroni2

The cheese.  It’s an important factor in macaroni and cheese, of course.  You can tell if you use really good cheese.  But your macaroni won’t be at all bad if you use normal grocery store cheese.  I used Target brand sharp white cheddar and a nice little block of real gruyere.  Use whatever you want, cheddar, colby, sharp, mild, etc.  But don’t use low fat cheese.  That’s just plain silly.  And remember that changing cheeses changes the final product, so mix cheeses and additions that pair well.

The milk.  2% is just fine.  You can use whole if you’re really going to go for it, but it’s not necessary to achieve a nice creamy sauce.  Do not forget the salt!  If the sauce tastes a little too salty, that’s ok because you’re mixing it with a pound of non flavorful pasta.

The pasta.  I like penne, a little more adult of a pasta than elbow, but elbow is just fine.  You can use fussili or farfalle (bowtie) but I personally like the tubular pasta noodles for macaroni and cheese.

The bacon.  I used center cut, baked it in the oven then chopped it up.  I used 6 slices (sorry I don’t have the ounce amount!) but could’ve easily done 8 and maybe even 10.  Leave the bacon out if you’re looking for a meatless dish, or substitute ham or another meat.

The shallots.  I love shallots.  They’re sweeter than onions are are a wonderful addition to this dish.  I used 3 large shallots, sliced them thinly and sauteed them in a little butter and olive oil over medium-low heat until they were nice and evenly browned without burning.  If they begin to darken too much, add a tablespoon of water to the hot pan and continue cooking.  You can use a yellow onion, the flavor will just be slightly different but still delicious.

This creamy, cheesy and delicious baked pasta dish is real comfort food and something that is sure to please just about everyone.  Enjoy!

Bacon and Caramelized Shallot Macaroni and Cheese

Adapted from Martha Stewart

Serves 6-8 as a main dish or 10-12 as a side dish

Ingredients

  • 6-8 slices of center cut bacon, cooked and chopped or crumbled
  • 3 large shallots, peeled and sliced thinly
  • 8 tablespoons butter, divided, + 1/2 tablespoon to saute the shallots
  • 1/2 tablespoon olive oil
  • 1 pound penne pasta
  • 1/2 cup flour
  • 5 and 1/2 cups milk
  • kosher salt
  • black pepper
  • 1 teaspoon fresh thyme leaves
  • 16 ounces sharp cheddar, grated (1 cup reserved for topping)
  • 6 ounces gruyere cheese, grated (1/2 cup reserved for topping)
  • 1 and 1/2 cups panko crumbs

Directions

  1. Preheat oven to  375°F.
  2. Caramelize the shallots: Heat 1/2 tablespoon of butter and 1/2 tablespoon of olive oil in a small pan over medium heat, add shallots, stir and cook for a couple minutes until shallots start to gain some color and soften slightly.  Reduce heat to medium-low and cook, stirring occasionally, until shallots are caramel in color and very soft.  Do not let them burn.  If they are browning too quickly you can lower the heat slightly or add a tablespoon of water and continue to cook.  This should take 10 minutes or so.  Set shallots aside.
  3. Heat a large pot of water to cook the penne.  While it is coming to a boil, make the cheese sauce.  Heat 6 tablespoons of butter in a large pan over medium heat, once it is melted add the flour and whisk for a minute.  Slowly pour in about 1 cup of the milk and whisk until mixture thickens, being sure to whisk out any lumps.  Continue adding the milk, a cup at a time, whisking until slightly thickened until the last addition of milk (this can be 1 1/2 cups).  Whisk until slightly thickened.
  4. Remove from the heat and add in salt (at least 1 teaspoon) pepper to taste, thyme, and all the cheese except that reserved for topping.  Stir to combine and melt the cheese until mixture is smooth.  Taste and season.
  5. Salt boiling water and add the pasta.  Cook 2 minutes fewer than the package instructs, then drain and add to the cheese sauce along with the shallots and bacon.  Stir well to combine everything.  NOTE: You may reserve some of the shallots to sprinkle on top, 2 tablespoon is enough.
  6. Grease ramekins or casserole dish and spoon pasta into the dishes. Top with reserved cheese, then shallots.
  7. Melt the remaining 2 tablespoons of butter and toss with the panko crumbs.  Spread crumbs evenly over the cheese and bake for 30 minutes.  Ramekins can bake for about 20, make sure to place them on a baking sheet to catch drips.
  8. Let cool for a few minutes before serving.


Penne with Asparagus, Chicken, Goat Cheese, Sundried Tomatoes and Wilted Greens

Inspiration for this came from a couple of pastas I’ve made before.  This one (originally from Smitten Kitchen) and this one from Fine Cooking.  I actually didn’t realize how similar they were until I started writing this recipe after I made this for dinner.  I thought about not posting it since they were so much alike.  But then I figured that it’s worth sharing because it shows how great this method is.  Adding a log of goat cheese to warm pasta, along with a little pasta water, makes for a super simple, creamy and delicious sauce and a great jumping off point for whatever else you feel like adding in.

goatcheesepastawithasparagu

If you read the ingredient list below you’ll notice some amounts for a few things aren’t too specific.  The reason for that is that I didn’t do a great job of writing down what I was doing as I made this!  If you’re a recipe follower and prefer a precise measurement, I encourage you to use this recipe to broaden your horizons and have a little faith in yourself and find your inner Martha, or Julia, or whoever.

If you don’t like sundried tomatoes, use less or leave them out, same with the greens.  Don’t have quite 2 cups of leftover chicken?  Not a problem.  I used to hate when recipes said “salt and pepper to taste”.  I’d get worried about not adding enough or adding too much.  So taste as you go, starting with a little and adding more if you feel like it needs it.  Same with the lemon juice.  It really ends up being a fun process when you get comfortable doing it.

Ricotta would be an OK cheese to substitute, if you don’t love the tang of goat cheese.  I guess you could use blue, but I’m sure that would be overwhelming for even a blue cheese lover like myself.  I don’t think feta would melt properly, but let me know if you try it and it does!

Use different types of pasta, flavored goat cheese, whatever veggies you want, add chicken or sausage or leave out the meat for a satisfying vegetarian meal.  There are lots of great options to make this pasta your own!  Eat up and enjoy.

Penne with Asparagus, Chicken, Goat Cheese, Sundried Tomatoes and Wilted Greens

Ingredients

  • 1 pound penne pasta
  • 1 bunch asparagus, tough ends snapped off and cut in halves or thirds on the bias
  • 1 1/2 to 2 cups cooked shredded chicken (rotisserie chicken works well)
  • 1 4-5 ounce log plain goat cheese
  • 10-15 sundried tomato halves, packed in oil, julienned
  • a couple generous handfuls of greens (spinach, arugula, baby kale)
  • 1 lemon, juiced
  • salt and pepper to taste
  • 1 cup of reserved pasta water (you may not use it all)

Directions

  1. Cook pasta according to package directions to al dente, adding in asparagus during the last 2 minutes of cooking.
  2. Set aside a cup of the pasta water, then drain pasta and asparagus and transfer to a large bowl.  Add in the goat cheese and begin to mix, add a little pasta water to create a sauce and help melt the cheese.
  3. Add in the greens, chicken and sundried tomatoes.  Toss to coat then season with salt, pepper and lemon juice.  If the pasta seems dry, add more pasta water.

Cauliflower Mac with White Cheddar, Parmesan and Thyme

In my dreams I am someone who eats nothing but good-for-you foods, mainly fruits and vegetables, that are all beneficial to my health and do things like make my skin glow, provide me with all my daily vitamins, and will add years to my life.  I grow all my own vegetables and get my eggs from the chickens I’m raising in my backyard.  In that backyard I am hanging my clothes out to dry on the clothesline.  In reality I love a greasy hamburger with cheese and bacon served up with a plate of crispy fries and followed by a creamy vanilla milkshake.  I’ve never grown anything edible besides some tomatoes that didn’t make it through the season.  And I actually hate the way clothes feel and smell after drying outside.  I’m nothing like I am in my dreams.  I like healthy foods, but I also really like to indulge.  I’ve visited both extremes of unhealthy habits with food and over time I’ve become better able to understand that there is a healthy balance between the two.  I believe that there is a time to indulge in cheesy macaroni and a time to take it easy and fill your body with nutritious vegetables.  This dish allows you to have your mac and eat it too.

cauliflowermacaroniandchees

Upon first reading this recipe in Fine Cooking I dismissed it as being way too much work.  I came across it again a few weeks later and thought I should give it a try.  It turned out to be really delicious and not terribly time consuming.  This is nothing at all like the ooey gooey cheesy macaroni and cheese I usually make, so it isn’t truly fair to compare them.  However, the flavor of this macaroni was full and rich thanks to the sharp cheese and fresh thyme.  Since it’s a warm baked pasta dish it still serves as comfort food, but it doesn’t carry all the butter, whole milk and cheese (and guilt) of the full fat version.  One of the best parts about it is the cauliflower and onion puree.  There’s half a head of cauliflower in this!  And it adds a wonderful flavor and creaminess as well as a good amount of vitamin C.  Purees are a great way to get more vegetables into your diet, and I’m going to look for ways to do more with them.  There are only so many salads and sides of steamed broccoli a girl can take before she needs some real food.  And while you eat this you can feel good knowing you’re getting some of your daily veggies.

There are a few things I did that are different from the original recipe.  I used macaroni instead of penne.  I used heaping measurements for the cheese because, well, I just love cheese.  And I used 2% milk instead of 1%.  I know there is a big difference between the two, and next time I will try 1% if I remember to pick some up.  Ben and Carson both drink 2%, and I have recently made the switch to almond milk, so that’s all the milk we have in our house most of the time.

If you make this dish start to finish it probably wouldn’t take you all that long, but it dirties a lot of dishes.  One of those dirty items is a blender, and I kinda hate cleaning the blender, not sure why.  As a stay-at-home mom I rarely have the luxury of making dinner leisurely and I also don’t want me or my husband to be stuck with a bunch of dishes when all we want to do is sit down after the kids are in bed.  So, here are some ways to make this easier and less stressful to prepare.

  • Make the vegetable puree earlier in the day, or even the day before, and store it in the fridge.  Warm it up in the saucepan and continue the recipe from that point.
  • Grate the cheese ahead of time and store in the fridge in ziplocs or tupperware.  (I prefer bags because I can throw them away.  But that’s because I am lazy and wasteful.)
  • Cook everything, put it in the pan, cover and put in the fridge.  Bake it that evening or the next day.

Give this a try. Even if you hate cauliflower I think you’ll like it.  And if you have any healthy and delicious recipes to share, please do!

Cauliflower Mac and Cheese

Ingredients

  • 4 cups 1-1/2-inch cauliflower florets (about 1 lb.; from 1/2 head) 
  • 1 medium onion, peeled and sliced 
  • 2 cloves garlic, peeled 
  • salt and pepper
  • 12 oz. macaroni noodles
  • 2 cups 2% milk 
  • 1 tsp. dry mustard 
  • 2 tsp. chopped fresh thyme 
  • 2 oz. coarsely grated sharp white Cheddar (about 1/2 cup) 
  • 1-1/2 oz. finely grated Parmigiano-Reggiano (1-1/2 cups using a rasp grater)

Directions

  1. Position a rack in the center of the oven and heat to 375°F.
  2. Put the cauliflower, onion, and garlic in a steamer basket set over 1 inch of boiling water in a 6- to 8-quart pot. Cover and steam until the cauliflower is tender, 10 to 15 minutes. Transfer the cauliflower, onion, and garlic to a blender.
  3. Fill the pot three-quarters full of salted water and bring to a boil over high heat. Add the pasta and cook for 3 minutes less than the package timing. Drain and return the pasta to the pot.
  4. While the pasta cooks, add 1 cup of the milk, the dry mustard, 1 tsp. salt, and 1/2 tsp. pepper to the vegetables in the blender and purée until smooth. Transfer to a 3-quart saucepan and stir in the remaining 1 cup of milk and the thyme. Heat over medium-low heat until hot but not boiling, about 3 minutes.
  5. In a small bowl, mix the Cheddar and Parmigiano. Add all but 1/2 cup of the cheese to the sauce and stir until the cheese is melted. Add the sauce to the pasta and stir to combine.
  6. Transfer the pasta and sauce to an 8-inch square baking dish and sprinkle with the remaining cheese.
  7. Bake until heated through and the cheese is beginning to brown, 20 to 30 minutes.


A Busy Life and Lots of Farmhouse Recipes: Spinach Basil Pesto, Quinoa Mac and Cheese Casserole, Mediterranean Eggplant and Quinoa Salad

The last month has been a crazy one, and the next two aren’t going to be any different.  We are moving from our sweet little rent house into a lovely suburban home with 4 bedrooms, 2 bathrooms, a nice big kitchen with garbage disposal, and enough counter space not to have to balance pans on top of the coffee maker.  Yes.  I have done this.  Life will be so good.  And about 5 weeks after we move in we will have a new baby on our hands, and so life will be a totally different kind of crazy.  Can that be an acceptable excuse for why I haven’t blogged in a month?

I have been cooking, but haven’t been taking pictures of any of it or recording it anywhere.  This is a big time bummer.  One of my favorite things about having this blog is being able to search for a recipe I’ve made in the past and be reminded of what I did to change it that made it better, or the things I didn’t like that I’d change the next time around.  When I don’t update the blog, I don’t have those recipes…unless I managed to write notes on them and put them somewhere safe…which is a rare event.  So today I am playing catch-up.

One of the things I’ve had the luxury of participating in this summer is the Farmhouse Delivery here in Houston.  When the bushel of local fruits and veg arrive on my doorstep carried by a shaggy headed hipster jamming out to whatever cool music is playing through his earbuds, I get positively giddy. Some of the items we receive are no-brainers.  Peaches and blackberries are perfect in my morning yogurt and granola.  Cucumbers, sweet peppers and the sweetest cherry tomatoes known to man get sliced and tossed into salads.  Potatoes, onions, corn and slicing tomatoes have also been part of our meals.  But then we get stuff like patty pan squash and eggplant.  What am I going to do with this?  I haven’t figured out the patty pan yet, but did find a use for the eggplant.  So Farmhouse Delivery, thank you for helping me to explore more in my kitchen.  And thanks, Sarah, for the recipe!  I feel more of an obligation to use the produce fully since, well, we paid for it, AND it’s fresh and local and delicious.  If I forget about a grocery store peach in the back corner of the fridge drawer I toss it out.  If I were to forget a farmhouse peach I would probably cry a few tears and have a little memorial service for the sweet and forgotten little guy. On to the recipes…

Spinach, Basil & Walnut Pesto

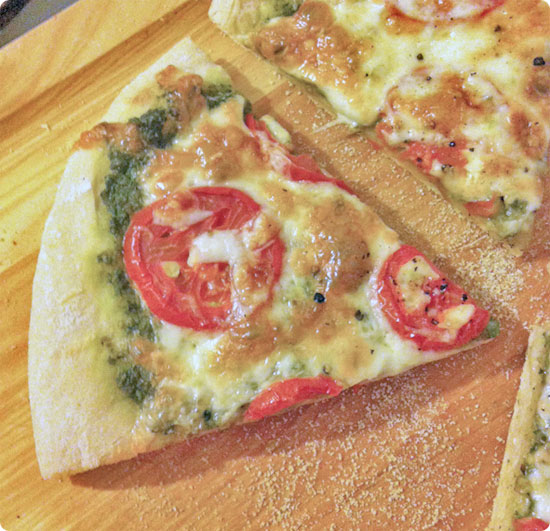
A big bag of fresh basil came one weekend, and so I made 2 batches of this pesto.  We ate it on pizza with mozzarella and farmhouse tomatoes.  Another night I mixed it in with penne pasta and chopped cherry tomatoes topped with grated Parmesan.  The leftovers from that meal got mixed with lots of mozzarella cheese, more pesto, more tomatoes and then baked in a casserole topped with Parmesan bread crumbs.  So many easy and delicious dinners out of one batch of pesto.

Ingredients

  • 4 cups baby spinach
  • 2 cups basil
  • 1/2 cup toasted walnuts
  • 1/4 to 1/2 cup olive oil
  • 1/4 cup grated Parmesan
  • 1/2 teaspoon salt, or to taste

Directions

  1. Rinse and pat dry spinach and basil.
  2. Put greens in the bowl of a food processor, pour walnuts over, sprinkle with salt and begin to pulse.  While pulsing, add olive oil in a stream until desired consistency is reached.  Taste and add more salt if needed.
  3. Transfer to a lidded container and store covered in the fridge or freeze for later use.

Quinoa Mac and Cheese Casserole

I’ve made this twice now.  It is sure to become a regular on our dinner menu.  The great thing is that you can change the vegetables, spices and cheese to make it fit your tastes or what you have available.  I used an onion from Farmhouse in this recipe, but other than that it’s a grocery store produce meal.  Don’t worry, I’m not getting all snooty about my produce…at least not forever.

Adapted from Eat, Live, Run

Ingredients

  • 1 1/2 cups dry quinoa
  • 3 cups chicken or vegetable broth
  • 1/2 onion, chopped
  • 1 red bell pepper, chopped
  • 1 green bell pepper, chopped
  • 3 green onions, chopped
  • 2 cloves minced garlic
  • 6 ounce bag fresh spinach
  • 8 ounces mushrooms, chopped
  • 1 cup milk
  • 2 cups grated white cheddar cheese
  • 1 cup Panko breadcrumbs
  • 1 tsp salt
  • 1/2 tsp dry mustard
  • 1/2 tsp black pepper

Directions

  1. Preheat oven to 350°F.
  2. Heat a drizzle of oil over medium heat in a large, deep saucepan.  Add the onion, bell peppers, scallions and saute for about four minutes, just until bell pepper has started to soften.   Add the mushrooms and spinach and cook until spinach is wilted.  Add the garlic and continue sauteing for another 30 seconds.
  3. Add quinoa to the pot, followed by the chicken broth, salt, dry mustard and pepper.  Bring to a boil then reduce heat and simmer for 15-20 minutes until all liquid has been absorbed, stirring just a couple times.
  4. Add 1 1/2 cups of the grated cheese and milk.  Stir to combine then pour into a greased 9 x 13″ casserole dish.
  5. In a small bowl, combine the Panko and the remaining cheese.  Sprinkle on top of casserole and bake for about 30 minutes until golden.

Mediterranean Eggplant and Quinoa Salad

Eggplant, onion, zucchini and tomatoes from Farmhouse and then a great punch from the lemon dressing and an herby freshness from the parsley and mint make this my kind of summer meal.  My sweet sister helped me find a recipe to use up my eggplant without feeling like I was eating eggplant.  I used her suggestions of using quinoa instead of barley, and adding in a can of chickpeas and crumbled feta.  This has made a terrific lunch the past couple days.

From Sarah, Adapted from Smitten Kitchen

Ingredients

  • 2 small to medium eggplants, peeled and cut into 1/2 inch cubes
  • 2-3 zucchini, cut into 1/2-inch cubes
  • 1/2 onion, halved then sliced
  • 10 tablespoons extra-virgin olive oil
  • 1 teaspoon salt
  • 1 teaspoon black pepper
  • 1 cup chopped scallion (from 1 bunch)
  • 1 1/2 teaspoons ground cumin
  • 1/2 teaspoon ground coriander
  • 1 1/2 cups quinoa
  • 1 garlic clove, minced
  • 3 cups reduced sodium chicken or vegetable broth
  • 2 tablespoons fresh lemon juice
  • 1/4 teaspoon sugar
  • 1/2 lb cherry tomatoes, quartered
  • 1 can chick peas, drained and rinsed
  • 1/3 cup Kalamata or other brine-cured black olives, pitted and halved
  • 1 cup chopped fresh flat-leaf parsley
  • 1/2 cup chopped fresh mint
  • 4-6 ounces crumbled feta

Directions

  1. Roast eggplant and zucchini: Put oven racks in upper and lower thirds of oven and preheat oven to 425°F.  Toss eggplant and zucchini and onion with 5 tablespoons oil, 3/4 teaspoon salt, and 3/4 teaspoon pepper in a bowl, then spread in 2 oiled large shallow (1-inch-deep) baking pans. Roast vegetables in oven, stirring occasionally and switching position of pans halfway through baking, until vegetables are golden brown and tender, 20 to 25 minutes total. Combine vegetables in 1 pan and cool.
  2. Cook Quinoa: Heat 2 tablespoons oil in a 3- to 4-quart heavy pot over moderately high heat until hot but not smoking, then cook scallion, cumin and coriander, stirring, until fragrant, about 1 minute.  Add quinoa and cook, stirring until well coated with oil, 2 minutes more.  Add broth and bring to a boil.  Reduce heat and simmer, covered, until all of liquid is absorbed and barley is tender, 20-25 minutes. Remove from heat and let stand, covered, 5 minutes. Transfer to reserved shallow baking pan and spread to quickly cool, uncovered, to room temperature, about 20 minutes.
  3. Make dressing and assemble salad: Whisk together lemon juice, sugar, and remaining 1/4 teaspoon salt, 1/4 teaspoon pepper, and 2-3 tablespoons oil in a large bowl.  Add quinoa, roasted vegetables, and remaining ingredients to bowl with dressing and toss until combined well.

Cilantro Peanut Pesto Pasta

When it comes to pesto, I tend to think only of the basil and pine nut variety.  This one is my favorite.  But there are so many combinations of herbs and nuts that you can use to make pesto!  I find basil and pine nuts to be on the pricier end of the spectrum, so using cheap ingredients like cilantro and peanuts make this a wallet friendly pesto as well as a delicious one.  The pesto is tossed with some linguine and shredded chicken to make for a complete meal.

My Everyday Food magazine on the iPad is proving to be quite the handy resource.  I can put the iPad in my cookbook holder.  I don’t have to print out the recipe, and I don’t have to have my big laptop next to the stove and sink.  In addition to being convenient, there are a lot of quick and simple recipes, like this one.

I didn’t change much about the recipe.  I used less pasta than the recipe calls for.  I did this for a couple reasons.  I’d rather have more stuff in my pasta dishes and less pasta.  Also, my pasta was a 1 pound package.  I’d rather use half and have enough to use later for another recipe instead of using 3/4 and trying to incorporate 1/4 into a meal.  I had some pesto left over, so I should have just used the 3/4 pound.

The recipe calls for 1/2 teaspoon red pepper flakes, but spice hasn’t been my friend lately.  So I left that out.  I used a little more ginger, added shredded rotisserie chicken for some protein, and used 2 tablespoons of soy sauce and found that to be plenty.  But start with 1 tablespoon, taste and adjust as you see fit.

Martha says you can use the entire bunch of cilantro, including the stems.  I’m not sure if the same is true for basil and parsley.  I would think parsley would be since the two are so similar (I’ve bought one instead of the other at the store on more than one occasion).  Basil, I don’t know.  But since basil leaves are so big it isn’t a difficult task to remove them from the stem.

This cilantro peanut pesto has inspired me to search out some other interesting pestos.  Here is a kale and walnut pesto from Lauren of Healthy Foods for Living.  And Cookie + Kate’s arugula and walnut pesto sounds amazing.

Cilantro Peanut Pesto Pasta

From Everyday Food

Ingredients

  • 1 bunch cilantro, 1/4 cup leaves reserved for serving
  • 1 clove garlic, smashed and peeled
  • 1 inch piece fresh ginger, peeled and cut into chunks
  • 2 tablespoons vegetable oil
  • 1 tablespoon toasted sesame oil
  • 1/2 teaspoon grated lime zest plus 2 tablespoons juice
  • 1 teaspoon light-brown sugar
  • 1/3 cup roasted peanuts, divided
  • 2 to 3 tablespoons low-sodium soy sauce
  • 1/2 to 3/4 pound spaghetti or linguine, cooked according to package instructions
  • 2 cups shredded chicken (optional)

Directions

  1. In a food processor, combine cilantro, garlic, ginger, vegetable and sesame oils, lime zest and juice, brown sugar, and 1/4 cup peanuts. Pulse until a coarse paste forms. Season with soy sauce and pulse to combine.
  2. In a large bowl, toss pesto with pasta.  Stir in shredded chicken.
  3. Roughly chop remaining peanuts and sprinkle over pasta along with cilantro leaves.

Basil Ricotta Pasta with Corn and Zucchini

The last meal I made from Martha Stewart Everyday Food was just ok, so I was a little apprehensive about this one.  It sounded like it had to be delicious, though.  Zucchini and fresh corn tossed with ricotta cheese, pasta and fresh basil.  It was a nice, light dinner served warm, but an even tastier lunch the following day right from the fridge.  This is a good summer pasta.

I changed some of the cooking methods.  The recipe calls for grilled zucchini left over from another meal, which is a great way to use leftovers, so use extra veggies if you have them on hand.  It also says to boil the corn with the pasta.  I just chopped the zucchini and sauteed it with the corn.  Basil and dill are the herbs in the recipe, but I just used basil.  I meant to add some fresh parsley, but forgot about it until my plate was almost clean.  I added some chopped grilled chicken Ben had made the night before.  I might serve this along side grilled chicken next time instead of mixing it in, at least the first night we eat it.  I think they would look good next to each other.  And then the chicken would have pretty grill marks and not look as pale and sad as it does in this picture.

The corn is wonderfully sweet and crunchy.  The basil is spicy and one of my personal favorite herbs for summertime.  The ricotta is not heavy or overwhelming, it just adds a light creamy coating to everything.  The only thing I found to be missing was salt.  I salted the pasta, salted the veggies and salted the sauce, but still I wanted more.  Now that I think about it, a nice squeeze of lemon juice might have done the trick.  Acid is important…at least that’s what they say on Top Chef.  So taste as you go along and definitely taste after mixing everything up to adjust as you see fit and let me know if you try lemon juice.

Here are some other changes.  I used bowtie pasta (and a little penne to make 3/4 pound) but I think you could easily get by with 1/2 pound of pasta.  Just throw in another zucchini or two and another ear of corn.  You can use fat free ricotta, but low fat might give you more of a creamy and substantial feel.  Grill the zucchini and the corn if you can.  While I loved the way the corn tasted I couldn’t stop thinking about how much better it would be with slightly charred smoky corn.  Grill it on the cob, then cut it off.  If you grill the zucchini, use a grill basket or cut the zucchini into long thick strips to grill it, then cut it into proper sized pieces after it cools a bit.

Does anyone have any great tricks for cutting corn from the cob?  I always make a ridiculous mess and throw bits of corn all over my kitchen.  Please advise.

Basil Ricotta Pasta with Corn and Zucchini

From Everyday Food

Serves 6

Ingredients

  • 1/2-3/4 pound short pasta, such as campanelle
  • 1 cup reserved pasta water
  • salt and pepper
  • 1 cup ricotta
  • 1/4 cup grated Parmesan, plus more for serving
  • 4-5 small zucchini, sliced and then quartered
  • 1 3/4 cups corn kernels (from 2-3 ears)
  • 1/2 cup fresh basil leaves, torn, plus more for serving
  • 2 cups chopped, cooked chicken (optional)
Directions
  1. In a large skillet heat a drizzle of olive oil over medium heat.  Add zucchini and corn and cook, stirring occasionally, for 5-7 minutes or until zucchini is slightly softened but not squishy.  Season with salt and pepper.
  2. Meanwhile, in a large pot of boiling salted water, cook pasta according to package instructions. Reserve 1 cup pasta water, then drain.
  3. In a large bowl, whisk together 1/2 cup pasta water, ricotta, and Parmesan. Add pasta mixture, zucchini, and basil, and toss to combine. Add more pasta water if necessary to create a light sauce that coats pasta. Season with salt and pepper and top with more basil and Parmesan.

You Can Make Your Own: Potato Gnocchi…But I Can’t

My gnocchi fell apart between boiling  and pan searing with browned butter.  It made for a gooey mess of a meal.  They tasted good.  But what wouldn’t after being tossed in butter and fresh thyme and topped with freshly grated Parmesan cheese?

After my failure I started reading a little more about gnocchi and came across an article by Tom Colicchio that includes a nice little video of the chef at Craft making gnocchi.  I was very encouraged to read that the first time you make gnocchi you will probably not get it right.  Thank you, Mr. Colicchio.

I used this recipe from Giada (like how I just use her first name like we’re old pals?) for the proportions and this article and instructions from Fine Cooking for the method.  Maybe mixing the two was one of my problems.  I will probably try the Colicchio method, but it strikes me as one of those things you have to do a lot to get the feel for.  Good thing potatoes are cheap because I think this is going to take me a while.

Honestly the process is not a long or arduous one, but getting the right feel for the dough seems to be the tricky part.  It’s kind of like bread baking.  My mom and I went out to my great aunt’s once to have her teach us how to make her incredible Swedish rye bread.  She didn’t use a recipe, didn’t use times for rising or baking, she just knew what it was supposed to look and feel and smell like.  While mom and I came prepared with pencil and pad in hand, we weren’t able to go home and recreate the bread with our notes.  So I’m not going to be down on myself about this, I’m just going to have to keep doing it if I want to get it right.

Next time I will do the following things differently.

  1. Bake instead of boil my potatoes.
  2. Cut open and rice the potatoes right onto my work space right after baking.
  3. Make and shape the gnocchi right before I want to cook them. (I let them sit our for a couple hours…)
  4. Boil just until they float to the surface to avoid overcooking.
  5. Ice them down before saucing.
I will let you know how batch #2 comes out.  I’m going to try to convince my sister to make some with me.  Cooking is always more fun with someone else, especially when you’re unsure about what you’re doing and someone else can laugh about it with you when it turns into a big mess.
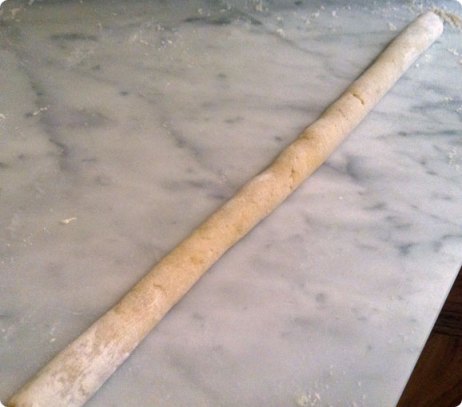
Dough Before Rolling
Dough Rolled Out
Cute Little Gnocchi


Peanut Noodles with Chicken and Vegetables

One of the great things about having a pantry that’s on the small side is that it is next to impossible to lose track of food, only to find it years later.  I don’t have to get elbow-deep in my canned goods to find a can of tomatoes.  My small food storage also keeps me from stocking up on things I don’t need…I do have a snack bowl on top of the cabinet for my assortment of gummy candies and what remains of Carson’s Easter goodies.  But candy is a need, right?

Anyway, when I came across this recipe on Eatingwell.com I knew that I had about 3/4 of a box of thin spaghetti because I see it every time I get something from the pantry, so I added this to my meals for the week.  I was already planning to buy chicken for chicken parmesan, so I was able to buy a 4 pack of chicken breasts and know that they would all get used that week.  That makes me happy.

The recipe calls for a bag of vegetable medley, but I just used veggies that we like; broccoli, red bell pepper, snap peas, frozen edamame and carrots.  Since I was using more like 11-12 ounces of spaghetti, I increased the amount of vegetables I used to about 20 ounces.  I really like there to be a lot of vegetables in pasta dishes, so you may not want to use as much as I did.  I used 1 medium sized broccoli crown, 1 red bell pepper, 5 small carrots, 1 small bag of snap peas, and 8 ounces of frozen edamame.  I kept the sauce pretty much the same, but did end up adding more soy and a drizzle of sesame oil at the end.  The sriracha is spicy.  I like spice, so I used 2 teaspoons of the stuff and definitely felt the heat.  If you are not a fan of spicy foods, use 1/2 a teaspoon in the sauce, taste it and add more if you’d like.

A mistake I made with this was adding all of my vegetables at once.  The carrots were a little under cooked, so if you’re using carrot slices, don’t slice them too thick and make sure to give them a head start in the boiling water.  The broccoli, bell pepper, snap peas and edamame cooked easily in the 3-4 minutes of cooking time.

To make this meal even faster to fix, use shredded rotisserie chicken.  Buy bagged vegetables that are ready to go, or chop your veggies the morning of or the night before.  You can even make the sauce ahead of time and refrigerate it.  The heat from the cooked pasta and hot water will loosen it up as it will be stiff coming out of the fridge.  You can serve this warm or cold.  We ate it both ways and it was delicious.

Peanut Noodles with Chicken and Vegetables

Adapted from Eatingwell.com

Serves 6-8

Ingredients

  • 2-3 boneless skinless chicken breasts
  • 10-12 ounces thin spaghetti
  • 16-18 ounces of vegetables (broccoli, snap peas, bell pepper, carrots, edamame) carrots, broccoli and bell pepper cut into pieces
  • fresh chopped cilantro, optional

Sauce

  • 1/2 cup chunky, natural peanut butter
  • 2-3 tablespoons reduced-sodium soy sauce
  • 2 teaspoons minced garlic
  • 1-2 teaspoons chile-garlic sauce (Sriracha), or to taste
  • 2-3 teaspoons minced fresh ginger
  • 1/2-1 teaspoon sesame oil

Directions

  1. Cook the chicken.  In a medium saucepan, bring water to a boil, salt water, then add chicken, reduce heat to a simmer and cook for 20 minutes.  Remove chicken from water and let cool slightly before shredding into bite size pieces.
  2. Bring a large pot of salted water to a boil, add pasta and cook for 4 minutes, add carrots if using and cook for a minute, add the rest of the vegetables and cook for another 3-4 minutes.  Reserve about 1 cup of pasta water then drain and rinse with cool water.
  3. Make sauce by whisking peanut butter, soy sauce, garlic, ginger, sriracha and sesame oil in a large bowl.  Stir 1/2 cup of pasta water into the sauce.  Toss in pasta, vegetables and chicken.  Add in more pasta water to moisten pasta to your liking.  Mix thoroughly so that all the veggies, pasta and chicken are coated with sauce.  Garnish with cilantro if desired.