almond

Baking Through Fika: Rustic Almond Cookies

When things don’t turn out as neat and tidy as they were intended to be you can get away with it by calling your product “rustic”.  Which is most of the time just a nice euphemism for “messy”.  These cookies aren’t messy, but they do have “rustic” in the recipe title, which means there need be no anxiety about how neat they turn out, because they’re not supposed to be perfect!  My kind of recipe.

Rustic Almond Cookies

As you can see, my cookies are not the same size.  Precision is not the goal remember, they’re rustic.  So don’t worry about rolling the log into a perfect cylinder, just roughly the same thickness so that the baking time can be the same. If you want to make them perfect, though, then go for it.

These are like sweet almond butter crackers, crisp and with a nice petite size that makes for a treat that satisfies your sweet tooth without making you feel guilty.  As with many recipe in this cookbook they’re perfect with a cup  of coffee.  I stashed what we didn’t eat in the first few days in the freezer.  I simply take a couple out in the afternoon, let them thaw a bit (or not) and enjoy them during the few minutes of calm I get at nap time with my reheated coffee from the morning.  Such is my glamorous life, guys.

This is one of those recipes in FIKA that only has a few ingredients (all of which I almost always have) and has very little hands-on time, making it perfect for a quick treat that can be completed quickly.  Start to finish these take under 2 hours including the hour of chilling time.

Rustic Almond Cookies-4

Another benefit to a short ingredient list is the simplicity of this cookie, which may be another reason it’s called rustic.  Simple ingredients and a simple baking method.  I sometimes feel like if I don’t make something extravagant that’s loaded with a million special and indulgent ingredients that no one is going to care.  But I think there is something refreshing in simplicity in the kitchen, especially in a world where people are making hamburgers with donut buns.  I’m not knocking them, though. I’m from Round Rock originally, and the next time I get a chance I will probably try this hamburger if it’s still on the menu.  I’ll eat the crazy food, I’m just not going to make it.

Rustic Almond Cookies-5

Rustic Almond Cookies

From FIKA

Ingredients

  • 4 ounces butter, room temperature
  • 1/3 cup sugar
  • 1 tablespoon corn syrup
  • 1 1/4 ounces almonds (blanched whole or slivered) finely chopped in a food processor
  • 1 cup flour
  • 1/2 teaspoon baking soda
  • 1/4 teaspoon salt

Directions

  1. Beat together butter, sugar and corn syrup until thoroughly combined.
  2. Whisk together flour, almonds, salt and baking soda in a small bowl.
  3. Add flour mixture to the butter mixture and beat to combine.
  4. On a floured surface, roll the dough into a log about 1 inch thick.  Wrap in plastic and chill for at least 1 hour.
  5. Preheat oven to 400°F and line a baking sheet with parchment.
  6. Using a serrated knife, slice cookie log into slices between 1/4 and 1/2 inch thick.  Place on prepared cookie sheet, spacing them 1/2 inch apart.  Bake for 5-8 minutes depending on how thick you sliced the cookies.  They should be just golden on the edges.  Let cook on a wire rack.


Baking Through Fika: Mazarin Tarts

Confession time: I ate all but two of these.  Myself.  In a week.  One night I ate 3 in one sitting.  These are evil.  And oh so delicious.

Mazarin Tarts-3

Really there was no choice but for them to be tasty.  Butter pastry and sweet almond filling are two of the best things in the food world I think.  At least in the sweet food world, because there’s bacon and goat cheese to consider…

Mazarin Tarts-5

I would like to make these again, and not simply with the intention of devouring them.  This was my first time using these tins and I don’t yet know the best way to prep them or to remove the final product.  In the Fika book they are perfect rounds, which is darling and seems easier to remove than a fluted tin.  I didn’t start out greasing them, but after I’d done a few I thought I’d better do it so that if the ungreased tins did stick I wouldn’t have ruined them all.  I think greasing helped, but it was still tricky to get them out fully intact.  That could also have something to do with the delicate-ness of the crust itself, though.

Mazarin Tarts

The filling was more than I needed for the dozen tart shells I prepared.  I think that the crust was a bit thick on some of them, so I could’ve probably stretched the dough for the crusts a bit and made at least 3 more than the dozen I made.  The filling does cook up so don’t fill them too much or it will run up and over the crust.

To finish these off, you can either give them a nice dusting of powdered sugar or a simple powdered sugar glaze.  I love the look of both, but chose the glaze since it added another texture to the tart.

Mazarin Tarts-4

This isn’t a dessert you make on a Wednesday just ’cause.  Or maybe it is!  I think they’d be a great addition to a dessert spread and perfect for a little tea or coffee party.  They keep very well in the fridge for a few days, just let them sit at room temp to warm up a bit.  Enjoy!  Hopefully this is all you will want to leave behind of these sweet tarts.

Mazarin Tarts-2

Mazarin Tarts

From Fika

Ingredients

Tart Shells

  • 3 1/2 ounces of butter, cold and cut into chunks
  • 2 tablespoons sugar
  • 3/4 cup flour
  • 1 egg yolk
  • pinch of salt

Filling

  • 1 3/4 ounces butter, softened
  • 1/2 cup sugar
  • 3 1/2 ounces of blanched almonds, ground
  • 2 eggs
  • 1/4 teaspoon almond extract

Glaze

  • 3/4 cup powdered sugar
  • 1 1/2 tablespoons milk

Directions

Tart Shells

  1. Combine flour, sugar, salt and butter in a food processor and pulse until mixture looks like coarse sand.
  2. Add in the egg and mix until dough comes together.
  3. Wrap in plastic wrap and chill for at least an hour.
  4. Grease 12-16 tart tins.  If you have small tins you will use more, bigger tins you’ll need fewer.

Filling

  1. Whisk together all filling ingredients.

Assemble and Bake

  1. Preheat oven to 350°F.
  2. Divide dough into as many pieces as you have tins.  Press a piece of dough into the tin and up the sides making it as even as possible.  Repeat for all the tins and place on a baking sheet.
  3. Fill the tarts about 2/3 full with the almond filling.  Err on the side of less filling since it could spill over the edge of the tart.
  4. Bake for about 20 minutes, until tarts begin to turn golden.
  5. Cool tarts completely and remove from the tins before whisking together glaze ingredients and pouring a thin layer over the filling of the tart.  You can also dust them with powdered sugar or leave them plain.


Almond Heart Danish with Browned Butter Glaze

Grand plans were made to post some lovely pink hued macarons in honor of Valentine’s Day!  In my mind they were beautiful and delicious and enviable.  How hard could macarons be, anyway?  I’m pretty knowledgeable when it comes to baking.  I’d say I’m an advanced amateur.  And I’m seeing macarons everywhere.  If all of those people can make them, then I can.  You know what happens when you start thinking like that?  You get humbled.  Big time.  I overestimated my kitchen abilities and wound up with some cracked and foot-less macarons.  Apparently macaron baking is a skill that requires practice.  Hats off to those of you who make them well.  You have my respect forever and always.  So I will keep working on my macaron making.  Maybe some day you’ll see a post on them!  That is if I don’t get too discouraged and give up.  Sometimes I do that…

almondheart6

Instead of finicky macarons I went with something I am more comfortable and familiar with, pastry!  This would make a lovely Valentine’s breakfast.  You can bake it the day before and then just warm it up in the oven briefly before glazing.  You could also let it do the second rise overnight in the fridge and bake it in the morning.

(more…)

Daring Bakers: Paris-Brest

I was thrilled when I saw this was the challenge for November!  I was less thrilled at my results, but still enjoyed this challenge and can’t wait to try my hand at Paris-Brest another time.

parisbrest1

The November Daring Baker’s challenge took us for a ride! Luisa from Rise of the Sourdough Preacher challenged us to make Paris-Brest, a beautiful pastry celebrating the Paris-Brest bicycle race.

Happy Thanksgiving!  Since things have been pretty crazy for us, as I am sure they have been you any of you celebrating Thanksgiving today, I am keeping this post short.

My most favorite part about this was making the incredible praline and creme mousseline.  I could’ve eaten the caramelized hazelnut and almond butter on just about anything.  A spoon is perfect.  That goes into a pastry cream and then you mix that with butter.  Few things could be better, in my opinion.  But then you pipe that amazing goodness onto pâte à choux rounds and things get super delicious.

parisbrest10 parisbrest9 parisbrest11 parisbrest5 parisbrest4

The pâte à choux didn’t seem to rise very well.  Not sure what I did wrong there.  I also didn’t have enough dough to make the 6 in the size called for in the recipe.  I would make mine smaller next time, and try piping with a larger tip.

parisbrest12

Even though my pâte à choux weren’t great, this was a delicious dessert that would be quite impressive to serve.  I’ll definitely be trying this one again!  Thanks, Luisa!

parisbrest2

Paris-Brest

Pâte à Choux

Ingredients

  • 1/3 cup water
  • 6 tablespoons plus 2 teaspoons whole milk
  • 1/3 teaspoon salt
  • 1 teaspoon sugar
  • 1/3 cup cold butter
  • ¾ cup plus 4 teaspoons cake flour
  • 3 medium eggs, beaten
  • two handfuls of slivered almonds
  • egg, beaten, for the brushing

Directions

  1. Preheat oven to moderate 350°F and sift the flour.
  2.  In a nonstick saucepan pour in the milk, water, sugar and salt. Add the butter in small pieces and put on medium heat. Stir with a wooden spoon and bring to a boil. Add the flour in one shot to the boiling liquid. Stir vigorously with a wooden spatula. Cook on the stove on a very low heat for a few minutes, until the dough becomes firm, smooth and homogeneous. The dough must be dry and detach from the bottom of the pan easily.
  3. If you have a stand mixer pour the mixture into its bowl. With the K beater stir the mixture on low speed for a few minutes, until it cools down a little. Add the eggs, one at a time, beating well on medium speed. Before adding the next egg make sure that everything is well blended. This way, the air will be incorporated into the dough and when baking it will make puff the Paris Brest which won’t deflate out of the oven.
  4. If you don’t have a stand mixer proceed mixing the eggs directly in the pan where you cooked the dough, after allowing it to cool down. Work the egg with the wooden spatula until all the egg is incorporated before adding the next one. The dough should be smooth, like a thick cream.
  5. Cover the baking sheets with baking paper or a silpat mat. If you use baking paper you can trace some circles of 4¾ -inches (12 cm) to help you out piping the circles. I use a silpat mat that already is specially designed to help out piping, that could be helpful too. To pipe the Paris-Brest use a pastry bag with a 3/8-inch (10 mm) plain nozzle and pipe two circles, the outer one of the diameter of the circle you drew. Pipe a third circle on top, using the star-shaped nozzle. If you don’t have one use a fork to trace some lines on its surface, this will help the choux pastry to rise properly. Brush with the beaten egg and sprinkle with slivered almonds.
  6. Bake in a moderate oven 350°F for about 23-25 minutes, in a static oven. To get rid of any moisture in the oven you can keep the door slightly open. This way the dough will dry out completely during baking. The Paris-Brest should be golden brown, with a uniform color. Let cool completely.

Praline

Ingredients

  • 1/3 cup (2 ounces) whole almonds
  • 1/3 cup (2 ounces) whole hazelnuts
  • 6 tablespoons caster sugar
  • 1 tablespoon water

Directions

  1. Put the sugar into a non-stick pan, over medium heat. Add water and bring to a boil.
  2. When the sugar reaches 250°F/121° C (without thermometer you will need to reach the stage at which the sugar begins to boil and the syrup starts to become more and more dense), add the nuts all at once. Mix well with a wooden spoon to coat all the nuts in the sugar. At this point, the sugar will start to sand, i.e. crystallize again. Continue to stir. The sugar will melt a second time, this time caramelizing.
  3. Once all the nuts caramelize, remove the pan from the heat.
    Pour the entire contents of the pan on a heat-resistant silicone mat or a piece of parchment.
  4. Let cool completely. Break into smaller pieces and grind in a food processor until a thick paste forms.
  5. Set aside or put in an airtight container and store in the fridge.

Creme Mousseline

Ingredients

  • 1 cup whole milk
  • 2 egg yolks
  • ¼ cup sugar
  • 3 tablespoon (45 ml) (2/3 oz) (20 gm) cake flour, sieved
  • ½ cup plus 1 tablespoon butter, softened
  • 3 oz praliné
  • 1 vanilla pod, sliced open length wise

Directions

  1. In a small saucepan bring the milk to a boil with the vanilla pod. Put aside and let cool for about 10 minutes. In a bowl whisk the eggs yolks and sugar until they become white.
  2. Add the flour and whisk until all mixed through.
  3. Mix half of the milk in the egg, until all uniform. Pout into a small pan and put on medium heat. Add the remaining milk.  Cook until the cream thickens, stirring the cream continuously. When thick transfer into a bowl and cover with cling film touching the cream. Chill until cool, an hour or two.
  4. In a bowl mix the softened butter with the praliné. Add to the cooled cream until homogeneous.

Assembly

  1. Fill a piping bag with creme mousseline.
  2. Halve pate a choux and pipe creme mousseline around the bottom layer then cover with the top.  Sprinkle with powdered sugar if desired.


Dried Cherry, Almond and White Chocolate Cream Scones

Scones.  Glorious scones!  Way better than muffins and not much more work.  In some ways I think they’re actually easier than muffins, I never liked cleaning muffin tins.  Scones are also easily adaptable.  These scones are full of goodies, but a simple scone with nothing in it is amazing when spread with a little jam or truly and simply plain.  If you’ve never tried to make scones, please do yourself a favor and make a batch of these!  You’ll be amazed at how easy they are and how amazing they taste. cherry-almond-scones-1 This is yet another recipe courtesy of my current favorite cookbook, America’s Test Kitchen Family Cookbook.  I took the basic recipe and added in dried cherries, sliced almonds and white chocolate chips.  I also brushed the tops with a little cream and sprinkled them with a little sugar.  I would’ve liked to have used coarse sugar but couldn’t seem to find mine, probably a sign I need to do some pantry organizing. cherry-almond-scones-4 In the recipe they recommend forming the circle in a cake pan, then turning it out before slicing into wedges.  What a wonderful idea!  It keeps it perfectly shaped and makes for beautiful scones.  But you can achieve equally tasty and lovely scones by free forming your disc.  I like to use a pizza cutter to cut the scones, but a bench scraper or large knife will do just fine. Like I said before, make these with what you like or have on hand to make them your own and experiment to find a combination that you really love.  Replace the cherries with your favorite dried fruit, the almonds with pecans, or walnuts, and leave out the chocolate altogether or use dark or milk chocolate chips.  Be careful not to load too much into these, though.  I used a total of 1 cup of additional ingredients and I wouldn’t go much heavier on the mix-ins than that.  As with biscuits, don’t over mix or over work the dough.  Mix and knead just until it holds together.  Overworking will yield a dense scone that doesn’t rise as well. cherry-almond-scones-2 I do have to warn you about these.  I photographed them while they were still warm and had a few bites of this one.  A few bites turned into me eating the entire thing.  And I loved every minute of it.  So make sure to exercise some self control and don’t eat all of them yourself!  Or do.  Just call it “research” or “quality control”. cherry-almond-scones-3

Dried Cherry, Almond and White Chocolate Cream Scones

Adapted from America’s Test Kitchen Family Cookbook Ingredients

Makes 8 scones

Ingredients

  • 2 cups flour, plus more for the counter
  • 3 tablespoons sugar. plus a little for sprinkling
  • 1 tablespoon baking powder
  • 1/2 teaspoon salt
  • 5 tablespoons butter, cold,  cut into chunks
  • 1/2 cup dried cherries
  • 1/4 cup sliced almonds
  • 1/4 cup white chocolate chips
  • 1 cup heavy cream, plus a little extra for brushing
  • 1/2 teaspoon almond extract

Directions

  1. Preheat oven to 450°F.
  2. Combine flour, sugar, baking powder and salt in the food processor.  Pulse a few times to combine.
  3. Add the butter chunks and pulse until the mixture is coarse like sand with some larger pieces of butter.
  4. Transfer the mixture to a large bowl and add the cherries, almonds and chocolate chips, then add the cream and the almond extract.  Mix with a rubber spatula until the mixture just comes together.
  5. Turn the dough out onto a floured surface and knead the dough until it comes together.  Press into 9-inch cake pan or free form the dough into a 9-inch disk.
  6. Turn dough out again (if you used a cake pan) onto a parchment lined cookie sheet.
  7. With a pizza cutter or other cutting tool, cut the disk into 8 triangles, separating them from each other a little.
  8. Brush with a little cream and sprinkle with a little sugar (or coarse sugar if you have some).
  9. Bake for about 15 minutes, until tops are light brown.
  10. Remove from the oven and let cool for 10 minutes before serving.

Chocolate Almond Biscotti

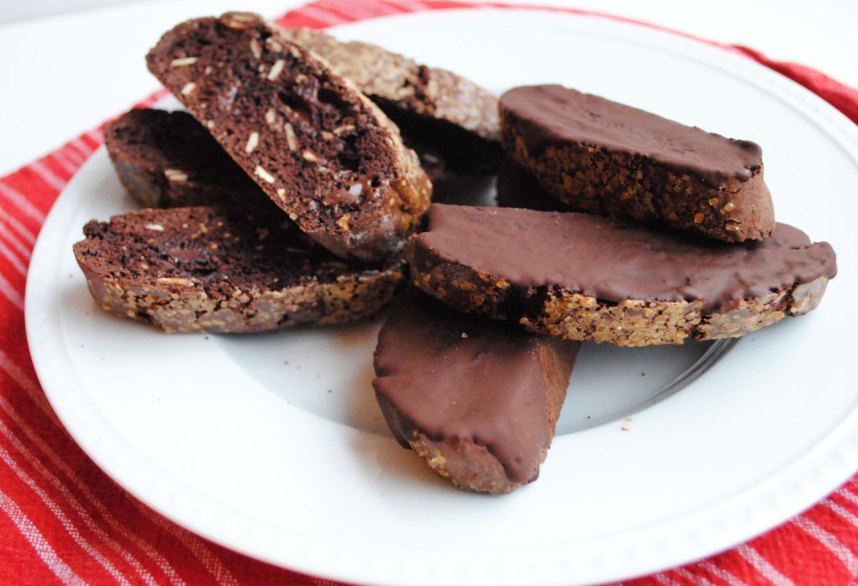
Happy February!  Earlier in the week I shared this flourless chocolate cookie recipe and declared that I would be sharing more chocolate recipes as we get closer and closer to Valentine’s Day, a day that should be full of chocolate.  The name of this blog is Hottie Biscotti, but I’m fairly confident that I’ve only shared one biscotti recipe.  So I thought it only appropriate to make some chocolate biscotti.

chocolatebiscotti1

Biscotti means “twice-baked”.  The dough is baked once in a log, allowed to cool slightly, then sliced into pieces and baked again creating a crunchy cookie that begs to be dipped into your hot beverage of choice.  Coffee is mine, but tea or hot chocolate would do just fine.  And they’re delicious eaten just as a cookie without any dipping.

chocolatebiscotti2

This biscotti is full of almonds and chocolate chips, but isn’t too sweet, making it the perfect morning or afternoon snack.  They would be wonderful crumbled up over a bowl of vanilla ice cream.  They’d also make great little gifts.

chocolatebiscotti4

This recipe is from Dave Lebovitz, a pastry chef whose blog I started reading a few months ago.  It’s a great mix of recipes, stories about life in Paris, cooking tips and restaurant reviews.  It’s been a fun change of pace in blog reading for me, since very few of the blogs I read are written by chefs, most are home cooks like myself.  Check it out and drool over some French food and wine, learn some things you didn’t know and grab some great recipes.

Chocolate Almond Biscotti

From Dave Lebovitz

Makes about 26 cookies

Ingredients

For Biscotti

  • 2 cups flour
  • 3/4 cup good cocoa powder
  • 1 teaspoon baking soda
  • 1/4 teaspoon salt
  • 3 large eggs, at room temperature
  • 1 cup sugar
  • 1 teaspoon vanilla extract
  • 1/2 teaspoon almond extract
  • 1 cup sliced almonds
  • 3/4 cup chocolate chips
  • 1 egg for glaze
  • raw sugar or coarse sugar for sprinkling

For Chocolate Dipping

  • 4 ounces bittersweet or semisweet chocolate
  • 2 teaspoons vegetable oil

Directions

  1. Preheat oven to 350°F and line a cookie sheet with parchment paper.
  2. In a medium bowl sift together flour, cocoa powder, baking soda and salt.
  3. In the bowl of a stand mixer combine eggs, sugar and extracts and mix until well combined.
  4. Add in the dry ingredients and mix until just combined, then add in almonds and chocolate chips and mix until evenly distributed.  The dough will be very stiff.
  5. Turn dough out onto a lightly floured work surface.  Divide dough in half and form each half into a log, about 8 or 9 inches long and 3/4 inch high.
  6. Transfer each log to the parchment lined baking sheet.
  7. Whisk egg and brush tops of each log, then sprinkle with sugar.
  8. Bake for 25 minutes.  Remove from the oven and let cool for 15 minutes.  Move logs to a cutting board and slice on the diagonal into 1/2 inch pieces.  A serrated knife works well for this.
  9. Place slices back on the parchment lined cookie sheet and return to the oven for 15-20 minutes, then flip cookies over and cook for another 10 minutes.  Remove from the oven, transfer to a cooking rack and let cool completely.
  10. You can coat one side in chocolate if you’d like to or leave them plain.  To coat in chocolate: melt chocolate and vegetable oil over low heat, stirring constantly until chocolate has just melted.  Remove from the heat and spread chocolate onto one side of the biscotti in a thin layer.  Move to a clean piece of parchment and allow the chocolate to set.


Daring Bakers: Baumkuchen

The January 2014 Daring Bakers’ challenge was hosted by Francijn of “Koken in de Brouwerij”. She challenged us all to bake layered cakes in the tradition of Baumkuchen (tree cake) and Schichttorte (layered cake).

baumkuchen8

The last Daring Bakers I participated in was in January of 2012.  That’s right.  2 years ago.  In January of 2012 we had just moved in to our rent house in Houston and not too long after I discovered I was pregnant with Betsy.  With a move and a new baby that year I was kept pretty busy.  By that time I was out of the habit and blogging wasn’t a priority, so 2013 came and went without any Daring Bakers challenges.  But with my resolution to blog more came a desire to get back into it.  I’d forgotten how many things I’d made that I’d never have made otherwise.  Thanks, Daring Bakers.  This is a fun group to be a part of and I’m glad to be back.  Hoping to continue participating this year without interruption…with the exception of the month of June.  And maybe July.  We’ll see how it goes.

Tree cake, or baumkuchen, is something I’d never heard of or seen before taking a look at the January challenge.  And to be honest, I might not have made it even if I had seen it somewhere.  The process of making the cake is time intensive, baking the cake in 10-12 layers, and the cake batter is more involved than cakes I’ve been making recently.  Separating eggs and beating egg whites to stiff peaks and folding them in is something my lazy self has not had the desire to do.  But it was a lot of fun and I actually enjoyed the entire process and the final result.

baumkuchen7

One of the only problems I encountered is that I didn’t do a great job of estimating how thick to spread my layers in order to end up with 10-12 total.  My first layer was too thick, then the next 6 or so were too thin, and by that time I had so much batter left over that my final cake was probably 16 layers total and had baked for at least 12 extra minutes.  This made the bottom of the cake (the first layer I made) pretty dark.  I’m afraid this also made the cake just a tad dry.   I also chose not to glaze the cake with jam before glazing it with chocolate.  That would’ve likely added some moisture.  BUT the flavor of the cake is really amazing.  The almond flavor is present but subtle.  I ate all the edges I trimmed off just plain and they were terrific.  It’s a really dense and sturdy cake.  Great to enjoy with a cup of coffee or tea.

I used a recipe for my baumkuchen from Allrecipes that is very similar to the one Francijn provided but has cornstarch in the batter.  The cooking method I used was Francijn’s, baking each layer for 3-4 minutes at 450°F.  I glazed the cake with dark chocolate melted with a little vegetable oil and it came out beautifully and was a nice contrast to the sweet cake.

Here’s a little step by step.

baumkuchen1

Batter and prepared pan

baumkuchen2

Cake: baked and trimmed

baumkuchen3

Layers

baumkuchen5

Glazingbaumkuchen4

More Glazing

This challenge was a fun one and was definitely out of my current baking comfort zone.  A perfect Daring Bakers challenge.  Thanks, Francijn!

Baumkuchen

From allrecipes.com and Francijn

Ingredients

  • 14 tablespoons (2 sticks minus 2 tablespoons) unsalted butter, softened
  • 5 1/2 ounces almond paste
  • 1 cup sifted confectioners’ sugar
  • 7/8 cup cornstarch
  • 1 1/2 teaspoons vanilla extract
  • 1 pinch salt
  • 2 egg yolks
  • 6 egg whites
  • 3/4 cup white sugar
  • 3/4 cup all-purpose flour
  • 8 ounces of good dark or semisweet chocolate
  • 2 teaspoons vegetable oil

Directions

  1.  Preheat oven to 450°F.
  2. Grease an 8×8 pan then line with parchment paper.  I used two sheets cut to the width of the pan and crossed them.  Trim excess overhang on all sides.  Grease the paper and set pan aside.
  3. Cream the butter until light and fluffy.  Add in the almond paste in chunks and beat until well combined.  You may see small chunks of paste, but no large chunks.  Scrape the bowl down.
  4. Add in powdered sugar, cornstarch, salt and vanilla and beat well.  Beats in the yolks, one at a time, until batter is smooth.
  5. In another bowl beat eggs whites until soft peaks form.  Slowly add in the granulated sugar and continue to beat on high speed until stiff peaks form.
  6. Fold whites gently into the batter, then sift flour on top and fold it in as well just until everything is evenly distributed.
  7. Spread some batter, enough to lightly cover the pan, onto the bottom of the prepared pan, being careful not to get batter on the sides of the pan (this batter burns and can then drop onto your cake and be baked in).  Bake for 3-4 minutes, until layer is lightly browned.  Continue spreading and baking layers until the batter is gone.  Aim for 10-12 layers total.
  8. Let cake cool for 5 minutes, then remove from the pan and let cool completely.  Trim the edges off (and save them for snacking!).
  9. Melt the chocolate and oil in a double boiler (or in a small saucepan over very low heat being extra careful not to burn it) until smooth and melted.
  10. Spread the chocolate onto the top and sides of the cake.  Let harden (I did this overnight) then flip cake over onto a sheet of parchment and spread chocolate onto the other side of the cake.  Note: You don’t have to glaze the bottom/other side with chocolate.  I covered the cake and chocolate overnight, remelted the chocolate the next day and glazed the other side.  Don’t try to glaze the bottom before the other chocolate is nice and set.
  11. Slice and serve.

Daring Bakers: Jalapeño, Bacon and Cheese Beer Bread & Blueberry Almond Streusel Bread

Oh, how I love quick breads.  They are delicious, easy and, most importantly, quick.  This month’s challenge was quite versatile and so fun.  I was able to make one loaf of savory bread to serve with dinner and then a sweet loaf a couple days later for breakfast.  Getting started on this challenge more than a day before the posting date was immensely helpful and I hope I can do the same thing next month.  But we shall see…I have a history of acknowledging how great it was to work on something and get it done early and yet still managing to go back to my old ways of procrastination.

The Daring Bakers’ February 2012 host was – Lis! Lisa stepped in last minute and challenged us to create a quick bread we could call our own. She supplied us with a base recipe and shared some recipes she loves from various websites and encouraged us to build upon them and create new flavor profiles.

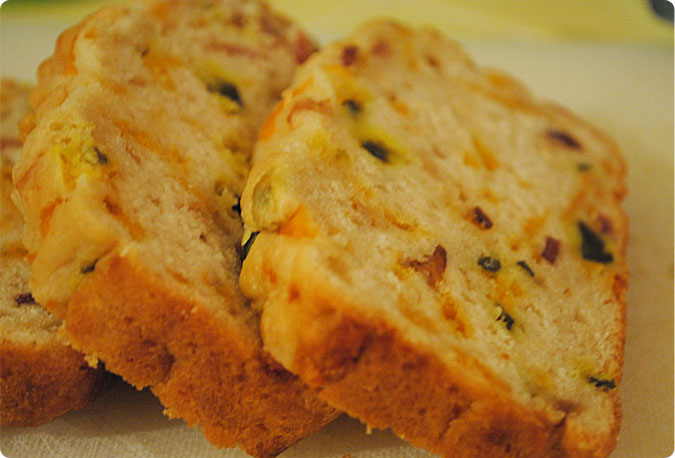
This jalapeño bread was a big hit.  I made a meal of barbecued chicken, creamed corn and cole slaw (all recipes I’d never used before and all of which were flops) and then this bread.  My husband told me the bread was the best part of the meal, and he was right.  I used a sharp cheddar cheese, pickled jalapeños, crumbled bacon and a bottle of Shiner.  We ate it with dinner warm from the oven and the next couple of mornings toasted with butter. I’m bummed it’s all gone, so I’ll probably have to make another loaf.

Jalapeño, Bacon and Cheese Beer Bread

Ingredients

  • 3 cups flour
  • 3 tablespoons sugar
  • 2 teaspoons baking powder
  • 1 teaspoon coarse salt
  • 1/2 cup chopped pickled jalapeños
  • 1/2 cup bacon, cooked and crumbled
  • 1 cup grated cheese
  • 12 ounces beer
  • 1/4 cup butter, melted

Directions

  1. Preheat oven to 375°F and grease a 9×5 loaf pan.
  2. Measure and then sift the flour, baking powder, sugar and salt into a mixing bowl.
  3. Mix in the the chopped jalapeños, cheese and bacon.
  4. Pour one can of beer into the mixing bowl and mix until blended.
  5. Pour mixture into the loaf pan, then pour half of the melted butter over the top.
  6. Bake for 30 minutes, then pour remaining butter on top of the loaf.  Bake for another 20-30 minutes or until golden brown.
  7. Cool for 5-10 minutes, then remove from the pan and cool an additional 10 minutes.

The blueberry almond bread recipe came from Joy the Baker.  She used raspberries in her bread, and I might try that next time, or maybe a mix of berries.  I used frozen blueberries that I’d thawed out and drained, and dried as much as I could on paper towels.  I added a buttery almond streusel to the top of this bread that was so delicious, sweet and crunchy.  It might have been my favorite part of the loaf.

Blueberry Almond Streusel Bread

Streusel

Ingredients
  • 1/3 cup flour
  • 1/4 cups sliced almonds, toasted
  • 1/4 cup cold butter, cut into small chunks
  • 1/4 cup brown sugar
  • 1/4 cup sugar
Directions
  1. Mix together all ingredients except for almonds and butter.
  2. Cut butter into flour mixture with a pastry blender or two knives until the butter pieces are mostly the size of small pebbles with some larger pieces, then mix in the almonds.  Refrigerate until ready to use.
Bread

Ingredients

  • 2 cups flour
  • 1 teaspoon baking powder
  • 1 teaspoon baking soda
  • 1/2 teaspoon salt
  • 1/2 cup (1 stick) unsalted butter, room temp
  • 1 cup sugar
  • 1/2 teaspoon pure almond extract
  • 2 eggs
  • 2 tablespoons sour cream
  • 1 cup blueberries, fresh or thawed and drained if frozen
  • 1/3 cup slivered almonds, toasted

Directions

  1. Preheat oven to 325°F.  Grease and sugar a 9×5 loaf pan.
  2. In a medium bowl, whisk together the flour, baking powder, baking soda and salt. Set aside.
  3. In a large bowl, using an electric mixer, cream the butter, sugar and almond extract until light and fluffy, about 3 minutes. Beat in the eggs one at a time, beating well after each addition. Mix in the flour and sour cream. Fold in the crushed fruit and almond slivers.
  4. Spoon the batter into the prepared pan, then top with streusel.  Bake in the center of the oven for 55 to 60 minutes, or until a cake tester inserted into the center comes out clean.
  5. Cool the bread in the pan for 20 minutes, then invert onto a wire rack, turn right side up and cool completely.

Trail Mix Cookies

Trail mix is one of my favorite snacks.  I am not active enough to really need the calories and nutritional value it provides, but it’s still not as bad as chowing down on a bag of potato chips, right?  Right…

Not only is trail mix delicious, but it’s an easy snack to take along with you, and we almost always have a bag (or a few bags) of it in our house.  I was planning to make cookies for a trip we took to Angel Fire this past weekend.  My original plan was oatmeal raisin, but then I thought I’d use the trail mix instead.  Pure genius.

The trail mix I buy for Ben can be found at Sam’s Club, but when I don’t feel like going to Sam’s just for a bag of the stuff I buy it at Wal Mart.  It is a perfect mix of peanuts, almonds, cashews, raisins and M&M’s.

I used a simple oatmeal raisin cookie base, but instead of the cup of raisins I measured out 1 1/2 cups of trail mix, chopped up the larger almonds and cashews and stirred it in to the dough.  I added a few dark chocolate M&M’s I had left over from Valentine’s Day just to be sure there was enough chocolate in there : )

The combination of peanuts, raisins, M&M’s, almonds and cashews was terrific.  The final product was hearty and delicious.  Enjoy!

Trail Mix Cookies

Ingredients

  • 1 stick butter
  • 1/2 cup shortening
  • 1 cup brown sugar
  • 1/2 cup sugar
  • 2 eggs
  • 1 teaspoon vanilla
  • 1 1/2 cups flour
  • 1 teaspoon baking soda
  • 1 teaspoon cinnamon
  • 1 teaspoon kosher salt
  • 3 cups oats
  • 1 1/2 to 2 cups trail mix, larger nuts chopped

Directions

  1. Preheat oven to 350°F.
  2. Beat butter and shortening until smooth, then beat in both sugars, then eggs until light.
  3. Add in vanilla.
  4. Stir in flour, baking soda, cinnamon and salt.
  5. Stir in oats and trail mix until well combined.
  6. Drop by rounded tablespoons onto cookie sheets.
  7. Bake for 8-10 minutes.

Coconut Macaroon Pie

I found this cookbook in a box of books I’ve inherited from various people’s discarded books in the last year or so.  I can’t even remember now who I got this cookbook from.  Anyway, it caught my eye this week and I decided to find something in it to make.  I wanted to make something that I’d never seen or tried before, and that I had all the ingredients for already on hand.  I chose this crust-less, coconut macaroon pie.

This budget cookbook has some good tips on freezing cookies and cakes.  There are also some great recipes for meals that use some very budget friendly ingredients.  I cannot wait to try them!

food7

Here is the recipe from the cookbook.  I omitted the dates and added about 1/2 cup sweetened shredded coconut to the pie.  I topped the cooled pie with whipped cream, toasted coconut and almonds.

macaroon6

This is a rich and sweet pie.  I loved the flavor and texture.  The coconut makes the pie more like a macaroon in flavor.  The texture is already very macaroon-like with a crunchy exterior and almost gooey interior.  This a great use for your broken saltine crackers, leftover nuts and egg whites.

Any nut would work.  I think pecans would be great, but would probably use vanilla extract instead of almond.  I saw another recipe similar to this one on allrecipes.com that uses this pie as a crust and then tops the pie with a fruit filling.  Here is the recipe if you are interested.