Chocolate

Baking Through Fika: Radio Cake

With any cookbook you are going to encounter some duds and some stand outs.  I’ve made a couple of duds from Fika that I don’t see myself ever making again.  But then there are the stand outs, and there are two types of stand out recipes.  Some are delicious but take so much work that you’re unlikely to repeat them.  Other stand outs are delicious and not overly complicated which makes them much easier and enjoyable to make again.

Raadio Cake-2

This radio cake didn’t seem like it would fall into either stand out category, really.  It just seemed safe.  It looked easy (a big plus for me!) and like it would be ok in the flavor department.  Turns out this is a true stand out that I can easily see myself repeating since it is simple to prepare, delicious, and lovely to look at.  It’s also unique, something I’d never made or eaten before.

Raadio Cake-9

You can keep this simple or dress it up.  A plain slice of this would be fine to enjoy as an afternoon treat by yourself.  Or you can add some whipped cream and cookie crumbs and serve it to your dinner guests.  Speaking of dinner guests, you can make this hours before if not a full day before you need to serve it, making it an even better choice to serve guests for dessert.

Raadio Cake-8

This is pretty rich and can be changed based on the type and quality of chocolate you use.  I used Ghiradelli bars, one 60% and one 70% cacao.  It was rich, a thin slice was plenty for me.

The recipe calls for Marie butter cookies.  I couldn’t find those, so I used a digestive biscuit cookie that I hadn’t tried before.  I finished the package I bought for the cookies and went back and bought two more just for snacking.  It has an almost graham cracker-like taste with a hearty texture that pairs well with the chocolate and cream (if you’re wise enough to add a dollop).  These cookies were too big to fit three in a row in my loaf pan on the bottom layer, so I broke them in half to fit.

As you can see in these photos, I didn’t do a great job of putting the plastic wrap in the loaf pan.  There are all kinds of creases in the chocolate.  In my defense, plastic wrap is a pain to keep smooth so I was lucky to get it in there at all!  I placed one sheet horizontally and a second vertically.  I guess there’s a way to smooth the top after you’ve inverted  it on to a platter, but I’m not sure what that is.  I’d probably make it look worse if I tried to make it better, though, so leaving it alone was a better choice for me!

To slice this I thought at first of using a large chef’s knife, but then thought that a bench scraper would be a better choice to make one nice clean cut.  I warmed it underneath hot water, dried it, then cut straight down on the cake for a nice clean slice.  Not a beautiful serving tool, but a functional one.

Raadio Cake-10

Raadio Cake-11

Now.  Those eggs.  I’m not sure if they’re warmed enough by the addition of the melted butter/chocolate mixture.  To be safe they need to be warmed to 160°F.  I did not check that they were.  Bad.  I know.  Grab a thermometer and check them after mixing.  If it’s not warmed enough you could set it over simmering water and whisk away until it does.  I escaped without any issues, but will check next time for sure.

I loved that the wonderfulness of this “cake” was such a surprise!  I just thought I was checking off another Fika recipe, and it wound up being terrific.  Looking forward to seeing what the next recipe holds.  Here’s hoping it’s another pleasant surprise!

Radio Cake

From Fika

Ingredients

  • 8 ounces butter
  • 8 ounces dark chocolate (roughly chopped)
  • 2 eggs
  • 3/4 cup powdered sugar
  • 1 tablespoon good cocoa powder
  • 1/2 teaspoon vanilla
  • Marie cookies (about 25) or large digestive cookies (12-18) extra cookies crushed for garnish
  • sweetened whipped cream for garnish

Directions

  1. Line a loaf pan with plastic wrap and set aside.
  2. Melt the butter and chocolate together in a bowl either in a double boiler or in the microwave in 30-45 second increments stirring in between until melted and smooth.
  3. In another bowl beat eggs, powdered sugar, cocoa powder and vanilla until light.  Add in the melted chocolate mixture and beat to fully combine.
  4. Spread a layer of chocolate in the pan, then lay cookies down in a row on top.  Cover with chocolate, then cookie, repeat until you have 3-4 cookie layers and end with chocolate.
  5. Chill for at least an hour.
  6. Invert on to a platter and peel off the plastic wrap.
  7. Slice and serve with whipped cream if desired.

Almond Joy Popcorn

One of the great things about cooking and baking is that there is never a point at which you know it all.  There are flavors and foods you haven’t tried or methods that are new to you.  With this recipe I learned how so very easy it is to pop your own popcorn on the stove-top!
Almond Joy Popcorn-7

For some reason the thought of popping it on the stove has always seemed like it would take too much time and effort.  But it’s actually very simple and fun, too!  My kids thought it was amazing.  You also get the added benefit of being able to control fat and salt.  When I pop popcorn in the microwave I either burn it or have a bunch of un-popped kernels.  With this method it was just about perfect, very few un-popped and no burnt pieces.

This is a Fine Cooking recipe from the Dec/Jan issue.  They give you the basic popping method, and then there are 7 popcorn recipes from cinnamon toast (can’t wait to try!) to pepperoni pizza.  I chose this chocolate and coconut one and added some sliced almonds.

Almond Joy Popcorn-3

This is best eaten the same day as it’s made, but it still ok the next day.  Not sure beyond that.  Like a salad with lots of stuff in it, the good stuff tends to sink to the bottom of the bowl, so be sure to scoop from the bottom.

Almond Joy Popcorn-8 Almond Joy Popcorn-9

Almond Joy Popcorn

From Fine Cooking

Basic Popcorn

Ingredients

  • 2 tablespoons canola oil (for the coconut popcorn use 3 tablespoons of coconut oil)
  • 1/2 cup popcorn kernels

Directions

  1. Put the oil and 2 or 3 popcorn kernels in a heavy-duty 4-1/2- to 5-1/2-quart pot. Partially cover and heat over medium-high heat until the kernels pop.
  2. Add the rest of the popcorn kernels.
  3. Cover the pot most of the way and shake the pot back and forth constantly once the heavy popping starts.  It helps to have two pot holders or heavy kitchen towels at this point.
  4. After about 3 minutes, the popping should slow down; when you can count to 5 without a pop, it’s done. Remove from the heat, and give the pot a final shake. Transfer to a large bowl and season as you like.

Almond Joy Popcorn

Ingredients

  • One recipe basic popcorn  (unprepared)
  • 4 ounces dark chocolate, chopped fine
  • 1 cup unsweetened shredded coconut
  • 1/2 cup sliced almonds, chopped fine
  • fine sea salt

Directions

  1. Toast the coconut by spreading it out onto a rimmed baking sheet and baking in a 300°F oven for 8-10 minutes, stirring occasionally.  Toast until golden brown and fragrant.  Set aside.
  2. Pop popcorn according to the recipe above.
  3. Immediately after popping pour into an over-sized bowl and toss with the chocolate, coconut, almonds and 1/2 teaspoon salt.  Once it’s evenly coated refrigerate for 5 minutes, then gently toss again breaking up any large chunks.  Season with more salt if desired.

Baking Through Fika: Checkerboard Cookies

This one was harder than I thought it would be.  It had a simple ingredient list and seemingly simple instructions.  But I just didn’t really deliver on the execution.  Gotta love being humbled in the kitchen!

Checkerboard Cookies-2

As you can see, my cookies are not sweet, dainty squares divided into equally sized plain and chocolate shortbread quadrants.  They are wavy, oddly shaped, and so far from dainty.  BUT they were yummy.  So yummy, in fact, that my son who much prefers a packaged sweet to my baked goods referred to them as the “special black and white cookies” when he told me what he wanted for dessert.  I thought he meant Oreos.  When I gave him an Oreo he says, “No, mom, the special ones you made!”  It was a rare moment, and a good one.

Checkerboard Cookies-3

There is a certain amount of precision required to make these cookies look like they should.  In order to get those straight edges you must really make each part neat, and then piece everything together neatly.  I just made rough rectangles by hand and the results were a more rustic cookie.  Here are some ideas I have for making them better.  Anyone out there have good tips to share?

  • Chill the dough after dividing it so that it’s just a bit firmer.  When I used the dough it was very soft, and too malleable.
  • Use a dough scraper as your straight edge to get neat edges on each piece, then chill them separately before joining them together.
  • Use the dough scraper again after putting the pieces together, and be sure to put them together on a flat surface that you can transfer directly in to the fridge to chill again.
  • When creating the long rectangles of dough, they become long and difficult to move.  If you made two sets of long rectangles, a total of 8 (4 chocolate and 4 plain) they would be easier to move and place together.

I’ll have to give these another go and see if any of those things help!

Even though these weren’t the prettiest of cookies, they had good flavor, buttery and slightly soft with a subtle chocolate flavor.  They’re nice along side your cup of coffee or tea and would make a nice addition to a Christmas cookie plate.  Not that I’m already thinking about Christmas…

Checkerboard Cookies

Checkerboard Cookies

From Baking Through Fika

Ingredients

  • 7 ounces of butter, softened
  • 1/2 cup sugar
  • 1/4 teaspoon vanilla extract
  • 2 cups flour
  • 2 tablespoons cocoa powder

Directions

  1. Beat the butter and sugar together until combined, then add in the vanilla followed by the flour.  Mix until evenly combined.
  2. Divide the dough into two equally sized pieces.
  3. Mix the cocoa into one half of the dough until it’s incorporated and the dough is a consistent color.
  4. Divide each half in half so that you have 4 pieces, two plain and two chocolate.  If your dough is especially soft, you may want to chill it for 10-20 minutes.
  5. Form each piece into a long rectangle, about 1/2 inch thick.  Make all the pieces the same length and width.  (This is the part where dividing the dough further might be helpful.)  Place one chocolate rectangle next to one plain.  Then place a plain piece on top of the chocolate and a chocolate piece on top of the plain.  Press together lightly, wrap in plastic wrap and chill for at least an hour.
  6. Preheat oven to 350°F.
  7. Remove from the fridge and unwrap.  Slice (a large chef’s knife is good for this) into slice that are about 1/4 inch thick.  Place on a baking sheet lined with parchment.  They spread a bit, but not too much, so space them 1/2 an inch or so apart.
  8. Bake for about 10 minutes, until they are set and the edges are just beginning to brown.
  9. These store very well once cooled at room temperature in a container.  They would also freeze very well.


Baking Through Fika: Chocolate Jitterbugs

I’m continuing my Baking Through Fika project!  My mom and I sat together, looked through the cookbook and marked a few recipes that she and I plan to bake together.  Tackling a daunting project seems less daunting when someone is going to do it with you (the Prinsesstårta is the one I am fearing the most!) so I am looking forward to making some of these recipes with my sweet mom!

When deciding which recipe to make next I looked through Fika and chose the recipe that I had all of the ingredients for and one with a short list of instructions!  I know I’m going to get myself into trouble if I continue on this path, saving all the tougher recipes for the end, so next time I’ll try something a little more complicated.  But this time I went with an easy one.  Chocolate jitterbug cookies!

Chocolate Jitterbugs

I’d never heard of these before seeing them in this cookbook.  Jitterbugs are made by taking a shortbread cookie dough which is rolled out, spread with meringue, rolled up jelly roll style, then sliced and baked.  I’m not sure if these chocolate ones are typical, but in doing a little searching I found them made more often with a plain shortbread cookie dough.  I will have to try them that way sometime…

These aren’t too chocolate-y, and are not terribly sweet.  They are light in texture and pair well with a cup of afternoon coffee or a glass of cold milk.  The cookie is soft and the meringue is slightly crunchy, a great combination.  I brought them to a family weekend and they were finished off quickly.

Chocolate Jitterbugs-2 Chocolate Jitterbugs-3

Here are a few tips not included in the recipe if you decide to make these!

  • When mixing up the chocolate dough you will probably need to use your hands to bring the dough together, it is pretty crumbly.
  • When rolling everything up the chocolate dough might crack, so be as careful as you can be!
  • When rolling the meringue might ooze out, and that’s just fine.
  • When slicing use a serrated knife, and work quickly, but don’t stress about making things perfect.  There will be mess, and that is fine.  After the cookies bake it won’t matter that they looked messy.
  • The ends of the roll (unless you perfectly rolled your dough!) might be uneven and not make the prettiest cookies.  I tossed the ends into the trash, but you can bake them if you’d like!

Chocolate Jitterbugs-4

Chocolate Jitterbugs

From Fika

Ingredients

Cookie Dough

  • 1 cup flour
  • 1/4 cup cocoa powder
  • pinch of salt
  • 3 1/2 ounces (100 grams) butter, softened
  • 1/4 cup sugar
  • 1 egg yolk

Filling

  • 1 egg white
  • 1/2 cup sugar

Directions

  1. Sift together the flour and cocoa powder.  Whisk in a pinch of salt.
  2. With a hand mixer combine butter, sugar and egg yolk and beat together.  Add in the flour mixture and beat until it comes together.  Bring together with your hands, then wrap in plastic wrap and refigerate for an hour.
  3. Right before you remove the dough from the fridge, beat the egg white until it is foamy.  Stream in the sugar and continue to beat until very creamy and thick, 3-4 minutes.
  4. Preheat the oven to 350°F and line a baking sheet with a non-stick mat or parchment paper.
  5. Roll out the dough between parchment to roughly 8×12 inches.  Spread the meringue onto the dough, then carefully roll up, starting at a long side.  Place on a cutting board and chill for 15 minutes.
  6. Use a serrated knife to slice the log into pieces 1/3-1/2 inch thick.  Place on the baking sheet and bake for 10-12 minutes.

Caramel Filled Pecan Brownies

While I was with my family recently, one of my sisters mentioned that she was perusing the blog and came across a recipe with some horrendous photographs.  There are lots of these posts.  I haven’t taken them down, and I don’t plan to.  Even though running across them is like finding old college pics that someone else posted on facebook from a night you kind of want to forget, I’m keeping them up.  One of the main reasons is that many of them are good recipes!  But we all know that the world of food blogging requires more than just a good recipe.  You’d better have some pictures that make people want to make the recipe.  I don’t know about you, but these pictures make me want caramel filled brownies.

Caramel Filled Brownies-6

Caramel Filled Brownies-7I decided that I would make a little project out of going back through some of my old posts that have really great recipes and re-doing them, without taking the old ones down.  It’s fun to see how far I’ve come in taking pictures of food, writing about the food, and I even think I’ve become a better baker and cook in the past 8 years or so that I’ve had this blog.  Here is the old post for these brownies.  It was just about 6 and a half years ago.  These pictures were taken in our little apartment in China Spring while I was teaching school and Ben was in law school.  Things are pretty different for us now!

Caramel Filled Brownies

This recipe is from The Pastry Queen.  It’s a great cookbook.  Everything is delicious.  If you’ve read my blog before you’ve likely heard me (if you can “hear” something in writing) sing its praises.  I only changed one thing from the original recipe, and that was to use a bag of those caramel bits instead of unwrapping a bunch of caramels.  It worked out just fine.

I highly advise cutting these cold from the fridge and even eating them cold is a great idea.  However, warming one briefly in the microwave and topping it with a little vanilla ice cream isn’t a bad way to enjoy these brownies.

Caramel Filled Brownies-4

Caramel Filled Pecan Brownies

From The Pastry Queen by Rebecca Rather

Ingredients

  • 1 1/2 cups pecan pieces
  • 1 cup (2 sticks) unsalted butter
  • 12 ounces bittersweet chocolate, coarsely chopped
  • 1 1/2 cups sugar
  • 4 large eggs
  • 1 tablespoon vanilla extract
  • 1 1/4 cups all-purpose flour
  • 1/2 teaspoon salt
  • 1 package (11 ounces) caramel bits
  • 1/3 cup whipping cream
  • 1 cup semisweet chocolate chips

Directions

  1. Preheat oven to 350°F.
  2. Toast pecans for about 8 minutes, until they are fragrant but before they begin to get too dark.  Break apart any large pieces and set them aside.
  3. Line a 9- by 13-inch baking pan with aluminum foil, leaving some overhang. Grease foil generously with shortening.  Set aside.
  4. Combine butter and chocolate in a medium-sized heavy saucepan and cook over low heat, stirring occasionally, until melted and smooth.  Do not let it burn.  Transfer chocolate to a large bowl and let cool for a few minutes.  Add in the sugar, eggs, and vanilla, and mix (with a whisk, hand mixer or a stand mixer) until thick and glossy. (
  5. Whisk or stir in flour and salt. Transfer half of batter (about 2 cups) to baking pan and spread evenly, sprinkle half of the pecans over the batter and bake for 20 minutes. Let cool for about 20 minutes.
  6. Once the brownies cool, melt caramels and cream in a medium-sized heavy saucepan and stir over low heat until completely melted and smooth.  Immediately spread caramel mixture over baked brownies.  Pour remaining brownie batter evenly over caramel mixture and spread gently to cover, being careful not to mix up the brownie and caramel layers.
  7. Sprinkle chocolate chips and remaining pecans on top and bake for 20 minutes. Cool, then transfer to the fridge for at least a few hours.
  8. Lift brownies out of the pan by lifting the foil.  Remove the foil carefully, bring sure to get all of it off, especially around the edges and the corners where the caramel will stick. Cut brownies into squares.  Serve at room temp or cold.  Store in an airtight container in the fridge.


S’mores Pudding Cups

First off, how much fun is this animated GIF?!  And it’s so easy to make.  I use Photoshop Elements and this took me maybe 15 minutes start to finish, including photo editing.  Gotta love those people who post YouTube tutorials!  You can rest assured that if something I make has layers you’ll be seeing one of these again.

smores7

This sweet dessert is inspired by the s’mores pot de creme at Sweet Houston.  Their version is a little different.  They have a layer of chocolate cake crumbles (I think) along with the graham layer, chocolate mousse (or maybe it’s pudding) and marshmallow cream.  They come in darling little glass jars, but I found that these Beechnut baby food jars work just as well!

(more…)

Fudge Brownie Pie with Graham Crust

I’m working my way through some recipes in the Milk Bar cookbook and really enjoying it so far!  If you missed this post, then check it out now.  Those cookies will blow your socks off.  This is another one that is on the simple side, not at all daunting.  It wasn’t what I expected when I saw “brownie pie”, but was quite delicious and something I’d definitely make again.

browniepie4

(more…)

Daring Bakers: Sachertorte Fail

The making of this month’s Daring Bakers challenge was a comedy of errors.  I can truthfully say that I laughed more than I cried through this process and I couldn’t wait to share my Sachertorte tale.  So here’s how it all went down.

The October Daring Bakers’ challenge was brought to us by Korena of Korena in the Kitchen. She took us to Austria and introduced us to the wonders of the Sachertorte.

sacher7

sacher2

It sure is nice that to kids cake is cake no matter how it looks!  Mine enjoyed having some chocolate cake in the middle of the afternoon for no reason.

I’ve never wanted to make or eat Sachertorte.  Sorry.  But I typically don’t like fruit with my chocolate.  I do like raspberry, maybe strawberry, but other fruit and chocolate pairings are not hard for me to turn down.  A Sachertorte is chocolate cake glazed with apricot and then dark chocolate.  I wasn’t thrilled at this month’s challenge, but I’m only 3 challenges away from completing a full year of The Daring Bakers, so I couldn’t turn it down.  Also, this was an opportunity to broaden my baking horizons, and that’s always a good thing.

I had everything I needed and planned to whip this up on a Friday.  Since the cake can be made ahead I had what I thought was a good plan of getting that done in the morning, letting it cool, and then tackling both the apricot and chocolate glazes and the assembly during afternoon naps.  My kids typically have about an hour of nap time that overlaps.  And it’s not like I’m not used to juggling kitchen and kid duties.  I thought I had this thing under control.  That’s when you know you don’t.

My youngest had a couple of vaccines given at his 4 month well check the day before and while I’m not confident that his fussiness was due to the shots I am confident that something was not right with him.  He is a happy baby who can deal with being put in the bouncer in the kitchen and being content while I cook.  Typically.  Today was not typical.  He hardly napped all day.  I’d just get him to sleep, get back downstairs to try to bake and he’d start crying again.  Did I mention we also had a Halloween event that night?  I needed to get the kids fed early and in their costumes by the time my husband got home.  I felt like a crazy person going from the kitchen to the crying baby upstairs, to the kids, to the kitchen, to the crying baby in the bouncer, to the sink full of dirty dishes, to the pirate costumes, to the crying baby on his exercise mat to the Sachertorte.

You don’t need me to tell you that the opportunities for disaster were countless.  While whipping egg whites with my hand mixer (something that seemed to take forever) my two boys were crying because they didn’t like the noise.  Take a moment now and try to imagine a 4 year old crying and tugging at you, a 4 month old screaming, and the metal beaters hitting the sides of your glass bowl as the little motor on your mixer whirs.  I should’ve given up right then.  But I soldiered on.  And amazingly the cake itself was fine.

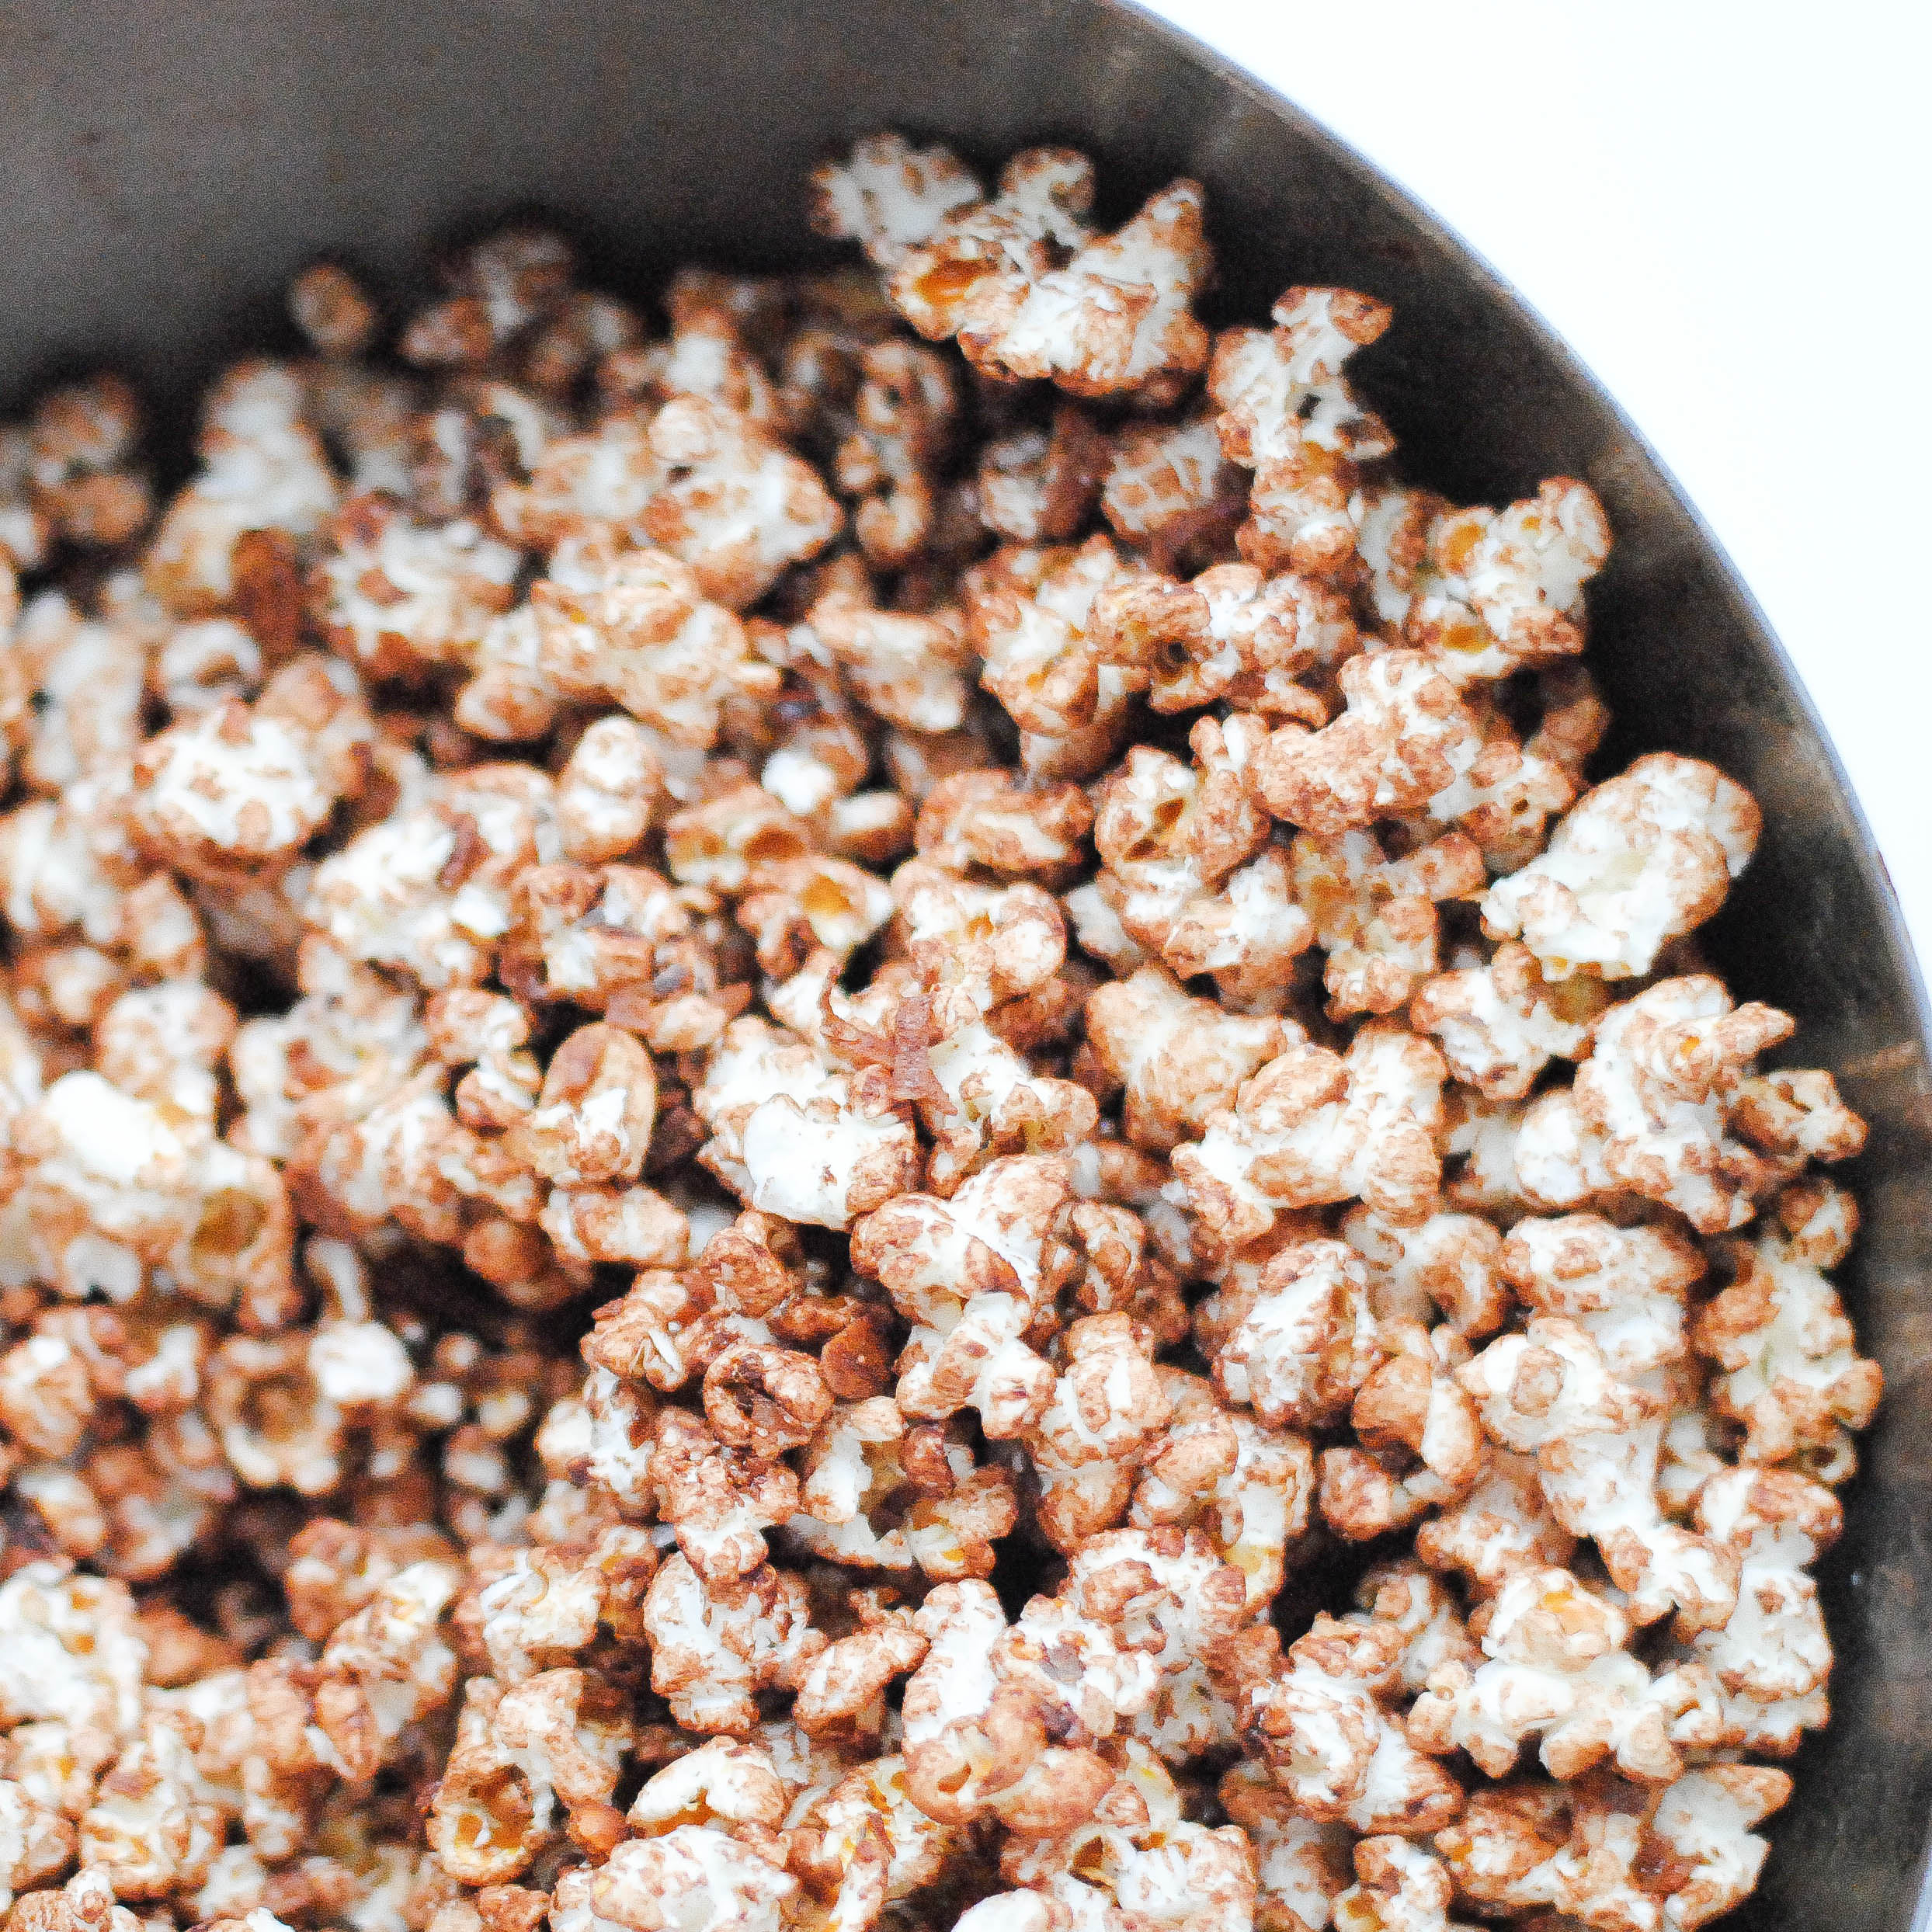
Cake got baked, cooled and sliced ready for glaze.

sacher10

Glaze got made and right when I got ready to use it my sweet baby woke up from his 30 minute nap and I had to feed him.  But the apricot glazing went well.  (Note: put parchment or wax paper under your rack when glazing.)  Right about then my older son woke up.

sacher11

The baby seemed ok after eating and I really needed to get this cake done.  I’d read the directions for the glaze, knowing it to be both temperature and time sensitive.  I decided I’d go for it.  Curious George Halloween special on the TV and kids on the couch with snacks and drinks.  Baby on the mat playing with toys.  This would be fine…

Once you start the glaze you have to finish.  No stopping points.  You have to cook the sugar to 234°F, mix in the chocolate, pour it on the cake and smooth it all without taking a second to neglect your duties.  My sugar was at about 215°F when sweet baby boy started to scream.  I tried putting him in the bouncer in the kitchen and making silly faces and noises at him while I tended to the boiling sugar.  He wasn’t fooled.  He knew he wasn’t number 1 in my book at that moment.  But I had to keep going.  He screamed for about 5 minutes, then discovered one of the toys in front of him and settled down.  I whisked in the chocolate and my glaze was thick and clumpy.  The recipe says that you can return the pan to the heat and add “a few drops” of water to get it to a pour-able consistency.  I did that and then proceeded to glaze the cake.  I went on nice at first.  I had my offset spatula at the ready and was spreading as I poured.  I got to the other side of the cake and it basically hardened up and became not only not spreadable but clumpy and when I tried to fix it it started pulling up cake with it.  So this is what I had on my hands.

sacher13


I was watching the temp of the sugar carefully and turned it off right at 234°F, but I guess that could’ve been the problem.  Or maybe I didn’t add enough water, although it did seem pourable enough.  Regardless of what went wrong, this chocolate glaze was a bust.

My baby had started to cry again and my oldest son was now in the kitchen asking for more snacks and milk because he’d spilled his on the rug.  At this point everything just had to be funny.  No point in getting upset about it.  Thankfully I wasn’t planning to serve this at a dinner party.  I had told a friend I’d bring dessert to a casual lunch on Saturday, but thankfully she’s the kind of friend who doesn’t love you any less for bringing ugly cake!

I completed the cake with the required “Sacher” but didn’t spend too much time worrying about how well that turned out.  Obviously.  I’m pretty sure I was snickering about this whole debacle when I took this picture.

sacher9

Now, the cake itself wasn’t bad.  I liked it, actually.  The chocolate glaze also tasted fine, but I will never make it again.  I’ll look for a different chocolate glaze or ganache recipe the next time I want to try to glaze a cake.  Now the apricot.  I just can’t get on board with the apricot and chocolate together.  If I am ever in Austria I will definitely order myself a slice of Sachertorte, but I won’t be making it again.  I might try the cake with a caramel glaze and chocolate ganache.  Or maybe just keep it all chocolate.  But there will be no traditional Sachertortes coming out of this kitchen.  The end.

sacher4 sacher3

 Sachertorte

Ingredients

  • ¾ cup (4 1/2 ounces) good quality bittersweet chocolate, chopped
  • 9 tablespoons unsalted butter, softened
  • 1 cup powdered sugar
  • 6 large eggs, separated, at room temperature
  • 1 teaspoon vanilla extract
  • ½ cup granulated sugar
  • 1 cup all-purpose flour
  • pinch fine grain salt

Directions

  1. Preheat oven to 375˚F with a rack in the center of the oven. Butter and flower the sides of a 9-inch springform pan, then line the bottom with a circle of parchment paper.
  2. Place the bittersweet chocolate in a heat-proof bowl and heat over a small saucepan of barely simmering water or you can melt it in the microwave, heating in 30 second increments, stirring in between each, until just melted. Set aside to cool completely, stirring often.
  3. Place the butter in a large mixing bowl and beat with the paddle attachment of a stand mixer or electric mixer on medium speed until very light and creamy. Add the confectioners’ sugar on low speed, then increase to medium speed and beat again until light and creamy.
  4. Beat in the egg yolks, one at a time, scraping down the sides of the bowl.
  5. Add the cooled chocolate and vanilla and beat until well-mixed and very light and creamy, scraping down the sides of the bowl.
  6. In a clean bowl using the whisk attachment, beat the egg whites with about one tablespoon of the granulated sugar on high speed until foamy. Gradually add in the rest of the granulated sugar and continue beating the whites until they form soft, shiny peaks – they should hold their shape but flop over on themselves.
  7. Vigorously stir about 1/3 of the whipped egg whites into the chocolate mixture to lighten it, then gently fold the remaining egg whites into the chocolate mixture with a spatula until just a few wisps of egg white remain. Do this carefully so as not to deflate the egg whites.
  8. Stir together the flour and salt and sift half of it over the chocolate mixture. Fold in with a spatula until almost incorporated. Sift over the remaining flour and fold to combine completely.
  9. Spread the batter evenly in the prepared springform pan.  Bake in the preheated oven for 35-45 minutes until a toothpick inserted in the middle comes out clean. The cake will crack and dome in the middle as it bakes but will flatten out as it cools.
  10. Cool completely, then slice in half.  Glaze middle, top and sides with warm apricot glaze (recipe below).  Let glaze set, then finish with your favorite chocolate ganache.

Apricot Glaze

Ingredients

  • 1 1/4 cups apricot jam or preserves
  • 2 tablespoons water

Directions

  1. Boil the jam and water in a small saucepan over medium heat.
  2. Cook, stirring often, until the mixture thickens and drips slowly from the spoon, about 2-3 minutes.
  3. Strain through a wire mesh sieve, pressing firmly on the solids. You should have about 1 cup of glaze. Use warm.

Here are some recipes for chocolate ganache that you could use.

Pourable Ganache

Sachertorte Chocolate Glaze


Perfect Chocolate Cake & Frosting

As with much of my spur of the moment baking, this was the result of perusing Pinterest right after my kids went down for naps.  I saw this amazing looking chocolate cake and had to have it.  Now.

Perfect Chocolate Cake | Hottie Biscotti

Perfect Chocolate Cake | Hottie Biscotti

As luck would have it I had all the ingredients (and you probably do, too!) which makes this a terrific cake to make at the last minute.  I decided to make it around 2 in the afternoon and it was cooled and frosted and ready to consume by 5.  Both the cake and the frosting come together so quickly.  Making this cake was a great use of nap time.  It was also a great way to take my mind off of the fact that my due date was going to come and go without meeting our new babe!  If only chocolate cake induced labor…

Perfect Chocolate Cake | Hottie Biscotti

I’ve had this cake before and remember asking who made it and if I could get the recipe.  For some reason I was surprised to find out it was a Hershey’s recipe.  I shouldn’t have been, I guess.  The best oatmeal cookie recipe is found on the top of the Quaker oats container, after all!  I didn’t use Hershey’s cocoa, though.  I had just enough Guittard cocoa left, so that is what I used.  The cake is moist and chocolatey and comforting, as chocolate cake should be.  The frosting is sweet and rich yet light and not dense.  I added a layer of crushed Oreos in between the layers of cake and also pressed some into the sides of the frosted cake and sprinkled some on top.  It adds some nice texture both in appearance and in your mouth, but it also helps to disguise a sloppy frosting job…which mine definitely was.

Perfect Chocolate Cake | Hottie Biscotti

You can make this in 9-inch cake pans, like I did, or in a 9×13 pan, 3 8-inch pans, a bundt pan, or you can make cupcakes.  I can easily see this becoming my new go-to chocolate cake recipe.

ONE-PAN CAKE: Grease and flour 13x9x2-inch baking pan. Heat oven to 350° F. Pour batter into prepared pan. Bake 35 to 40 minutes. Cool completely. Frost.

THREE LAYER CAKE: Grease and flour three 8-inch round baking pans. Heat oven to 350°F. Pour batter into prepared pans. Bake 30 to 35 minutes. Cool 10 minutes; remove from pans to wire racks. Cool completely. Frost.

BUNDT CAKE: Grease and flour 12-cup fluted tube pan. Heat oven to 350°F. Pour batter into prepared pan. Bake 50 to 55 minutes. Cool 15 minutes; remove from pan to wire rack. Cool completely. Frost.

CUPCAKES: Line muffin cups (2-1/2 inches in diameter) with paper bake cups. Heat oven to 350°F. Fill cups 2/3 full with batter. Bake 22 to 25 minutes. Cool completely. Frost. About 30 cupcakes.

Perfect Chocolate Cake | Hottie Biscotti

The next time I post I hope it’s to announce the birth of our baby, but I might just find myself doing some more baking if this baby decides he or she is just not ready!  Happy weekend!Perfect Chocolate Cake | Hottie Biscotti

Perfect Chocolate Cake

From Hershey’s

Ingredients

Cake

  • 2 cups sugar
  • 1-3/4 cups all-purpose flour
  • 3/4 cup unsweetened cocoa
  • 1-1/2 teaspoons baking powder
  • 1-1/2 teaspoons baking soda
  • 1 teaspoon salt
  • 2 eggs, room temperature
  • 1 cup whole milk, room temperature
  • 1/2 cup vegetable oil
  • 2 teaspoons vanilla extract
  • 1 cup boiling water

Frosting

  • 1/2 cup (1 stick) butter
  • 2/3 cup unsweetened cocoa
  • 3 1/2 cups powdered sugar
  • 1/3 cup milk
  • 1 teaspoon vanilla extract
  • Optional: Crushed Oreos for topping (about a sleeve and a half)

Directions

Cake

  1. Preheat oven to 350F.
  2. Grease and flour 2 9-inch cake pans.  Set aside.
  3. In the bowl of a stand mixer, or in a large bowl, mix together sugar, flour, baking soda, baking powder and salt.
  4. Add in oil, milk, eggs and vanilla and beat for 2 minutes.
  5. Add in the boiling water and mix to combine.  The batter will be very thin, and that’s ok!
  6. Pour batter into prepared pans, dividing evenly, and bake for 30-35 minutes.  A toothpick inserted into the center of the cake should come out clean or with a few moist crumbs attached.
  7. Let cool in the pans on wire racks for 15 minutes, then turn out onto the racks to let cool completely before frosting.

Frosting

  1. Measure cocoa into a medium sized bowl.  Melt butter and pour into the cocoa and whisk to combine.
  2. Using a mixer, beat in powdered sugar and milk alternately in 5 batches (sugar, milk, sugar, milk, sugar).  Add in more sugar if you want the frosting to be a little thicker.  Stir in the vanilla.
  3. Frost the cake, layering some of the Oreos in between the layers and press some onto the edges.  Serve immediately or let chill in the fridge for an hour if your house is especially warm (like mine was!).


Frozen S’mores Mousse

The name of this retro dessert in the cookbook I found it in is chocolate marlow, but I figured that while that might intrigue some people, it would be better to describe it more…descriptively.  It’s a chocolate and marshmallow mousse that’s frozen then topped with whipped cream, sugar coated graham crackers and some chopped chocolate.  In other words,  amazing.

Frozen S'mores Mousse | Hottie Biscotti

If you like the flavors of a s’more but want something a little different and dressed up, then you’ll love this.  The marshmallow flavor is there but is not overwhelming or cloying.  The graham crackers are baked with egg white and a sprinkling of sugar that transforms them into something really incredible.  There’s a terrific crunch from the sugar and a kind of toasted-ness that makes these a perfect garnish.  I’d definitely make more graham crackers next time since they’re also a good alternative to a spoon or fork!

After making a chocolate base of marshmallow, chocolate and milk it is chilled then folded in with whipped cream.  After a 1 hour chill in the freezer it is perfectly scoop-able.  If you allow it to harden completely in the freezer you need to let it sit out for 20-30 minutes before scooping.

Frozen S'mores Mousse | Hottie Biscotti

After scooping I decided topping this with a little sweetened whipped cream couldn’t hurt anybody.  A couple of the graham crackers and a square of chocolate top this off perfectly.

Frozen S'mores Mousse | Hottie Biscotti

Crumble up the graham crackers over everything before enjoying!

Frozen S'mores Mousse | Hottie Biscotti

Frozen S’mores Mousse

From America’s Best Lost Recipes 

Serves 6-8

Ingredients

Mousse

  • 2 cups mini marshmallows
  • 2/3 cup milk
  • 6 ounces semisweet chocolate (I used 4 ounces semisweet and 2 ounces 60% cocoa) chopped
  • 2 teaspoons vanilla
  • 1 1/3 cups heavy cream

Sugared Crackers

  • 4 whole graham crackers (or more)
  • 1 egg white, lightly beaten
  • granulated sugar

Garnish

  • Sweetened whipped cream
  • chocolate squares

Directions

Mousse

  1. Combine the marshmallows, milk and chocolate in a saucepan over medium heat and cook, stirring constantly until marshmallows are melted completely and mixture is smooth.
  2. Pour the mixture into a bowl, cover with plastic wrap and chill for an hour in the refrigerator.
  3. Whip cream to soft peaks and stir in vanilla.
  4. Fold whipped cream into chocolate mixture,
  5. Scoop into a 2 quart souffle dish and freeze for 1 hour.

Sugared Graham Crackers

  1. Preheat oven to 350°F.
  2. Lay crackers out on cookie sheet.  Brush each with the egg white, then sprinkle evenly with sugar.
  3. Bake for about 5 minutes, then let cool completely and break into pieces.

Assemble

  1. If mousse is still scoop-able, scoop into dessert bowls.  If it is too hard to scoop, let warm up a bit.
  2. Top with whipped cream, a couple of crackers and a chocolate square.