casserole

Chicken Taco Cornbread

When I went to visit my sister last fall I bought a magazine at the airport that she later made fun of me for buying, a Cast Iron Cooking magazine!  Of course she had reason to poke fun.  I should’ve bought some beauty, design or gossip mag like normal women do.  But this magazine has already produced two very tasty meals, so I don’t mind so much.

Chicken Taco Cornbread

They call this a “twist on taco salad” which is a great description and makes this a meal that doesn’t really require a side dish since it’s the main dish and the veggie side.

Chicken Taco Cornbread-8


You don’t need to do too much prep, just some chopping of vegetables.  And everything is done in one skillet.  You can shred the cheese, or buy pre-shredded.  The recipe calls for shredded rotisserie chicken, but if you have leftover cooked chicken that would be perfect, or you could poach chicken breasts if you have the time.  A can of tomatoes and green chile is on the ingredients list, but if you want to skip the green chile or can’t find it a partially drained can of diced tomatoes will do just fine.

Chicken Taco Cornbread-4

Chicken Taco Cornbread-3

The dressing is something quite close to Chuy’s creamy jalapeno so be sure to save whatever it left over and use it as a dip for tortilla chips!

The recipe uses a blend of mozzarella and cheddar.  Any cheese you’d use for tacos or fajitas would work, monterery jack, colby, cheddar, or the Mexican cheese blend they sell in bags.

Chicken Taco Cornbread-7

Chicken Taco Cornbread-6

The cornbread base has tortilla chips baked in.  I had some very thin tortilla chips that weren’t the best in this situation, they lost their crunch.  A nice thick corn chip would be better here and hold up nicely.  I’ll definitely be sure to do that next time.  And there will be a next time because there is so much room for modification here.  Adding in black beans or corn, using ground beef instead of chicken, or leftover fajita meat which we often have after cooking up fajitas for friends…we always overbuy!

Chicken Taco Cornbread

Ingredients

Dressing

  • 1 cup cilantro leaves
  • 1/2 cup ranch dressing
  • 1/2 cup salsa verde

Filling

  • 2 tablespoons olive or vegetable oil
  • 1/2 cup chopped onion
  • 1/4 -1/2 cup chopped red bell pepper
  • 1 tablespoon finely chopped jalapeno
  • 2 cups shredded rotisserie chicken
  • 1 can (14 ounces) diced tomatoes with green chiles OR 1 can diced tomatoes and a couple tablespoons diced green chiles
  • 3 tablespoons chopped cilantro
  • 1/2 teaspoon salt
  • 1/4 teaspoon black pepper
  • 1 teaspoon cumin
  • 1 teaspoon chili powder

Crust

  • 1 egg
  • 1 7-ounce package of cornbread mix
  • 1/2 cup milk
  • 3/4 cup crushed tortilla chips

Toppings

  • 1/2 cup shredded mozzarella
  • 1/2 cup shredded cheddar
  • 2-3 heads of romaine lettuce, chopped
  • 1 cup chopped tomatoes
  • chopped cilantro


Directions

Dressing

  1. Combine cilantro, ranch dressing and salsa in a food processor and mix until well blended.  Cover and chill until ready to use.

Filling

  1. Heat oil over medium heat in a 10-inch cast iron skillet.
  2. Cook onion, bell pepper and jalapeno until softened.  Stor in chicken, tomatoes, cilantro and seasonings.  Cook for about 5 minutes, taste and season more if needed.
  3. Transfer filling to a bowl, wipe out skillet and grease with crisco.

Crust

  1. Preheat oven to 400°F.
  2. In a bowl beat egg, milk and cornbread mix just until combined.
  3. Put chips in the greased skillet, then pour batter over the chips.
  4. Spoon chicken mixture over the cornbread batter and sprinkle with cheeses.
  5. Bake for 15-20 minutes, let cool briefly before cutting in to slices.

Toppings

  1. Top slices of cornbread with shredded lettuce, tomatoes and cilantro.
  2. Drizzle with dressing and serve.


Overnight Breakfast Enchiladas with Tomatillo Sauce

Before I get in to the food,  I have to ask for some help, advice, wisdom and possibly someone to commiserate with on this.  I made these enchiladas something like 6 weeks ago.  But I am just now blogging about them.  Why is cranking out a simple post so difficult?  I have the hardest time finding the time, or maybe it’s making the time, to blog.  I have three kids (ages 5,3  and 1) who I stay home with and I think that’s a pretty good excuse, but there are people out there blogging up a storm with young kids at home.  On the days I do write up a post it takes me forever if I do it while the kids are awake, and if I do it while they’re asleep I don’t get the regular housekeeping stuff done.   Do any of you have any tips for amateur stay-at-home mom blogging with kids?  Do you just get up early?  Stay up late?  Help a girl out.  I cannot figure out how to balance being a mom and blogger.

Now on to the important stuff!

Every now and then we enjoy a proper, satisfying breakfast at our house.  It’s almost always on a Saturday since that is the only day of the week we’re all home for breakfast together and don’t have to rush to get anywhere.  Someday I’d like to be that great mom, getting up earlier than everyone and having a lovely table full of pancakes and eggs and bacon and hot coffee ready for the family.  But I just do not know if that will ever happen!  Thankfully this breakfast casserole is assembled the night before, so as long as I can get up early enough to preheat the oven and put the pan in and bake them for 40 minutes we can enjoy a hot breakfast together without the stress.

Breakfast Enchiladas

This recipe is from Fine Cooking and, like most of their recipes, does not disappoint.  There is quite a bit of prep and you will dirty a few pans in the process of getting these fridge ready.  I’d recommend making these when you have some guests in town (preferably ones who like to help in the kitchen!) and getting some help with the chopping and what-not the night before.  Cooking is almost always more fun when you have people to help you and keep you company in the kitchen.

Breakfast Enchiladas-3

This is an easily adapted recipe if you want or need to leave something out like the onion, bell pepper, potato or even the chorizo (but only leave that out if you absolutely have to cause it’s yummy).  Just be sure to replace it with something else, like black beans, more eggs, vegetarian chorizo, etc.  I thought the proportions in the recipe were good and especially loved the sauce, which is very easy and well worth making.  You could use it as a sauce for chicken enchiladas or just on tacos, too.

I divided these in to 2 pans and baked one the first morning and saved the other to bake a couple days later so that they would be freshly baked.  Of course if you’re serving a crowd I’d recommend baking them all in one big  pan, but if you’re serving a small group dividing them up is a good option. I didn’t try freezing them, but it might work to do that.  Let me know if you try it.

Breakfast Enchiladas-4

Overnight Breakfast Enchiladas with Tomatillo Sauce

Ingredients

Sauce

  • 2 pounds fresh tomatillos, husked and rinsed in warm water
  • 1 medium jalapeño
  • 1 cup chopped fresh cilantro
  • 1 large clove garlic, peeled
  • 1 teaspoon ground cumin
  • salt and pepper
  • 1 cup heavy cream (You could use 1/2 cup cream and 1/2 cup fat-free half and half)

Enchiladas

  • 1 small russet potato, peeled and cut into 1/4-inch dice (1 cup)
  • 1pound fresh, raw chorizo, casings removed and meat crumbled
  • 1 medium red bell pepper, cut into 1/4-inch dice (1 cup)
  • 1 small yellow onion, finely chopped (1/2 cup)
  • 1 small can diced green chiles (4 ounces) , drained, optional
  • 6 large eggs
  • salt and pepper
  • 1 tablespoon unsalted butter
  • 16 6-inch corn tortillas
  • 4 ounces Monterey Jack, grated (1 cup)
  • Sour cream, for serving (optional)

Directions

Sauce

  1. Put the tomatillos and the jalapeño in a medium sized saucepan and add water to cover.  Bring to a boil, then lower the heat and simmer, uncovered, turning the tomatillos occasionally, until they’re brownish-green all over and very tender, about 15 minutes.
  2. Drain and place the tomatillos in a bowl, cut the jalapeno in half and add half of it to the bowl.  Use a hand blender to blend together.  You could also do this in a blander.  Add the cilantro, garlic, cumin, and 2 teaspoons of salt and purée.  Taste and blend in the other jalapeno half for spicier sauce. Add the cream and pulse to blend. Transfer to a bowl and let cool to room temperature.

Enchiladas

  1. Cook the potato: Boil water in a saucepan and add the potato,cook for a few minutes until just tender.
  2. Cook the chorizo: Heat a skillet over medium high heat and add the chorizo.  Cook for 5-8 minutes until cooked through.  Remove from the pan and place on a paper towel lined plate.  Leave some of the oil in the pan.
  3. Cook the onion and pepper: Heat the oil from the chorizo in the pan over medium heat and add the onion and pepper.  Cook until beginning to brown and becoming tender, 5 minutes or so.  Stir in the potato and chorizo and cook for 3-4 minutes, add in the green chiles if using, and then remove from the heat.
  4. Cook the eggs: Whisk the eggs, 1 tsp. salt, and several grinds of black pepper in a medium bowl. Melt the butter in a skillet over low heat and cook until the foam subsides. Add the eggs and cook without stirring until they begin to set on the bottom, about 20 seconds. Draw a wooden spoon across the pan a few times to form large curds. Continue to cook, stirring occasionally, until the eggs are barely set and still quite moist, 1 to 2 minutes—do not cook through. Gently add the eggs to the chorizo mixture and then gently stir in 1 cup of the sauce.
  5. Assemble the enchiladas: Heat the tortillas in between two slightly damp paper towels (or in a tortilla warmer) so that they are flexible.  Spray a 9×13 pan with cooking spray.  Fill each tortilla with 1/3 cup of the egg mixture, roll and arrange seam side down in the pan.  Cover and refrigerate overnight.   Refrigerate the sauce as well.
  6. Bake the enchiladas:  In the morning preheat the oven to 350°F.  Pour the sauce onto the enchiladas, sprinkle with cheese and bake for 30-40 minutes until lightly browned.  Serve with sour cream and extra cilantro.


Cheesy Sausage and Green Chile Overnight Breakfast Casserole

Over Easter weekend my sister made a breakfast casserole that everyone loved, especially my husband.  So when we got back home I decided to make it again as a special weekend breakfast.  Instead of making a full batch I halved it and made individual casseroles.  You could easily make this batch in an 11×7 or maybe even a deep 8×8.  Or you can follow the original recipe and do it in a 9×13.  Whichever way you choose you will have a really satisfying and hearty breakfast on your table with very little effort.

Cheesy Sausage Breakfast Casserole-2

Of course you can leave out the green chiles, or use more or less than called for depending on how spicy you like things.  You can also adjust the cheese and sausage to taste.  I found this to be super cheesy, which I love.  This combination of mozzarella and sharp cheddar is great, but use what you have or what you like.  I used a turkey breakfast sausage, but again, use what you like.  I love dishes like this that are very forgiving and easily adapted.

Cheesy Sausage Breakfast Casserole-4

Cheesy Sausage Breakfast Casserole-5

This makes 8-10 individual casseroles depending on the size of your ramekins.  Be sure to bake them on a rimmed baking sheet just in case they spill.  Mine did not, but better safe than sorry.

The measurements and instructions below might frustrate you if you thrive on precision in the kitchen.  Since this was my first time making this and I was working from measurements for a larger dish I had to adjust as I worked.  I started off with 4 eggs and 3/4 cup of sour cream and as I was filling up the dishes I realized I was not going to have enough, so I whisked in another egg and a bit more sour cream.  I included that adjustment in the recipe.  But since we likely do not have the same ramekins, your definition of “a sprinkle” is different than mine, and I may tend to be heavy-handed when is comes to sausage you may find that you have too much or maybe that you didn’t have quite enough of something.  I wrote the ingredient list with the motto, “Better too much than not enough” but please let me know if you found any ingredient to be way off.

Cheesy Sausage Breakfast Casserole


Cheesy Sausage and Green Chile Overnight Breakfast Casserole

From Allrecipes

Makes 8-10 individual casseroles

Ingredients

  • 8 to 10 ounces breakfast sausage, cooked
  • 3 or 4 plain english muffins
  • 1 to 2 cups shredded cheddar
  • 1 to 1 1/2 cups shredded mozzarella
  • 1 cup low fat sour cream
  • 5 eggs
  • 2-3 tablespoons chopped green chiles

Directions

  1. Spray ramekins with cooking spray and arrange on a rimmed baking sheet lined with a dish towel (this will keep them from sliding around).
  2. Butter the inside of each halved english muffin and then cut each half into about 12 chunks.  Add enough chunks to just about cover the bottom of the ramekin, for me this was about 6.  Squish them in there so they make a nice layer, but err on the side of too few since they will expand once they soak up the egg mixture.  Repeat with all of the ramekins.
  3. Whisk together the eggs, sour cream and green chiles and set aside.
  4. Divide the sausage between the dishes, sprinkle generously with a little of both cheeses (leave a little extra), then pour some egg mixture on top.  Pour just enough of the egg mixture to reach the top of the dish.  Sprinkle with a little more cheese.  Repeat with all the dishes.  Cover the entire pan with a sheet of foil and move (carefully) to the fridge to sit for 8-12 hours.
  5. Preheat oven to 350°F.  Remove the dish towel from the baking sheet, line with foil and arrange ramekins back on the pan.  Bake for 25-30 minutes, until cheese begins to brown and there’s just a slight jiggle to the egg.  Let sit for 10 minutes before serving.

Shepherd’s Pie with Cheddar Potato Topping

St. Patrick’s Day was yesterday.  After dropping my son off at school I remembered, having dressed him in nothing green.  With blog posts and Instagram feeds full of “pot o’ gold” crafts, kids decked out in green and green or Irish foods, I knew I’d failed as a mom and food blogger.  I figured I should make something for dinner that night that was somewhat Irish, even though I’ve never been big on the holiday.  The more important thing about March 17 is that it’s my niece’s birthday!  Happy 4th birthday, Maren!

I’d seen a few people posting pics of their beautiful Irish soda breads on social media, but I am kind of breaded out at the moment.  The next thing that popped into my head was Shepherd’s Pie.  A complete meal with meat, veggies and starch all in one pan!

shepherdspie5

I found an easy and basic recipe, made a quick grocery list and headed to the store.  This one from Martha is basically what I made, but with a few changes.  I also took some tips from a cookbook just recently added to my collection, America’s Test Kitchen Family Cookbook.

In perusing recipes I found some call this dish Shepherd’s Pie, and others call it Cottage Pie.  What’s the difference?  Opinions differ as to whether or not there is one.  Cottage pie was the term first used for the dish.  But over time people began calling it Cottage pie if it contained beef and Shepherd’s pie if it contained lamb.  A lot of what I’ve read says you can use either term.

shepherdspie4

This meal wound up being quite good, a terrific comfort food, and something you can make in advance.  Cook the meat filling and the potatoes, store them separately, refrigerate for up to 1 day, then layer in the casserole and bake when you’re ready.  You can even assemble this in the morning, refrigerate it and bake it in the evening.  I’d recommend adding a little extra milk to the potatoes if you’re going to make it in advance.  For some reason I feel like letting mashed potatoes sit in the fridge dries them out.  This might not be true, but it just makes me feel better to add a little extra liquid.  No one likes dry potatoes.  A couple tablespoons should be enough.

shepherdspie2

I like the combination of carrots, celery, onion and peas in this, but you can leave the peas out if you’re not a fan, or add corn to the mix.  If you don’t have fresh thyme, use 1/2 teaspoon of dried thyme leaves.  Instead of water use leftover beef or chicken broth.  It’s not enough to justify opening a new container, but if you have 1 cup that needs to be used, this is a fine time to use it.  Instead of sharp white cheddar you can use regular cheddar cheese, or leave it out if you like.  Use the combination of 2% milk and cream, or use all whole milk or all 2%.  The cream adds a nice richness, but isn’t totally necessary.

You don’t need to serve this with anything, but pairing it with a crispy green salad is a good way to round out the meal.  Enjoy!

shepherdspie1

Shepherd’s Pie

Adapted slightly from Martha Stewart

Serves 6-8

Ingredients

Filling

  • 1 pound ground beef
  • 4 stalks celery, cut in half lengthwise then chopped
  • 4 carrots, cut into quarters lengthwise then chopped
  • 1/2 onion, diced
  • 2 tablespoons tomato paste
  • 2 tablespoons flour
  • 1 teaspoon chopped fresh thyme
  • 1 cup water or broth
  • 1 tablespoon Worcestershire sauce
  • 1 cup frozen peas
  • salt and pepper to taste

Potatoes

  • 2 large russet potatoes
  • 2 tablespoons butter
  • 1/4 cup 2% milk
  • 1/4 cup heavy cream
  • 3 ounces sharp white cheddar cheese, grated
  • 1 egg

Directions

Filling

  1. Heat a large skillet over medium high heat and drizzle with a little olive or vegetable oil.  Add in the beef and cook, breaking up the pieces until it is no longer pink, about 8 minutes.
  2. Line a large plate with paper towels and remove meat from the pan to drain on the paper towels.
  3. Return the pan to the heat and add in onion, celery and carrots.  Cook, stirring occasionally, for 8-10 minutes, until vegetables become tender.  Season with a pinch of salt and the thyme.
  4. Add in the flour and tomato paste and stir to combine, cook for 2 minutes.
  5. Add in the water or broth, stir to combine and bring to a simmer.  Add in the peas, stir and let cook for 3-5 minutes.

Potatoes

  1. Peel the potatoes and then cut into small chunks.
  2. Place potatoes in a saucepan and cover with cool water.
  3. Place pan over high heat and cook for about 15 minutes, until potatoes can be easily pierced with a fork,
  4. Drain the water from the potatoes, then return to the pan and begin mashing to release some of the steam, mash for about 1 minute.
  5. Add in the butter and milk along with some salt.  Mash it up, then add in the cheese and continue to mash until it reaches a consistency that you like.  Add in more milk if the potatoes seem dry, and taste and adjust seasonings.
  6. Mix in egg.

Assemble and Bake

  1. Preheat oven to 400°F.
  2. Spray a casserole dish (a deep 8×8, 9×9 or 11×17) with non-stick spray.
  3. Layer beef mixture on the bottom of the pan, then layer potatoes on top and spread evenly.
  4. Bake for 20-25 minutes, until top begins to brown.


Bacon and Caramelized Shallot Baked White Cheddar and Gruyere Macaroni and Cheese

If you know me or have searched around on the blog much, then it comes as no surprise that I love macaroni and cheese.  I’ve made it more than a couple of times and have tried lots of variations.  But I have two basic recipes that are my favorites, this one from Martha and this one from The Pioneer Woman.  Both are great jumping off points for creating different types of meals based on what you choose  to add in.  They are similar, creamy baked pasta dishes but Ree’s uses an egg, less milk and cheese, Martha doesn’t use an egg but uses twice as much milk and more cheese.  They have similar cooking processes and both yield tremendously tasty results.  Pioneer Woman doesn’t call for bread crumbs, but if I have them around I almost always use them.  There is just something about a crunchy topping on a creamy pasta dish that does me in.  Heaven.

macaroni1

For this macaroni and cheese I used the Martha recipe as my base and added in cooked crumbled bacon, caramelized shallots and fresh thyme.  I made 4 of these individual servings and had plenty left over to fill a 9×13 casserole.  If you don’t make any little servings it will still all fit in a 9×13.  I sometimes make two smaller casseroles and freeze one for a day when I know I won’t have time to make dinner.  If you do freeze it don’t go through with the baking step prior to freezing.  Wrap your pan in plastic wrap then foil.  Let it thaw in the fridge overnight then bake (with foil only!) for 20 minutes, then uncovered for another 20-30 depending on the size of the pan.  This macaroni can be served as a main course, which is what I usually do, paired with a green salad.  Or it can be a side dish and is a great addition to a pot luck table.

The thought of making a roux is one that may seem daunting if you haven’t done it before.  It does sound like a fancy cooking skill, but it’s really simple and kind of wonderful.  I love the way the butter and flour smell together as they’re cooking.  This whisk from Pampered Chef is the one I always use when making a roux or sauce.  It doesn’t scratch my pan and can get up next to the edges of the pan like a normal whisk cannot.  It’s also great at breaking up lumps.  But it’s a pain to clean, so soak it right after you’re done with it to avoid stress at dish washing time.  In addition to a good whisk, you also need a nice big saucepan and uninterrupted time.  You can’t go browse Pinterest or finish that episode of whatever you were watching while you make the roux and cheese sauce.  Do that while the macaroni is in the oven.  If you don’t whisk it fairly constantly you run the risk of getting a lumpy sauce or even burning it and having to start over.  It doesn’t take a terribly long time, but it is active time. The first step of cooking the butter and flour happens especially fast.  So just be attentive.

macaroni2

The cheese.  It’s an important factor in macaroni and cheese, of course.  You can tell if you use really good cheese.  But your macaroni won’t be at all bad if you use normal grocery store cheese.  I used Target brand sharp white cheddar and a nice little block of real gruyere.  Use whatever you want, cheddar, colby, sharp, mild, etc.  But don’t use low fat cheese.  That’s just plain silly.  And remember that changing cheeses changes the final product, so mix cheeses and additions that pair well.

The milk.  2% is just fine.  You can use whole if you’re really going to go for it, but it’s not necessary to achieve a nice creamy sauce.  Do not forget the salt!  If the sauce tastes a little too salty, that’s ok because you’re mixing it with a pound of non flavorful pasta.

The pasta.  I like penne, a little more adult of a pasta than elbow, but elbow is just fine.  You can use fussili or farfalle (bowtie) but I personally like the tubular pasta noodles for macaroni and cheese.

The bacon.  I used center cut, baked it in the oven then chopped it up.  I used 6 slices (sorry I don’t have the ounce amount!) but could’ve easily done 8 and maybe even 10.  Leave the bacon out if you’re looking for a meatless dish, or substitute ham or another meat.

The shallots.  I love shallots.  They’re sweeter than onions are are a wonderful addition to this dish.  I used 3 large shallots, sliced them thinly and sauteed them in a little butter and olive oil over medium-low heat until they were nice and evenly browned without burning.  If they begin to darken too much, add a tablespoon of water to the hot pan and continue cooking.  You can use a yellow onion, the flavor will just be slightly different but still delicious.

This creamy, cheesy and delicious baked pasta dish is real comfort food and something that is sure to please just about everyone.  Enjoy!

Bacon and Caramelized Shallot Macaroni and Cheese

Adapted from Martha Stewart

Serves 6-8 as a main dish or 10-12 as a side dish

Ingredients

  • 6-8 slices of center cut bacon, cooked and chopped or crumbled
  • 3 large shallots, peeled and sliced thinly
  • 8 tablespoons butter, divided, + 1/2 tablespoon to saute the shallots
  • 1/2 tablespoon olive oil
  • 1 pound penne pasta
  • 1/2 cup flour
  • 5 and 1/2 cups milk
  • kosher salt
  • black pepper
  • 1 teaspoon fresh thyme leaves
  • 16 ounces sharp cheddar, grated (1 cup reserved for topping)
  • 6 ounces gruyere cheese, grated (1/2 cup reserved for topping)
  • 1 and 1/2 cups panko crumbs

Directions

  1. Preheat oven to  375°F.
  2. Caramelize the shallots: Heat 1/2 tablespoon of butter and 1/2 tablespoon of olive oil in a small pan over medium heat, add shallots, stir and cook for a couple minutes until shallots start to gain some color and soften slightly.  Reduce heat to medium-low and cook, stirring occasionally, until shallots are caramel in color and very soft.  Do not let them burn.  If they are browning too quickly you can lower the heat slightly or add a tablespoon of water and continue to cook.  This should take 10 minutes or so.  Set shallots aside.
  3. Heat a large pot of water to cook the penne.  While it is coming to a boil, make the cheese sauce.  Heat 6 tablespoons of butter in a large pan over medium heat, once it is melted add the flour and whisk for a minute.  Slowly pour in about 1 cup of the milk and whisk until mixture thickens, being sure to whisk out any lumps.  Continue adding the milk, a cup at a time, whisking until slightly thickened until the last addition of milk (this can be 1 1/2 cups).  Whisk until slightly thickened.
  4. Remove from the heat and add in salt (at least 1 teaspoon) pepper to taste, thyme, and all the cheese except that reserved for topping.  Stir to combine and melt the cheese until mixture is smooth.  Taste and season.
  5. Salt boiling water and add the pasta.  Cook 2 minutes fewer than the package instructs, then drain and add to the cheese sauce along with the shallots and bacon.  Stir well to combine everything.  NOTE: You may reserve some of the shallots to sprinkle on top, 2 tablespoon is enough.
  6. Grease ramekins or casserole dish and spoon pasta into the dishes. Top with reserved cheese, then shallots.
  7. Melt the remaining 2 tablespoons of butter and toss with the panko crumbs.  Spread crumbs evenly over the cheese and bake for 30 minutes.  Ramekins can bake for about 20, make sure to place them on a baking sheet to catch drips.
  8. Let cool for a few minutes before serving.


Cauliflower Mac with White Cheddar, Parmesan and Thyme

In my dreams I am someone who eats nothing but good-for-you foods, mainly fruits and vegetables, that are all beneficial to my health and do things like make my skin glow, provide me with all my daily vitamins, and will add years to my life.  I grow all my own vegetables and get my eggs from the chickens I’m raising in my backyard.  In that backyard I am hanging my clothes out to dry on the clothesline.  In reality I love a greasy hamburger with cheese and bacon served up with a plate of crispy fries and followed by a creamy vanilla milkshake.  I’ve never grown anything edible besides some tomatoes that didn’t make it through the season.  And I actually hate the way clothes feel and smell after drying outside.  I’m nothing like I am in my dreams.  I like healthy foods, but I also really like to indulge.  I’ve visited both extremes of unhealthy habits with food and over time I’ve become better able to understand that there is a healthy balance between the two.  I believe that there is a time to indulge in cheesy macaroni and a time to take it easy and fill your body with nutritious vegetables.  This dish allows you to have your mac and eat it too.

cauliflowermacaroniandchees

Upon first reading this recipe in Fine Cooking I dismissed it as being way too much work.  I came across it again a few weeks later and thought I should give it a try.  It turned out to be really delicious and not terribly time consuming.  This is nothing at all like the ooey gooey cheesy macaroni and cheese I usually make, so it isn’t truly fair to compare them.  However, the flavor of this macaroni was full and rich thanks to the sharp cheese and fresh thyme.  Since it’s a warm baked pasta dish it still serves as comfort food, but it doesn’t carry all the butter, whole milk and cheese (and guilt) of the full fat version.  One of the best parts about it is the cauliflower and onion puree.  There’s half a head of cauliflower in this!  And it adds a wonderful flavor and creaminess as well as a good amount of vitamin C.  Purees are a great way to get more vegetables into your diet, and I’m going to look for ways to do more with them.  There are only so many salads and sides of steamed broccoli a girl can take before she needs some real food.  And while you eat this you can feel good knowing you’re getting some of your daily veggies.

There are a few things I did that are different from the original recipe.  I used macaroni instead of penne.  I used heaping measurements for the cheese because, well, I just love cheese.  And I used 2% milk instead of 1%.  I know there is a big difference between the two, and next time I will try 1% if I remember to pick some up.  Ben and Carson both drink 2%, and I have recently made the switch to almond milk, so that’s all the milk we have in our house most of the time.

If you make this dish start to finish it probably wouldn’t take you all that long, but it dirties a lot of dishes.  One of those dirty items is a blender, and I kinda hate cleaning the blender, not sure why.  As a stay-at-home mom I rarely have the luxury of making dinner leisurely and I also don’t want me or my husband to be stuck with a bunch of dishes when all we want to do is sit down after the kids are in bed.  So, here are some ways to make this easier and less stressful to prepare.

  • Make the vegetable puree earlier in the day, or even the day before, and store it in the fridge.  Warm it up in the saucepan and continue the recipe from that point.
  • Grate the cheese ahead of time and store in the fridge in ziplocs or tupperware.  (I prefer bags because I can throw them away.  But that’s because I am lazy and wasteful.)
  • Cook everything, put it in the pan, cover and put in the fridge.  Bake it that evening or the next day.

Give this a try. Even if you hate cauliflower I think you’ll like it.  And if you have any healthy and delicious recipes to share, please do!

Cauliflower Mac and Cheese

Ingredients

  • 4 cups 1-1/2-inch cauliflower florets (about 1 lb.; from 1/2 head) 
  • 1 medium onion, peeled and sliced 
  • 2 cloves garlic, peeled 
  • salt and pepper
  • 12 oz. macaroni noodles
  • 2 cups 2% milk 
  • 1 tsp. dry mustard 
  • 2 tsp. chopped fresh thyme 
  • 2 oz. coarsely grated sharp white Cheddar (about 1/2 cup) 
  • 1-1/2 oz. finely grated Parmigiano-Reggiano (1-1/2 cups using a rasp grater)

Directions

  1. Position a rack in the center of the oven and heat to 375°F.
  2. Put the cauliflower, onion, and garlic in a steamer basket set over 1 inch of boiling water in a 6- to 8-quart pot. Cover and steam until the cauliflower is tender, 10 to 15 minutes. Transfer the cauliflower, onion, and garlic to a blender.
  3. Fill the pot three-quarters full of salted water and bring to a boil over high heat. Add the pasta and cook for 3 minutes less than the package timing. Drain and return the pasta to the pot.
  4. While the pasta cooks, add 1 cup of the milk, the dry mustard, 1 tsp. salt, and 1/2 tsp. pepper to the vegetables in the blender and purée until smooth. Transfer to a 3-quart saucepan and stir in the remaining 1 cup of milk and the thyme. Heat over medium-low heat until hot but not boiling, about 3 minutes.
  5. In a small bowl, mix the Cheddar and Parmigiano. Add all but 1/2 cup of the cheese to the sauce and stir until the cheese is melted. Add the sauce to the pasta and stir to combine.
  6. Transfer the pasta and sauce to an 8-inch square baking dish and sprinkle with the remaining cheese.
  7. Bake until heated through and the cheese is beginning to brown, 20 to 30 minutes.


Chicken and Rice Casserole with Roasted Squash and Spinach

We’re moving in 12 days!  I’m starting to wonder why we thought moving 7 weeks before my due date was a good plan!  I’m actually very excited, just anxious and stressing a bit.  My sweet mom came down and helped me for a few days last week.  We didn’t pack the entire kitchen, but that process is beginning.  I plan to have the kitchen pretty much packed away by the beginning of next week.  That last week I plan to eat easy breakfasts, freezer meals, give Carson a lot of convenience foods (and his weight in strawberries of course) and explore the take-out situation in our neighborhood.  I’ve already stocked up on paper plates, plastic utensils and cups.  I don’t want to find myself packing plates and silverware at 2 am the night before we move.

Eating restaurant food is probably going to get old after a few days.  I like cooking and knowing what goes into our meals.  So I want to cook a lot in the coming week.  The problem with that is how unprepared I have been recently when it comes to groceries.  And if I’ve forgotten something, I have little to no desire to take Carson to the store for one item.  One night last week I made dinner with what we had around, which was an adventure.  And a pretty tasty adventure.  So tasty, in fact, that I typed this recipe up right after we ate so that I wouldn’t forget it.  The picture doesn’t do it justice, but casseroles in general are just plain unattractive.

I made fried chicken earlier in the week.  Since 2 people can’t (and shouldn’t) eat an entire chicken we had quite a bit left over.  My thought for dinner began with that chicken.  I knew we had rice, but I couldn’t think of what else I was going to throw in my chicken and rice dinner.  So began the scavenging.  Squash from Farmhouse.  A shallot.  Green onions.  A half bag of spinach.  The remains of a box of chicken broth.  The rest of a carton of sour cream.  Leftover white cheddar cheese.  And a packet of Lipton chicken noodle soup mix.  This was going to be dinner.  The biggest gamble was the squash.  I roasted it and figured if I didn’t end up using it in the casserole I could snack on it and give some to Carson.  It ended up being really great and something I would definitely repeat.

Chicken and Rice Casserole with Roasted Squash and Spinach

Ingredients

  • 2-3 cups 1/2 inch cubed squash (I used patty pan and butternut)
  • 1 shallot, chopped
  • 6 green onions, chopped
  • 2 garlic cloves, minced
  • 4-6 ounces fresh spinach
  • 1 cup white medium grain rice
  • 1 1/2 cups chicken broth
  • 1 package Lipton chicken  noodle soup mix
  • 1/2 cup sour cream
  • 1/4 cup milk
  • 1/4-1/2 cup shredded white cheddar cheese (optional but delicious)

Directions

  1. Roast Squash:  Preheat oven to 400°F.  Toss seeded and cubed squash with a drizzle of olive oil and a sprinkle of salt.  Spread on a rimmed baking sheet and roast for 20-30 minutes, tossing about halfway through.  Set aside.
  2. Heat 1/2 tablespoon of olive oil and 1/2 tablespoon of butter over medium heat in a large skillet.  Once hot, add in shallot and cook for 2 minutes, add in green onion and cook 2 minutes, then add in garlic, stir and cook for about 1 minute.
  3. Stir in the rice, stir and cook for 2-3 minutes.  Add in the spinach and cook until slightly wilted.  Turn off the heat and mix in the chicken and roasted squash.
  4. Pour in the chicken broth, soup mix, sour cream and milk.  Stir until well combined.
  5. Reduce oven temperature to 375°F.  Pour into a greased 9×13 pan and sprinkle with the cheese, if using.
  6. Cover tightly with foil and bake for 40 minutes.  Remove foil and bake for 10 more minutes.  Let cool slightly before serving.

A Busy Life and Lots of Farmhouse Recipes: Spinach Basil Pesto, Quinoa Mac and Cheese Casserole, Mediterranean Eggplant and Quinoa Salad

The last month has been a crazy one, and the next two aren’t going to be any different.  We are moving from our sweet little rent house into a lovely suburban home with 4 bedrooms, 2 bathrooms, a nice big kitchen with garbage disposal, and enough counter space not to have to balance pans on top of the coffee maker.  Yes.  I have done this.  Life will be so good.  And about 5 weeks after we move in we will have a new baby on our hands, and so life will be a totally different kind of crazy.  Can that be an acceptable excuse for why I haven’t blogged in a month?

I have been cooking, but haven’t been taking pictures of any of it or recording it anywhere.  This is a big time bummer.  One of my favorite things about having this blog is being able to search for a recipe I’ve made in the past and be reminded of what I did to change it that made it better, or the things I didn’t like that I’d change the next time around.  When I don’t update the blog, I don’t have those recipes…unless I managed to write notes on them and put them somewhere safe…which is a rare event.  So today I am playing catch-up.

One of the things I’ve had the luxury of participating in this summer is the Farmhouse Delivery here in Houston.  When the bushel of local fruits and veg arrive on my doorstep carried by a shaggy headed hipster jamming out to whatever cool music is playing through his earbuds, I get positively giddy. Some of the items we receive are no-brainers.  Peaches and blackberries are perfect in my morning yogurt and granola.  Cucumbers, sweet peppers and the sweetest cherry tomatoes known to man get sliced and tossed into salads.  Potatoes, onions, corn and slicing tomatoes have also been part of our meals.  But then we get stuff like patty pan squash and eggplant.  What am I going to do with this?  I haven’t figured out the patty pan yet, but did find a use for the eggplant.  So Farmhouse Delivery, thank you for helping me to explore more in my kitchen.  And thanks, Sarah, for the recipe!  I feel more of an obligation to use the produce fully since, well, we paid for it, AND it’s fresh and local and delicious.  If I forget about a grocery store peach in the back corner of the fridge drawer I toss it out.  If I were to forget a farmhouse peach I would probably cry a few tears and have a little memorial service for the sweet and forgotten little guy. On to the recipes…

Spinach, Basil & Walnut Pesto

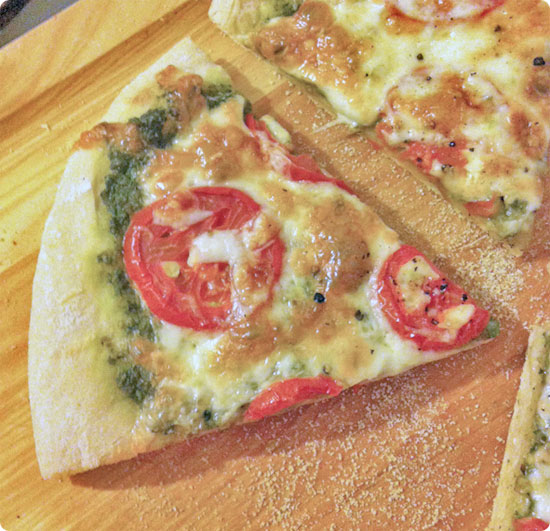
A big bag of fresh basil came one weekend, and so I made 2 batches of this pesto.  We ate it on pizza with mozzarella and farmhouse tomatoes.  Another night I mixed it in with penne pasta and chopped cherry tomatoes topped with grated Parmesan.  The leftovers from that meal got mixed with lots of mozzarella cheese, more pesto, more tomatoes and then baked in a casserole topped with Parmesan bread crumbs.  So many easy and delicious dinners out of one batch of pesto.

Ingredients

  • 4 cups baby spinach
  • 2 cups basil
  • 1/2 cup toasted walnuts
  • 1/4 to 1/2 cup olive oil
  • 1/4 cup grated Parmesan
  • 1/2 teaspoon salt, or to taste

Directions

  1. Rinse and pat dry spinach and basil.
  2. Put greens in the bowl of a food processor, pour walnuts over, sprinkle with salt and begin to pulse.  While pulsing, add olive oil in a stream until desired consistency is reached.  Taste and add more salt if needed.
  3. Transfer to a lidded container and store covered in the fridge or freeze for later use.

Quinoa Mac and Cheese Casserole

I’ve made this twice now.  It is sure to become a regular on our dinner menu.  The great thing is that you can change the vegetables, spices and cheese to make it fit your tastes or what you have available.  I used an onion from Farmhouse in this recipe, but other than that it’s a grocery store produce meal.  Don’t worry, I’m not getting all snooty about my produce…at least not forever.

Adapted from Eat, Live, Run

Ingredients

  • 1 1/2 cups dry quinoa
  • 3 cups chicken or vegetable broth
  • 1/2 onion, chopped
  • 1 red bell pepper, chopped
  • 1 green bell pepper, chopped
  • 3 green onions, chopped
  • 2 cloves minced garlic
  • 6 ounce bag fresh spinach
  • 8 ounces mushrooms, chopped
  • 1 cup milk
  • 2 cups grated white cheddar cheese
  • 1 cup Panko breadcrumbs
  • 1 tsp salt
  • 1/2 tsp dry mustard
  • 1/2 tsp black pepper

Directions

  1. Preheat oven to 350°F.
  2. Heat a drizzle of oil over medium heat in a large, deep saucepan.  Add the onion, bell peppers, scallions and saute for about four minutes, just until bell pepper has started to soften.   Add the mushrooms and spinach and cook until spinach is wilted.  Add the garlic and continue sauteing for another 30 seconds.
  3. Add quinoa to the pot, followed by the chicken broth, salt, dry mustard and pepper.  Bring to a boil then reduce heat and simmer for 15-20 minutes until all liquid has been absorbed, stirring just a couple times.
  4. Add 1 1/2 cups of the grated cheese and milk.  Stir to combine then pour into a greased 9 x 13″ casserole dish.
  5. In a small bowl, combine the Panko and the remaining cheese.  Sprinkle on top of casserole and bake for about 30 minutes until golden.

Mediterranean Eggplant and Quinoa Salad

Eggplant, onion, zucchini and tomatoes from Farmhouse and then a great punch from the lemon dressing and an herby freshness from the parsley and mint make this my kind of summer meal.  My sweet sister helped me find a recipe to use up my eggplant without feeling like I was eating eggplant.  I used her suggestions of using quinoa instead of barley, and adding in a can of chickpeas and crumbled feta.  This has made a terrific lunch the past couple days.

From Sarah, Adapted from Smitten Kitchen

Ingredients

  • 2 small to medium eggplants, peeled and cut into 1/2 inch cubes
  • 2-3 zucchini, cut into 1/2-inch cubes
  • 1/2 onion, halved then sliced
  • 10 tablespoons extra-virgin olive oil
  • 1 teaspoon salt
  • 1 teaspoon black pepper
  • 1 cup chopped scallion (from 1 bunch)
  • 1 1/2 teaspoons ground cumin
  • 1/2 teaspoon ground coriander
  • 1 1/2 cups quinoa
  • 1 garlic clove, minced
  • 3 cups reduced sodium chicken or vegetable broth
  • 2 tablespoons fresh lemon juice
  • 1/4 teaspoon sugar
  • 1/2 lb cherry tomatoes, quartered
  • 1 can chick peas, drained and rinsed
  • 1/3 cup Kalamata or other brine-cured black olives, pitted and halved
  • 1 cup chopped fresh flat-leaf parsley
  • 1/2 cup chopped fresh mint
  • 4-6 ounces crumbled feta

Directions

  1. Roast eggplant and zucchini: Put oven racks in upper and lower thirds of oven and preheat oven to 425°F.  Toss eggplant and zucchini and onion with 5 tablespoons oil, 3/4 teaspoon salt, and 3/4 teaspoon pepper in a bowl, then spread in 2 oiled large shallow (1-inch-deep) baking pans. Roast vegetables in oven, stirring occasionally and switching position of pans halfway through baking, until vegetables are golden brown and tender, 20 to 25 minutes total. Combine vegetables in 1 pan and cool.
  2. Cook Quinoa: Heat 2 tablespoons oil in a 3- to 4-quart heavy pot over moderately high heat until hot but not smoking, then cook scallion, cumin and coriander, stirring, until fragrant, about 1 minute.  Add quinoa and cook, stirring until well coated with oil, 2 minutes more.  Add broth and bring to a boil.  Reduce heat and simmer, covered, until all of liquid is absorbed and barley is tender, 20-25 minutes. Remove from heat and let stand, covered, 5 minutes. Transfer to reserved shallow baking pan and spread to quickly cool, uncovered, to room temperature, about 20 minutes.
  3. Make dressing and assemble salad: Whisk together lemon juice, sugar, and remaining 1/4 teaspoon salt, 1/4 teaspoon pepper, and 2-3 tablespoons oil in a large bowl.  Add quinoa, roasted vegetables, and remaining ingredients to bowl with dressing and toss until combined well.

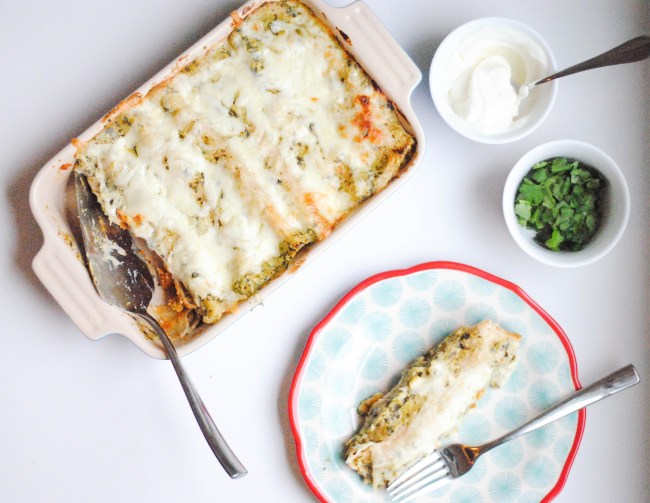
Green Chile Chicken Enchiladas with Greek Yogurt

The internet is a great place to peruse recipes and get new ideas for healthifying your meals.  I think I made that word up.  I like comfort food.  I like cheese, cream, sugar, butter, bacon, chocolate and all things bread.  Unfortunately, eating like that all the time would mean big trouble.  So I sometimes like to find ways to lighten up those calorie laden foods, even if it’s just a touch, so that we can enjoy them more often.

There are all kinds of tricks and substitutions people come up with for lightening up old favorites.  Sometimes you find something that sounds great, almost too good to be true…which a lot of the time means it is and the final product is not what you’d hoped it would be.  I once found a recipe for scalloped potatoes that used skim milk.  Skim milk!  No cream!  And it claimed to be the same creamy potato dish without all the fat.  They lied.  I ended up throwing the majority of it away.  So, I was worried about these enchiladas.  I love the idea of using non-fat greek yogurt instead of sour cream or a cream sauce, but wasn’t sure if it was going to work out.  But I’ve seen lots of recipes that make the substitution, so I gave it a try.  Thankfully this was one of those times that taking a chance worked out and we had a delicious dinner with a little less guilt than usually comes with a plateful of enchiladas.

The original recipe came from Meals and Moves, a blog I hadn’t come across until yesterday.  I changed very little, and would make just a couple additional changes when I make these again.  I used corn tortillas, because I believe there is no other way to make enchiladas.  I added cilantro, garlic, jalapeno and just a bit more cheese to the filling.  Next time I might add chopped green bell pepper to the veggies, maybe a little more chicken and the whole jalapeno, seeded for the spice sensitive (like myself these days).  But feel free to go for it with the seeds.  I’ll meet back up with you in September when I can handle it without a serious case of heartburn.  Too much information?  Sorry.

If you’re looking for a good side dish to serve with these enchiladas or any Tex-Mex meal, try this black bean and corn salad from Whole Foods.  It also makes for a good salsa and can be adapted to fit your tastes.  I like to add chopped tomatoes.

Green Chile Chicken Enchiladas with Greek Yogurt

Ingredients

  • 10 corn tortillas
  • 6-8 green onions, chopped
  • 1/2 jalapeno, diced small
  • 2 garlic cloves, minced
  • 1 can chopped green chiles (7-8 ounces total)
  • 1 teaspoon ground cumin
  • 2 cups cooked shredded chicken
  • 1 1/2 cups non fat Greek yogurt (a little more for topping)
  • 1 cup salsa verde
  • salt and pepper to taste
  • 1/2-1 cup shredded cheese (montery jack, colby jack, etc.)
  • 1/2-3/4 cup chopped cilantro (and a little extra for garnish)

Directions

  1. Heat a drizzle of oil in a skillet over medium high heat.  Add the green onions and the jalapeno and saute for 3-4 minutes.  Then add in the garlic and cook for another minute or so.  Add the green chiles, cumin and a dash of salt and cook for another 2-3 minutes.
  2. Mix the chicken into the warm vegetables and set aside.
  3. Combine the yogurt, salsa verde and cilantro in a bowl.  Add all but 1 cup of the yogurt mixture into the chicken mixture.  Add 1/4-1/2 cup of cheese to the chicken and mix to combine.
  4. Heat corn tortillas in 2 batches in the microwave, wrapped in slightly damp paper towels for about 30 seconds or until they are pliable.
  5. Coat a 9×13 pan with cooking spray.  Fill the center of a tortilla with about 1/3 cup of filling, roll up and lay seam side down in the pan.  Repeat with the remaining tortillas.  Some of your tortillas may crack, but it’s not a big deal.  (If you have extra space, extra tortillas and extra filling, cram another enchilada or 2 into the pan.)
  6. Spread remaining yogurt sauce over the enchiladas and then sprinkle with 1/4-1/2 cup of cheese.
  7. Bake for 25-30 minutes until cheese is melted and edges have started to brown.
  8. Garnish with a little yogurt and chopped cilantro.

Freezer Meals

With baby countdown at 2 weeks and 1 day I felt it necessary to make some freezer meals for those days (of which I’m sure there will be many) that I don’t have time to cook a real meal.  I searched quite a few websites for recipes that would freeze and reheat well.  I cannot attest to their post-freezer goodness , but I did some taste testing along the way and I was pleased with the flavors and a little upset that I wasn’t going to be able to enjoy the food for dinner that night.

I didn’t want to make typical freezer meals.  Lasagna, chili and casseroles that use cans of cream of whatever soup were just not the kind of meals I was looking for.  Yes, I like to make things difficult for myself.  Yes, I am a bit of a food snob.  Ask me a year from now, and I think my love of convenience foods will have grown.  But since I have the time now, why not make something extra good?

Here is what I ended up with in my freezer.  Click on the meal for a link to the recipe.  The pastitsio and shepherd’s pie include freezing instructions.  I added my own for the chicken pasta.

Pastitsio – a layered Greek noodle dish with ground beef, tomatoes and bechamel sauce.  The beef layer is spiced with olives, oregano, cinnamon and oregano.

Chicken Florentine Artichoke Bake – a bowtie pasta casserole with chicken, artichokes, spinach, sun-dried tomatoes and cheese.

Shepherd’s Pie – Turkey, tomato, peas, corn and mushrooms topped with mashed carrots and potatoes.

These are not the quickest meals to get prepped for the freezer.  But the time you spend now will be time you save in a few weeks or a couple months when you go to enjoy the results of your hard work.  I made the pastitsio the other afternooon, I think it took me about an hour and a half to cook and clean up.  I made the chicken pasta and shepherd’s pie Saturday morning, and I think my total chopping, cooking, boiling, packaging and cleaning time was 3 hours.  Here’s my kitchen during its worst moment on Saturday.

I know some of you have now decided that I am crazy to have spent that much of my Saturday morning on this project, but it’s something I’d planned to do…and so I had to do it.  I also kind of like spending that time in the kitchen and having something to show for it.  It makes me feel productive, and it’s a lot more fun that organizing the stacks of paper on the desk in the office.  And look at my fully stocked freezer!  Two 9×13 pans and two 8×8 pans of food waiting patiently to be eaten.  Why does this kind of thing make me happy?

Here are a few quick notes and changes on these recipes.  Some changes were made because of personal preferences, others because I forgot to or chose not to buy an ingredient.  I am becoming more and more comfortable with improvising in the kitchen.  It makes life so much easier, and it saves money too.  A jar of sun-dried tomatoes was going to set me back $5.99…so I used some sun-dried tomato pesto that I already had.  It makes me feel so resourceful when I can do things like that.

Pastitsio:

  • Left out the red wine
  • Used green olives instead of Kalamata
  • Used only 4 tablespoons of butter, 1 cup of milk and 1 egg in the pasta mixture
  • Use a LARGE and DEEP pan, I did not have room in a regular 9×13 to fit all the sauce.  It broke my heart to pour that creamy bechamel down the drain.

Chicken Florentine Artichoke Pasta

  • Cooked 2 chicken breasts in a skillet and chopped it up to make 2 cups
  • Used a 12 ounce package of pasta instead of 8 ounce
  • Used 2 tablespoons of sun dried tomato pesto instead of the chopped sun dried tomatoes
  • Freezer Instructions: Bake without bread crumbs for 15 minutes, then with bread crumbs for 5 minutes.  Let cool completely, then cover with plastic wrap and a couple layers of foil.  When ready to bake, let it thaw in the fridge overnight, then bake @ 350 F covered with foil for 20 minutes and without foil for 15-20 minutes or until nicely brown on top.

Shepherd’s Pie

  • Used 6 carrots and 4 large baking potatoes which was enough to top 2 8-inch pans
  • Made one of my pans with cheese, and one without
  • Used 1 1/2 cups mushrooms, 1 1/2 cups peas and 1 cup corn in addition to the meat and tomatoes

When Ben and I get around to eating these over the next couple months I will give some feedback about how the thawing and re-heating goes.  If you try them in the meantime and bake them right away, please let me know how they turn out!