Desserts

Dessert Recipes

Caramel Filled Pecan Brownies

While I was with my family recently, one of my sisters mentioned that she was perusing the blog and came across a recipe with some horrendous photographs.  There are lots of these posts.  I haven’t taken them down, and I don’t plan to.  Even though running across them is like finding old college pics that someone else posted on facebook from a night you kind of want to forget, I’m keeping them up.  One of the main reasons is that many of them are good recipes!  But we all know that the world of food blogging requires more than just a good recipe.  You’d better have some pictures that make people want to make the recipe.  I don’t know about you, but these pictures make me want caramel filled brownies.

Caramel Filled Brownies-6

Caramel Filled Brownies-7I decided that I would make a little project out of going back through some of my old posts that have really great recipes and re-doing them, without taking the old ones down.  It’s fun to see how far I’ve come in taking pictures of food, writing about the food, and I even think I’ve become a better baker and cook in the past 8 years or so that I’ve had this blog.  Here is the old post for these brownies.  It was just about 6 and a half years ago.  These pictures were taken in our little apartment in China Spring while I was teaching school and Ben was in law school.  Things are pretty different for us now!

Caramel Filled Brownies

This recipe is from The Pastry Queen.  It’s a great cookbook.  Everything is delicious.  If you’ve read my blog before you’ve likely heard me (if you can “hear” something in writing) sing its praises.  I only changed one thing from the original recipe, and that was to use a bag of those caramel bits instead of unwrapping a bunch of caramels.  It worked out just fine.

I highly advise cutting these cold from the fridge and even eating them cold is a great idea.  However, warming one briefly in the microwave and topping it with a little vanilla ice cream isn’t a bad way to enjoy these brownies.

Caramel Filled Brownies-4

Caramel Filled Pecan Brownies

From The Pastry Queen by Rebecca Rather

Ingredients

  • 1 1/2 cups pecan pieces
  • 1 cup (2 sticks) unsalted butter
  • 12 ounces bittersweet chocolate, coarsely chopped
  • 1 1/2 cups sugar
  • 4 large eggs
  • 1 tablespoon vanilla extract
  • 1 1/4 cups all-purpose flour
  • 1/2 teaspoon salt
  • 1 package (11 ounces) caramel bits
  • 1/3 cup whipping cream
  • 1 cup semisweet chocolate chips

Directions

  1. Preheat oven to 350°F.
  2. Toast pecans for about 8 minutes, until they are fragrant but before they begin to get too dark.  Break apart any large pieces and set them aside.
  3. Line a 9- by 13-inch baking pan with aluminum foil, leaving some overhang. Grease foil generously with shortening.  Set aside.
  4. Combine butter and chocolate in a medium-sized heavy saucepan and cook over low heat, stirring occasionally, until melted and smooth.  Do not let it burn.  Transfer chocolate to a large bowl and let cool for a few minutes.  Add in the sugar, eggs, and vanilla, and mix (with a whisk, hand mixer or a stand mixer) until thick and glossy. (
  5. Whisk or stir in flour and salt. Transfer half of batter (about 2 cups) to baking pan and spread evenly, sprinkle half of the pecans over the batter and bake for 20 minutes. Let cool for about 20 minutes.
  6. Once the brownies cool, melt caramels and cream in a medium-sized heavy saucepan and stir over low heat until completely melted and smooth.  Immediately spread caramel mixture over baked brownies.  Pour remaining brownie batter evenly over caramel mixture and spread gently to cover, being careful not to mix up the brownie and caramel layers.
  7. Sprinkle chocolate chips and remaining pecans on top and bake for 20 minutes. Cool, then transfer to the fridge for at least a few hours.
  8. Lift brownies out of the pan by lifting the foil.  Remove the foil carefully, bring sure to get all of it off, especially around the edges and the corners where the caramel will stick. Cut brownies into squares.  Serve at room temp or cold.  Store in an airtight container in the fridge.


Daring Bakers: Tarte Tatin

This is one of those classic desserts that I can’t believe I haven’t made before!  Thanks again, Daring Bakers, for getting me to try something new and delicious.  And so beautiful!

Tartetatin-14

Tartetatin-11

 For the March Daring bakers’ challenge, Korena from Korena in the Kitchen taught us that some treats are best enjoyed upside down. She challenged us to make a tarte tatin from scratch.

Since I of course didn’t make this until 2 days before the posting date and I am off to visit family for the weekend I am going to keep this post pretty short.  The recipe worked wonderfully well and I had no issues whatsoever.  I would do it all the same the next time around.

Except for the apples.  Mine were HUGE and I used the recommend 6 called for and had a bunch left over.  You want more apples than the pan can hold since they do cook down, but I had probably 2 apples worth of slices left.  That being said, I’d rather have too much than not enough.

The recipe for the pastry is easy and bakes up so flaky I know I’ll be making it again.  I can’t believe I almost cheated and used a frozen puff pastry!

Tartetatin-5

Tartetatin-6

The caramel is a time consuming but fun project!  Forgive these photos, but I thought it would be helpful to see the process.  If I didn’t know the stages the sugar would go through I would’ve thought something was going terribly wrong.  So, no need to worry when the sugar gets all nasty and clumpy and looks like nothing good can come from it.  Something very good is coming.  Just keep stirring and be patient.

20150326_144700000_iOS

The apples get wonderfully soft in the rich caramel.  A scoop of plain vanilla bean ice cream is the perfect accompaniment to this rich dessert.

Tartetatin

Tartetatin-2


After arranging the apples and letting them cool a bit, place the crust on top and bake.  I wasn’t supposed to let the tarte cool all the way before unmolding, so I was worried that it wouldn’t come out cleanly.  I warmed the pan on the stove very breifly and it came out perfectly.

Tartetatin-7

Tartetatin-8

Tartetatin-13

This is a beautiful dessert, perfect for impressing your guests!  Or perfect to make for yourself and your baked good-loving toddler when your husband has gone out of town…

Tartetatin-15

Tartetatin-17

Tartetatin-18

Tarte Tatin

Pastry

Ingredients

  • 1 cup all-purpose flour
  • 2/3 cup ( 5 ounces) unsalted butter, cold
  • ¼ tsp fine salt
  • ¼ cup ice cold water

Directions

  1. Pulse flour, butter and salt in a food processor until butter is in pea sized pieces.
  2. Stream in the water until the dough just comes together.
  3. Turn out on a floured surface and press together into a square.
  4. Roll into a 10 inch rectangle.  Fold the top third of the dough down and the bottom third up so that you have 3 layers.  Rotate 1/4 turn and repeat this process 4 more times.
  5. Wrap in plastic and refrigerate at least one hour, but up to a day.

Filling

Ingredients

  • 4 large or 5-6 medium-sized apples (I used Granny Smith)
  • Juice of half a lemon
  • 6 tablespoons unsalted butter
  • 1-1/3 cups granulated sugar, divided
  • pinch salt

Directions

  1. Peel the apples and cut them into 4-6 pieces depending on the size of the apples. Remove the cores in such a way that each apple quarter has a flat inner side: when placed rounded-side-up, it should sit on a flat base. Place the apples in a large bowl and toss with the lemon juice and 1/3 cup sugar. This will help draw out some of the moisture from the apples and prevent an overly runny caramel. Set aside for 15 minutes.
  2. Melt the butter in a very heavy, 9” or 10″ oven-proof saucepan over medium heat, then sprinkle with the remaining 1 cup sugar. Stir with a whisk until the sugar melts and becomes a pale, smooth caramel. The sugar will seem dry and chunky at first, then will start to melt and smooth out. If the butter appears to separate out from the caramel, just keep whisking until it is a cohesive sauce.  This can be a long process, but it eventually works! Remove from the heat.
  3. Preheat oven to 375F.  Discard the liquid that has come out of the apples, then add the apple quarters to the caramel, round side down. They won’t all fit in a single layer at first, but as they cook they will shrink a bit. Cook over medium heat for 10-15 minutes, pressing down gently on the apples with a spoon to cover them in the caramel liquid. Move the apples around the pan gently so that they all cook evenly, trying to keep them round side down. When the apples have shrunk enough to mostly fit in a single layer and are starting to soften but still keep their shape, remove the pan from the heat.
  4. With a wooden spoon, arrange the apples, round side down, in a single layer of concentric circles covering the bottom of the pan. Set aside until the filling stops steaming before covering with pastry.
  5. Remove the pastry from the fridge, roll it out on a lightly floured surface, and trim it into a circle about 1″ in diameter larger than your saucepan. Lay it over the filling, tucking in the edges between the apples and the sides of the pan, and cut a few steam vents in the pastry. Place the saucepan on a rimmed baking sheet (just in case the filling decides to bubble over the sides) and place in the preheated oven and bake for 20 minutes, then increase the heat to 400°F for 5 minutes.  Keep and eye on it so it doesn’t get too dark.
  6. Remove from the oven and let sit just until the caramel stops bubbling. Immediately place a serving platter (slightly larger in diameter than the saucepan) over the pastry. Wearing oven mitts, grab hold of the saucepan and platter and quickly invert everything to unmold the Tatin onto the platter. If any of the apples stick to the pan or come out of place, rearrange them with a spatula.
  7. The tarte can be served warm from the oven or at room temperature. Suggested accompaniments include vanilla ice cream, whipped cream, or crème fraîche.


Pie for Pi Day: Blueberry Cream Cheese Streusel Mini Pies

I’m jumping on the Pi day bandwagon!  And why not?  Any excuse to make pie.  And I also happen to love dates that have some numerical-mathematical significance.  3-14-15 and 3.1415!  It’s amazing!  And tasty.

DSC_0620

And oh my goodness.  These sweet little pies are magical.  The best way I can describe them is to compare them to those Duncan Hines boxed mix blueberry muffins with the can of blueberries and the streusel topping.  Making those is one of earliest memories I have of baking something on my own.  If you haven’t ever had them before you are missing something special.

DSC_0599

These came into being so perfectly.  I had a frozen pie crust (this recipe from Smitten Kitchen), a can of blueberry pie filling (don’t judge), a half package of cream cheese and some leftover frozen streusel from kolaches (this recipe).  All of that came together to make something so incredible that I will be making these again without changing a thing.

Aside from making the pie crust there isn’t much work to do.

Prepare the crusts.

DSC_0569

Spread with cream cheese.

DSC_0572

Fill.

DSC_0575

Top.

DSC_0576

Bake.

DSC_0582

You could make this in a regular pie plate, but these mini pie pans are a generous individual size and I really liked the way the pies baked in them.  After the pies cooled they were very easily removed from the pans.  They seem pricey, but are worth it.  They’d be great for pot pies, too.

DSC_0634

Go enjoy Pi day and have a great weekend!

Blueberry Cream Cheese Streusel Mini Pies

Ingredients

  • 1 unbaked pie crust for a 9-inch pie
  • 5 ounces cream cheese, softened
  • 1 1/2 tablespoons sugar
  • 1 can blueberry pie filling

For Streusel

  • 1/2 cup sugar
  • 1/2 cup flour
  • 3 tablespoons butter, chilled

Directions

  1. Make streusel: Use a pastry blender to combine sugar, flour and butter.  Chill.
  2. Preheat oven to 400°F.
  3. Divide the pie crust into 4 pieces, roll each piece out into a circle that fits into the pan.  Trim the edges.  Freeze for 20 minutes.
  4. Beat cream cheese and 1 1/2 tablespoons of sugar together until well combined.  Spread cream cheese mixture into the bottom of each pie.
  5. Top with blueberry filling.
  6. Top with streusel.
  7. Place pies on a baking sheet and bake for 15 minutes, then reduce the heat to 350F and bake for another 10-15 minutes until the crusts and tops are golden brown.  If they brown too quickly top with a sheet of foil.
  8. Let cool and then serve warm or room temp with vanilla ice cream.


Crunchy Coconut and Oat Bars

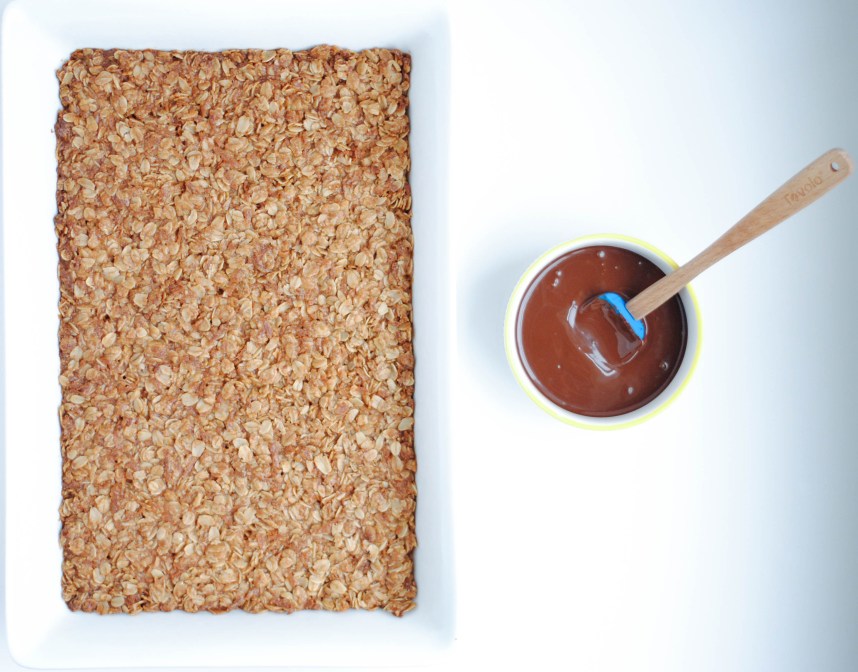
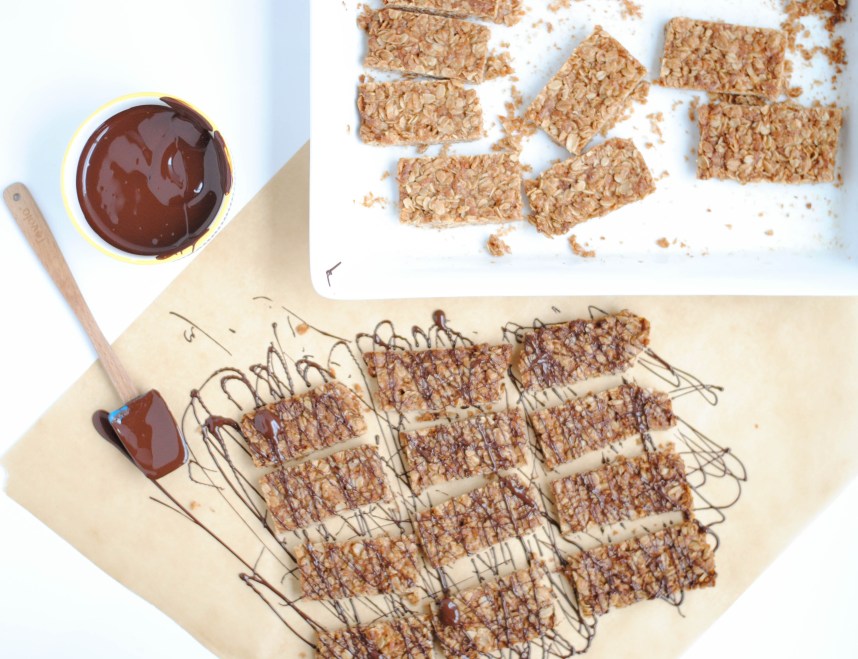
Sometimes you just need to bake something.  Maybe the weather is dreary, you’ve had a bad day, or, if you’re anything like me, you just need a project that has a beginning and an end and tangible (and edible!) results because no other task you’ve attempted that day has been successfully completed.  You want something quick with very little prep and a short bake time so that you don’t have to wait long to enjoy the fruits of your labor.  These oatmeal bars meet every one of those qualifications AND they’re delicious.  They remind me a lot of the oat and honey Nature Valley bars.  Drizzle on some melted chocolate chips to make them a bit fancier, but they are really good just on their own.

Crunchy Coconut and Oat Bars | Hottie Biscotti

This recipe is from a cookbook I have baked from a lot, but it’s been a while, Rebecca Rather’s Pastry Queen.  It is one of my favorite dessert cookbooks.  Most of you probably scrounge around on the internet for recipes, like I do.  But then you browse an old cookbook and find a real gem and you tell yourself you’ll do it more often.  But you somehow find yourself going back to the computer or pinterest the next time.  I urge you to go to your cookbooks!  I have so many of them, some I have never even cooked from.  And that’s a shame.  I vow to do more cooking from physical cookbooks.  You should join me.  Back to the bars.

Crunchy Coconut and Oat Bars | Hottie Biscotti

If you bake at all, then you have everything you need for these bars.  They come together in a snap and bake up in a mere 20 minutes.  After cooling they are very crunchy, so slicing them is really more like sawing or chopping.  If you’re not so concerned with appearance you can just break them apart into pieces.  Those pieces might be amazing along with a bowl of vanilla ice cream…and some hot fudge…

Crunchy Coconut and Oat Bars | Hottie Biscotti

Crunchy Coconut and Oat Bars | Hottie Biscotti

Crunchy Coconut and Oat Bars

From The Pastry Queen

Ingredients

  • 1 stick butter
  • 1/2 cup dark brown sugar
  • 1 tablespoon corn syrup
  • 2 cups old fashioned oats
  • 1 teaspoon baking powder
  • 1/2 teaspoon salt
  • 1/2 teaspoon cinnamon
  • 1/3 cup sweetened shredded coconut
  • 1/2 cup chocolate chips (optional)

Directions

  1. Preheat oven to 350°F and grease a 9×13 pan.
  2. Melt butter, brown sugar and corn syrup over medium heat.  Stir until sugar dissolves, 1 to 2 minutes.  Remove from the heat.
  3. In a large bowl stir together oats, baking powder, salt, cinnamon and coconut.  Pour melted butter over and stir to combine thoroughly.
  4. Press firmly into the prepared pan and bake for 20-25 minutes.
  5. Cool for 20 minutes before cutting into bars.
  6. Melt chocolate and drizzle over bars or dip them.


Caramel Chocolate Chip and Pretzel Cookies

At my bi-weekly trip to Target I found a bag of Nestle chocolate chips that are filled with caramel!  Of course I bought them.  There was no other choice.  They played a big part in making these chocolate chip cookies super delicious.

DSC_0737

I’ve had the recipe for Big and Chewy Chocolate Chip Cookies marked in my Test Kitchen Family Cookbook for a while now. I’m not sure why it took me so long to make them. I finally made them when I needed a quick dessert to include with a meal for a friend who just had a baby. The casserole I made for them was really simple, quick, delicious AND kid friendly.  I’ll have to share that one soon.

DSC_0706

Along with the heavenly filled chips I added some crushed up pretzels to these cookies.  They didn’t stand out in flavor but definitely added a different texture to the cookies which made them extra special.  These are truly thick and chewy chocolate chip cookies, so if you’re looking for a thin variety look here or here.

One thing I love about these cookies is that you don’t have to soften butter! You just have to melt it.  This makes the interior of the cookie chewy.  I also love the extra yolks, for two reasons. One, it makes the cookie soft and tender. Two, I have extra whites ready to add in to my scrambled eggs.  I hate using just the whites and throwing away the yolks.  So this way I get to use the whole egg and not be wasteful.  Win-win.

The base of this cookie is just begging for some different mix-ins.  What are your favorite things to add in to your chocolate chip cookies?

DSC_0732

Caramel Chocolate Chip and Pretzel Cookies

From America’s Test Kitchen Family Cookbook


S’mores Pudding Cups

First off, how much fun is this animated GIF?!  And it’s so easy to make.  I use Photoshop Elements and this took me maybe 15 minutes start to finish, including photo editing.  Gotta love those people who post YouTube tutorials!  You can rest assured that if something I make has layers you’ll be seeing one of these again.

smores7

This sweet dessert is inspired by the s’mores pot de creme at Sweet Houston.  Their version is a little different.  They have a layer of chocolate cake crumbles (I think) along with the graham layer, chocolate mousse (or maybe it’s pudding) and marshmallow cream.  They come in darling little glass jars, but I found that these Beechnut baby food jars work just as well!

(more…)

Daring Bakers: Mini Esterhazy Torte

Right now I am in a dreamy state after sampling and photographing this incredible cake!  If you need a special dessert and you’re a hazelnut fan, you should seriously consider taking the time to whip this up.  You will thank me for the rest of your life.

esterhazy10

For the month of January Jelena from A Kingdom for a Cake invited us to start this year with a dreamy celebration cake. She challenged us to make the Esterhazy cake a.k.a the Hungarian dream. What better way to start the year than with a sweet dream?

(more…)

Oatmeal Raisin Cookies

This is my husband’s favorite cookie.  I made 200+ of them as favors for our wedding guests.  After trying many recipes I found that the one on the bottom of the lid of the Quaker Oats container was my favorite.  But when I saw this one in my Test Kitchen cookbook I thought I’d give it a try.  You know, for research.  They are quite good and may give the Quaker recipe a run for its money.

oatmealraisin7

But really a fair comparison can’t be made.  I’d probably have to have them side by side to decide which is better.  These are puffier and more tender than the others, they are more full of oats and are flavored with nutmeg instead of cinnamon.  I kind of missed the cinnamon, so I’d add some the next time.  I might also add more raisins.

(more…)

Fudge Brownie Pie with Graham Crust

I’m working my way through some recipes in the Milk Bar cookbook and really enjoying it so far!  If you missed this post, then check it out now.  Those cookies will blow your socks off.  This is another one that is on the simple side, not at all daunting.  It wasn’t what I expected when I saw “brownie pie”, but was quite delicious and something I’d definitely make again.

browniepie4

(more…)

Rosemary and Brown Butter Pecan Blondies

Did anyone else have the post-Thanksgiving blues?  I got home after a week with family and had a rough time adjusting back to normal life.  I wanted to stay in my pajamas and in bed all day.  I scoured the freezer for meals, bought groceries to make pot pies but when it came time to make them I just didn’t want to do it so we ordered pizza, and one night I ate salad straight from the plastic container it came in instead of using a plate.  Keeping it classy, y’all.  I am back from my hiatus and have even cooked a couple of proper meals this week.  Hopefully my post-Christmas blues don’t find me in this same predicament…

Christmas is fast approaching and while my shopping is mostly completed and our tree and lights are up I feel like I have a lot of cooking still to do.  I’m excited to make some of the nostalgic cookies that bring me right back to my childhood, but I always like to try my hand at something new.  So along with some reliable and time-tested recipes, I’ll also share some new ones that would be perfect for the holiday season.

I have a thing for rosemary.  An herb that is lovely in savory dishes but really gets along well with sweet flavors, rosemary is also incredibly easy to grow.  In fact, the rosemary plant I thought was dead and moved to the side yard to die a slow death is doing better than the one I have been caring for on the back porch.  That should give you an idea of my gardening skills.  The blog is already full of sweets that feature rosemary, but that isn’t stopping me from sharing another one with you!

rosemaryblondies

These blondies were a big hit with my husband, who prefers his sweets more on the savory side.  My 4-year-old was not a fan.  My 2-year old ate them up happily, a girl after my own heart.  It has butter and sugar in it?  We are in.

Brown butter and dark brown sugar make these blondies quite rich.  Add pecans and rosemary to the mix and the flavors are all warm and rich.  The cranberries are a welcomed sweet-tart addition that make these blondies more balanced and super delicious.

I went heavy on the salt and rosemary, but realize that not everyone has my taste buds.  Opt for less salt and less rosemary if you’re skeptical.  Then if you think it needs more you can adjust the next time.  I usually say it’s better to have too much than not enough, but that’s not the case with those ingredients.

rosemaryblondies2

 Rosemary and Brown Butter Pecan Blondies

Adapted from Tasty Kitchen

Ingredients

  • 1 3/4 cup flour
  • 2 1/2 teaspoons baking powder
  • 1-2 teaspoons chopped, fresh rosemary
  • 1-2 teaspoons salt
  • 8 tablespoons butter
  • 2 1/4 cups dark brown sugar
  • 1 teaspoon vanilla
  • 2 eggs
  • 1 cup toasted pecans, roughly chopped
  • 1 cup dried cranberries

Directions

  1. Brown butter: Place butter in a small saucepan and heat over low-medium heat until butter begins to sizzle and spit.  Reduce heat to low, watch closely and swirl the pan occasionally just until butter smells nutty.  Pour into a bowl and let cool slightly.
  2. Preheat oven to 325°F and butter a 9×13 pan.
  3. Whisk flour, baking powder, salt and rosemary together in a small bowl.
  4. Beat cooled butter and brown sugar together.  Add eggs and vanilla and beat well.
  5. Mix in flour mixture and then the pecans and cranberries.
  6. Spread batter into the pan and bake for 20-25 minutes.
  7. Cool before cutting and serving.