About Carrie Zinnecker

Posts by Carrie Zinnecker:

Cherry, Almond and Coconut Bread

A fellow 6th grade math teacher gave me a bag of Amish friendship bread starter about a 6 weeks ago and I have been going strong giving away starter and baking bread every ten days since then.  The problem now is that I’m running out of friends to give it to!  Nothing like realizing you only have 12 friends to really boost the self esteem.  Sad day.  Anyone in Amarillo need some starter?  Let me know.  I will even drive it to your house.  There is one caveat, you have to then become my friend…

I’ve tried a few variations on the basic cinnamon bread.

  1. butterscotch pudding with toffee bits
  2. butterscotch pudding with toffee bits and vanilla chips
  3. vanilla pudding with pecans
  4. chocolate pudding with white chocolate chips

These cookies I made last week inspired my latest bread experiment.  Seeing as how I had dried cherries, almonds and coconut on hand it only seemed natural to give these ingredients a chance in the bread.  I made one loaf plain with vanilla pudding and cinnamon, and to the remaining batter I added the cherries, almonds and coconut; about a handful of each.  What am I doing?  No measuring?  I think I’m turning in to Rachel Ray!  Before you know it I am going to be writing EVOO in my posts and giving all my posts super cutesy names!  OK, OK.  I will not turn in to Rachel Ray.  I will tell you that the amounts were about 3/4 cup each.  Give or take…

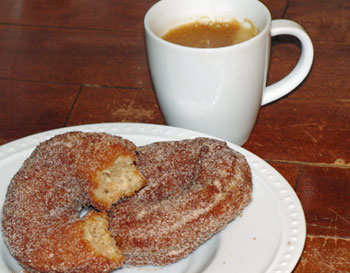
If you have friendship bread starter, then just add 3/4 cup each cherries, sliced almonds and sweetened shredded coconut.  If you do NOT have starter, then you can try to make your own using the following recipe from allrecipes.com.  After you make the starter you can make the bread!  The recipe I have been using is at the bottom of this post.  One of the best parts about this bread is the cinnamon sugar coated pans.  It gives such a wonderful, crunchy exterior.  I used some Sugar in the Raw on top of my loaves and it was incredibly good.  Perfect crunchy sweetness.

(more…)

Croque Monsieur Mac and Cheese

Macaroni and cheese has become one of my favorite things to cook and something that I can count on Ben being happy about having for dinner almost 100% of the time.  I love that there are endless options when it comes to this dish.  You can go plain and simple with traditional elbow macaroni and cheddar cheese.  You can mix things up and add chicken or ham for a meaty version.  This one with chicken was great.  Vegetables are another great addition.  This green chile mac and cheese was incredible.  I would like to try a mac and cheese with cauliflower or broccoli sometime.

This recipe pays tribute to the amazing French ham and cheese sandwich of the same name.  I’ve made croque monsieurs and madames and they are both delicious sandwiches, so there was no possible way that this could be anything less than incredible!  It was more than incredible.  It was life altering and something I will definitely make again, but not regularly since gruyere cheese is not exactly cheap.  I think it was something like $13.99 per pound at my grocery store, but can apparently set you back even more if you order it from this artisanal cheese site.  Yikes.  You could use Swiss cheese and it would be just as good.

(more…)

Kitchen Sink Carrot Cake

This recipe came to me through my magical Google reader.  I love this thing.  I don’t have to go from blog to blog looking for new posts.  The new posts come to me!  That is how life should be, right?  You want it…it arrives.  If only everything in life was like this…or would that be too boring?  Always getting what you wanted when you wanted it?  Another topic for another time…

Almost all of the posts I read are foodie blogs.  I have a few news feeds from Amarillo and Austin as well as a few design blogs including my sister-in-law’s blog Grey is Pink which has some design, some fashion and some life stories.  I have to sift through lots of recipes every day as many bloggers post at least once a day.  I must admit this, the pictures are what hook me.  If there is a tasty looking photo to accompany a tasty sounding recipe, I am in.  This is how I happened upon this recipe for carrot cake.

King Arthur Flour has a ton of yummy sounding recipes.  Their blog, Baker’s Banter, tests some of those recipes and gives an honest opinion of their success and also includes step-by-step photos to accompany the recipe.  So, I won’t make you look at my step-by-step photos since the one’s on Baker’s Banter are pretty thorough.  I will just show you this one photo of my completed cake since many of the ones I took did not turn out that great.  This cake is full of so many yummy ingredients that I could barely control my pure and utter happiness!  Carrots, pecans, coconut and pineapple.  Yum.  The cream cheese icing isn’t too sweet, but sweet enough to pair perfectly with the mild sweetness of the cake.  You will not be disappointed if you enjoy a carrot cake like this…packed with all kinds of goodness and topped with creamy frosting.

Kitchen Sink Carrot Cake

Courtesy of King Arthur Flour

Cake Ingredients
  • 4 large eggs
  • 1 cup granulated sugar
  • 3/4 cup brown sugar
  • 2 teaspoons vanilla extract
  • 3/4 cup melted butter
  • 3/4 cup vegetable oil
  • 2 cups flour
  • 1 1/2 teaspoons baking powder
  • 1 teaspoon baking soda
  • 1 1/2 teaspoons salt
  • 2 teaspoons cinnamon
  • ½ teaspoon nutmeg
  • 1/8 teaspoon allspice
  • 3 ½  cups finely grated carrots
  • 1 cup diced pecans or walnuts, toasted if desired
  • 1 cup shredded unsweetened coconut (preferred) or sweetened coconut
  • 1 8-ounce can crushed pineapple, drained and squeezed dry
Frosting Ingredients
  • 6 tablespoons butter, at room temperature
  • 1 (8 ounce) package cream cheese, softened
  • 1 teaspoon vanilla extract
  • 1/8 teaspoon salt
  • 3 ½ cups confectioners’ sugar, sifted
  • 2 tablespoons milk, or enough to make frosting spreadable
Directions
  1. Preheat the oven to 350°F. Lightly grease a 9″ x 13″ pan.
  2. Beat the eggs, sugars, and vanilla in a large mixing bowl till smooth, about 2 minutes at medium-high speed.
  3. Mix the melted butter with the oil. With the beater running, add the oil mixture in a stream, beating till smooth.
  4. In a separate bowl, whisk together the flour, leaveners, salt, and spices. Add these dry ingredients to the wet ingredients, stirring to make a smooth batter.
  5. Stir in the carrots, nuts, coconut, and pineapple.
  6. Spoon the batter into the pan, spreading it to the edges.
  7. Bake the cake for 40 to 50 minutes, until the cake is golden brown, and a cake tester inserted into the center comes out clean.
  8. Remove the cake from the oven, and cool right in the pan.
  9. When it’s completely cool, make the frosting.
  10. Combine the butter, cream cheese, vanilla, and salt in a medium-sized bowl, and beat together until light and fluffy.
  11. Add the sugar gradually, beating well.
  12. Add the milk a little at a time, until the frosting is a spreadable consistency.
  13. Spread frosting over the cake. Garnish with minced crystallized ginger, if desired.

Yield: 9″ x 13″ sheet cake, about 24 servings.

Cherry, Almond & Coconut Oatmeal Cookies

When Ben ate one of these he practically fell over, overtaken by deliciousness.  The tart cherries, sweet coconut, crunchy almonds and oats make this an incredible cookie.  I have nothing else to say.  Enjoy.

Cherry, Almond & Coconut Oatmeal Cookies
Ingredients
  • 1/2 cup shortening
  • 1/2 cup butter, room temperature
  • 1 cup dark brown sugar
  • 1/2 cup white sugar
  • 2 eggs
  • 1 teaspoon vanilla
  • 1 1/4 cup flour
  • 1/2 teaspoon baking soda
  • 2 teaspoons ground cinnamon
  • 1 teaspoon salt
  • 3 cups quick cooking oats
  • 1 cup blanched, chopped
  • 1 cup shredded coconut
  • 1 cup dried cherries (or cranberries)
Directions
  1. Preheat the oven to 350°
  2. In a large bowl, cream together butter, shortening, brown sugar, and white sugar until fluffy.
  3. Beat in eggs one at a time, then add the vanilla.
  4. Combine the flour, baking soda, salt, and cinnamon; stir into the creamed mixture. Mix in oats, almonds, coconut and cherries until just blended.
  5. Drop by rounded tablespoons onto cookie sheets, about 6 to a sheet.
  6. Bake for 10-12 minutes rotating half-way through. Cool cookies on a wire rack.

Pistachio and Almond Baklava

Happy National Pistachio Day!  Ok, so I missed it by about 11 days but better late than never.  In belated honor of this wonderful holiday I made this baklava Sunday night to accompany a Greek meal I made with my mother and sister-in-law who came to visit along with Ben’s Grandma Betty.  Having company is wonderful, and having lovely company is even better.

Baklava is an impressive looking dessert.  It’s crisp sweet layers of dough encasing crunchy, salty nuts all enrobed in a honey syrup is simply irresistible.  The best part is that baklava is not as hard as it seems.  The phyllo dough isn’t hard to work with as long as you keep it covered with a moist towel in between removing sheets for layering.

You can use any combination of nuts in the baklava.  Pistachios seem to be traditional, but I have seen recipes that use all kinds of nuts.  I like the combination of pistachios and almonds here.  The amount of butter you use may seem like a lot, but you need it to get all the layers to stick together properly.  Give in.  Use the butter, and love the butter.  You know you want to.

Pistachio and Almond Baklava

Adapted from allrecipes.com

Ingredients
  • 1 (16 ounce) package phyllo dough
  • 8 ounces chopped roasted almonds
  • 6 ounces chopped roasted pistachios
  • 1 cup butter, melted
  • 1 teaspoon ground cinnamon
  • 1/2 teaspoon ground cardamom
  • 1 cup water
  • 1 cup white sugar
  • 1 teaspoon vanilla extract
  • 1/2 cup honey
Directions
  1. Preheat oven to 350 degrees F(175 degrees C). Butter the bottoms and sides of a 9×13 inch pan.
  2. Chop nuts and toss with cinnamon and cardamom. Set aside.
  3. Unroll phyllo dough.  Cover phyllo with a dampened cloth to keep from drying out as you work.
  4. Place two sheets of dough in pan, butter thoroughly. Repeat until you have 8 sheets layered. Sprinkle 4 tablespoons of nut mixture on top.
  5. Top with two sheets of dough, brush with butter, then layer with nuts after you have 6 layers of phyllo. The top layer should be about 6 – 8 sheets deep.
  6. Using a sharp knife cut into diamond or square shapes all the way to the bottom of the pan.
  7. Bake for about 50 minutes until baklava is golden and crisp.
  8. Make sauce while baklava is baking. Boil sugar and water until sugar is melted. Add vanilla and honey. Simmer for 15-20 minutes.
  9. Remove baklava from oven and immediately spoon sauce over it. Let cool.

Cheryl’s Chicken Fried Steak

This was not restaurant style chicken fried steak with the thick, crunchy exterior and white cream gravy.  This chicken fried steak had a thinner crust and the gravy was not the thick white kind with specks of peppercorns that I am used to.  The gravy I made has a thinner consistency and a darker caramel color with specks of thyme.  So, this is not exactly what you get when you order chicken fried steak at Lone Star Cafe like I remember getting as a kid.  I remember it looking something like this.I always ordered the kids meal version, or a half order, but it always came out looking huge and daunting.  Somehow I managed to scarf down every bit along with the buttery Texas toast which I used to sop up the extra gravy.  Oh man.  Those were good times.

This chicken fried steak is a bit different.  It is homemade.  It is comforting.  And it is delicious. I got the recipe from a woman I met here in Amarillo.  She grew up here and remembers having this at least once a week if not more often when she was a kid.

This is beef country, people.  A great deal of the economy depends on it.  I wake up on many mornings and can smell the feed lots when I let the dog out.  My grandpa Marvin appropriately calls it the “money smell”.  Texans love their beef, but Amarillo-ans LOVE their beef.  This may be a stereotype, but it’s a stereotype that is true and in no way negative.  Beef is good, and so is chicken fried steak.

The gravy recipe is not all hers, she admits.  She once watched an Alton Brown show where he added fresh thyme to the gravy.  Intrigued, she used it the next time she made her gravy and hasn’t gone back since.  You can’t help but love Alton Brown.  He stays true to what a dish originally was and only adds to it if it really and truly makes it better.  You wouldn’t catch him adding something weird like lavender to a chicken fried steak gravy, but I am sure some ridiculous chef out there has.

Cheryl wasn’t very specific in her measurements, but I think it all turned out OK.  I am a big fan of recipe following, so the term “some flour” kinda freaks me out.  But really when you think about it, the ingredients in chicken fried steak are simple and do not require a lot of measuring.  If it sticks to the steak, then that’s how much you need.  If there are naked spots, then you need more.  Pretty easy.

I served this with mashed potatoes and steamed green beans.  A few slices of buttered Texas toast would have been a good idea, but I was not quite on top of things enough to get Texas toast when I was at the grocery store.

Here is Cheryl’s recipe for the steaks and Alton Brown’s Gravy.

Cheryl’s Chicken Fried Steak
  • 4 pieces of tenderized round steak, pounded thin
  • 2 cups flour
  • 1-2 teaspoons salt
  • 1-2 teaspoons black pepper
  • 2-3 eggs, beaten
  • vegetable oil
  1. Whisk the flour, salt and pepper in a large, wide dish.
  2. Whisk the eggs in a seperate large wide dish.
  3. Dredge steaks in flour, then eggs, then flour once more.
  4. Let the steaks sit for a few minutes while you heat enough oil to cover the bottom of a large skillet over medium high heat.
  5. Cook steaks in oil for about 5 minutes, flip and cook for about 3 minutes more.  Transfer to a plate and keep warm in a 200° oven while you cook the remaining steaks.
Alton’s Creamy Gravy
  • 2 cups chicken broth
  • 1/2 cup whole milk
  • 1/2 teaspoon fresh thyme leaves
  • salt and pepper to taste
  1. After cooking the steaks, heat the remaining cooking oil and tasty bits left over medium heat.
  2. Whisk in 3 tablespoons of the flour left over from the dredging.
  3. Add the chicken broth and deglaze the pan.
  4. Whisk until the gravy comes to a boil and begins to thicken.
  5. Add the milk and thyme and whisk until the gravy coats the back of a spoon, approximately 5 to 10 minutes. S
  6. eason to taste, with more salt and pepper, if needed. Serve the gravy over the steaks.

Chocoflan Cake

My mom sent this recipe to me.  I discovered in talking with her today that the reason she sent it to me is because she was too scared to try it out herself.  I have become the recipe guinea pig, and I am totally OK with that.

There’s always a little bit of uncertainty when trying a new recipe and it helps to know that someone else has tried it with good results.  It really helps to know that someone you know and trust has tried it.  I am often skeptical of some online reviews because I don’t know if the people writing the reviews are clueless in the kitchen and totally botched a perfectly good recipe, OR if the person likes anything they eat because they lack good taste and taste buds.  So, send me your iffy recipes and I will try them and give you my honest opinion…if that means anything.

This cake is half chocolate cake and half flan.  Well, more like 60% chocolate cake and 40% flan.  Regardless, chocolate cake + flan = crazy delicious.  A bundt pan is filled with a thin layer of cajeta, topped with a chocolate cake batter and finished off with a flan type mixture that makes it way down to the bottom of the pan during the baking process.  This creates the layer of creamy flan on top of the cake which when inverted is topped with the sweet and decadent cajeta.

I topped the finished cake with toasted pecans.  It could be served with some sweetened whipped cream or vanilla ice cream.  This cake was a hit at the small group we had at our house last night.  It was such a hit that we had a mere slice left over. (more…)

Daring Bakers: Tiramisu

Tiramisu.  Oh, I’ve made it before.  I’ve made it more than once.  It is simple, easy and delicious.  Tiramisu is a piece of cake when you use store-bought lady fingers, a cream mixture of store-bought mascarpone cheese and sugar, and brewed coffee.  This challenge uses nothing store-bought.  This challenge is so much more than store-bought.  This challenge is a challenge.  A devilishly delicious and decadent challenge.

The February 2010 Daring Bakers’ challenge was hosted by Aparna of My Diverse Kitchen and Deeba of Passionate About Baking. They chose Tiramisu as the challenge for the month. Their challenge recipe is based on recipes from The Washington Post, Cordon Bleu at Home and Baking Obsession.

As is my habit with Daring Bakers challenges, I waited until the last minute to make this dessert.  Thankfully I read through the recipe on Monday of this past week and realized that I would need at least 4 days from start to finish to complete it.  Each component requires your attention and an overnight chill.  Conveniently, the components can be prepared and chilled for a few days in advance.  So I made a plan for how to get this done without going crazy.

Day 1: Make the Savoriardi Biscuits (Ladyfingers)

Day 2: Make the mascarpone

Day 3: Make the pastry cream and zabaglione

Day 4: Whip the cream and assemble the tiramisu

Day 5: Consume your masterpiece

(more…)

Cinnamon Sugar Cake Donuts

There are times in my life, for reasons unknown, that I just crave something.  There isn’t always a good or rational reason for the craving.  It just happens.  Last weekend I was craving cake donuts.  I was really craving blueberry cake donuts from Lone Star Bakery in Round Rock, Texas.  But seeing as how I live about 500 miles from there now I would have to settle for these homemade donuts.  Maybe settle is not the right word.  To “settle” implies that I was accepting something less.  These were no bakery donut, but I would not classify them in the “settling” category.  These were some yummy donuts.

I found these donuts to be very simple and delicious.  The texture was delicate and sweet.  I liked the coating of cinnamon sugar and the contrast of soft donut to crunchy sugar.  The slight nutmeg flavor is perfect.

This recipe is from allrecipes.com and I followed it word for word.  Well, I guess I refrigerated the dough for more than an hour.  It was more like 2 hours.  But I don’t consider that a modification.  I consider it more like bad planning.  With the good results I got with the increased chilling, you could probably make the dough the night before and use it in the morning.  I love things you can make ahead of time.

Cinnamon Sugar Cake Donuts
Ingredients
  • 2 ½ cups all-purpose flour
  • ½ cup white sugar
  • 1 tablespoon baking powder
  • ½ teaspoon salt
  • 1 teaspoon ground cinnamon
  • ¼ teaspoon ground nutmeg
  • 1 cup milk
  • 1 egg, beaten
  • ¼ cup butter, melted and cooled
  • 2 teaspoons vanilla extract
  • 2 quarts oil for deep frying
  • ½ teaspoon ground cinnamon
  • ½ cup white sugar
Directions
  1. In a large bowl, stir together the flour, ½ cup sugar, baking powder, salt, 1 teaspoon of cinnamon and nutmeg.
  2. Make a well in the center and pour in the milk, egg, butter, and vanilla. Mix until well blended. Cover and refrigerate for at least 1 hour.
  3. Heat oil in a deep heavy skillet or deep-fryer to 370 degrees F (185 degrees C).
  4. On a floured board, roll chilled dough out to ½  inch thickness. Use a 3 inch round cutter to cut out doughnuts. Use a smaller cutter to cut holes from center.
  5. Fry doughnuts in hot oil until golden brown, turning once. Remove from oil to drain on paper plates.
  6. Combine the remaining ½ teaspoon cinnamon and ½ cup sugar in a large re-sealable bag. Place a few warm donuts into the bag at a time, seal and shake to coat.  Enjoy with a nice cup of coffee.

Dining at Starbucks and McDonalds

This past weekend we went to Boerne, Texas to attend the wedding of a good friend from our days at Baylor Law.  The wedding was beautiful and we had such an incredible time with friends.  I was more sore after a night of dancing in some hot 2 1/2 inch heels than I was after a day of skiing the weekend before.  Is there something wrong with that?

Having so much fun with our friends made me sad to live so far away from those people, but also so very happy that we still enjoy each others company and keep in touch despite the distance.

When you travel, you are often required to eat what is quick and convenient.  Our day of travel on Sunday found us having breakfast at Starbucks, and lunch at the McDonalds in the DFW airport.  Here are my reviews of both of these fine food establishments.

Starbucks:  On Sunday morning we headed to the airport to catch our flight back to Amarillo.  We decided to pick up coffee and breakfast at Starbucks on the way to San Antonio.  I was just going to get a cappuccino and a muffin, but then I noticed that they also offered breakfast sandwiches and wraps.  I’ve seen these before, but never at a time when I needed breakfast so I had never thought to try them.

There are about 5 different options, including the Huevos Ranchero wrap that Ben ordered and said was “OK”.  I had the Turkey Bacon Breakfast Sandwich which is an egg white, white cheddar cheese, and turkey bacon on a whole grain english muffin.  It wasn’t bad, but not great either.  The bacon was kinda crispy, the egg wasn’t too rubbery, the cheese was warm and melty, and the muffin was pretty tasty with nice crunchy egdes.  It wasn’t the best breakfast sandwich I’ve ever had, but it wasn’t the worst.  It didn’t leave me feeling overly full , but it didn’t leave me unsatisfied either.  I think it is the perfect size for pre-travel breakfast, and it wasn’t too greasy.  No one wants to get on a plane after having scarfed down a short stack, eggs and sausage.  And no one wants to be the person sitting next to that person either.

McDonalds (@ DFW):  When we arrived in Dallas it was 2 o’clock.  We were hungry, and since our plane left in 30 minutes, we were not about to stand in line at the Chili’s and miss our flight.  McDonald’s it is!

I was more than a little disappointed in the situation here.  NO salad.  NO grilled chicken.  NOT well stocked in the kitchen, I see.  So, I ordered a cheeseburger Happy Meal…and I didn’t even get a toy. Come on!  That is why you get the Happy Meal.  Toys make people happy.  No toy = no happy.

The burger was what you’d expect from a simple McDonald’s cheeseburger.  Plain bun, small patty, yellow cheese that is only partially melted, a splat of ketchup and mustard in the center of everything with 3 pickles (without seeds…interesting).  It was, however, comforting.  It brought me back to being a kid except that I actually liked the mustard on this burger.