About Carrie Zinnecker

Posts by Carrie Zinnecker:

Giving Recipe Credit Where Credit is Due

I don’t know how many food blogs exist, but it’s a lot.  Anyone can have one.  And you can say whatever you want and post whatever you want.  You are the creator and the master of your blog and you can do what you want with it.  I look at a lot of food blogs and I read a lot of recipes.  When someone posts a recipe with no mention of where this recipe or idea came from you are led to believe that this blogger wrote this recipe him or herself.  But that’s not always the case.

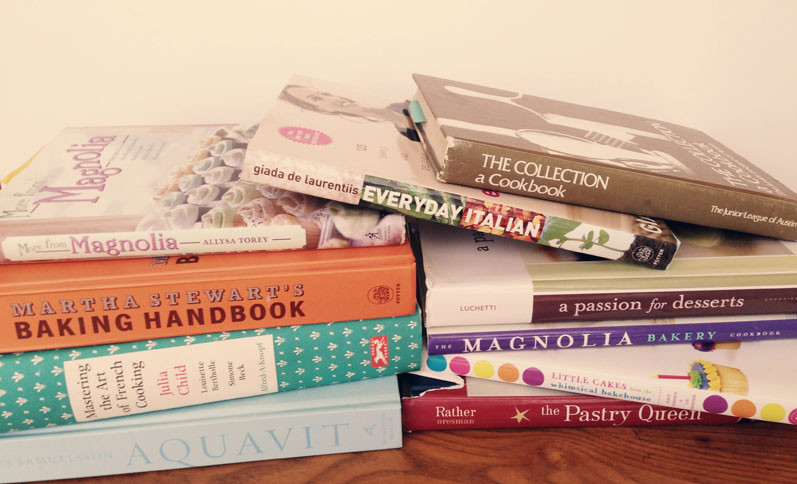
cookbooks

I made a cake a few years ago.  A simple berry buttermilk cake.  I got the recipe from Smitten Kitchen who linked to the recipe in Gourmet.  Now, I get a little irritated when some people call a recipe “adapted” when nothing at all was changed in the recipe, but whatever.  At least they give someone some credit!  Recently I came across that exact berry cake recipe, ingredient for ingredient and step by step, on another blog without any credit given except to say that she saw something like it in a magazine once upon a time.  And maybe that’s true, but the similarities in the recipe led me to believe that it wasn’t total truth.

I rarely make something original, very few recipes I share are ones I wrote myself.  I get my recipes from cookbooks, online mags and blogs and I’m sure I don’t do it right all the time, but I try to give credit to the source.  I make changes, sometimes enough to call it “mine” but usually just minor ingredient changes, switching something out for something different, adding something extra or adjusting amounts.  So sometimes I say I adapted a recipe, but other times I just link to the original recipe or cite the cookbook or magazine.

So, what are the rules?  When you post a recipe, how do you do it courteously without taking something from someone else?  What is “original”?  What is “adapted”?  What is “inspired by”?  I found these useful guidelines in a post on the Food Blog Alliance written by David Lebovitz who writes his own food blog, davidlebovitz.com   I can only hope I’m not violating any rules by reposting this!  Read the entire post for some great information and this other post about what to do if you find that YOUR content has been lifted.

Most importantly, when you change or adapt a recipe: Don’t just change a few words for the sake of changing a recipe. You should rewrite the recipe as you’ve made it, in your own words, rather than just tweaking someone else’s recipe.

But when is a recipe completely yours?

That’s a question open to interpretation. Obviously there are thousands of recipes for vinaigrette and cheesecake, so there is going to be a lot of crossover in recipes, and probably a few that have the exact same proportions. In general, recipes that are considered “basics” (such as most pie dough, shortbread, vinaigrette, and the like), are fair game. There simply aren’t that many variations on the basics, and similarities are bound to arise.

The rules that most cookbook authors and food writers follow are these:

1. If you’re modifying someone else’s recipe, it should be called “adapted from“.

2. If you change a recipe substantially, you may be able to call it your own. But if it’s somewhat similar to a publisher recipe, you should say it’s “inspired by“, which means that you used else’s recipe for inspiration, but changed it substantially.

3. If you change three ingredients, you can in most instances call the recipe yours.

If you’re adapting a recipe from a website, link to that site’s original recipe page URL. If you’re adapting a recipe from a cookbook, link to that cookbook on Amazon, the publishers website, and/or the author’s website. You can adapt a previously published recipe and republish it, as long as you give attribution. But it should not be a word-for-word republication without permission. When it doubt, ask, then get it in writing.

Now we know the rules about recipe sharing on food blogs!  I am good about linking to the source, but not always good about rewriting the recipe in my own words.  I always do it if I’ve actually changed the way in which I made something, but if not I don’t change much of anything.  I need to start doing it all the time.  There are probably other things I do that aren’t considered good blog etiquette.  And not because I don’t care about doing things properly and politely, but because I don’t know any better.  I think that’s the case for a lot of people.  But we need to make the effort to make sure we’re being courteous bloggers.  We will all be happier with each other in the end.

Here’s another article about blogging in general and sharing content.

How Not To Steal People’s Content on the Web
 

Pineapple Upside Down Cupcakes

Throwing food away, especially fruits, vegetables and meat, really bums me out and I get kinda mad at myself for not making better use of it and being a better planner.  I’ll just get too excited about all the fruit that looks good at the store and wind up with way more than our family of 4 can consume before it goes bad.  Thankfully our son would eat nothing but fruit if we’d let him, so he helps out a lot when we have a surplus.  I’d bought a container of fresh pineapple for a fruit salad and had over half of it left.  I’d mixed some of it in with coconut yogurt (a terrific tropical summertime breakfast by the way) but wasn’t going to use it up in time that way.  Solution?  Cupcakes.

pinappleupsidedowncupcake

These were tasty and I’d make them again.  They are sweet, but not too sweet.  One cupcake for dessert was the perfect size.  The cake has great moist texture and all the cupcakes came out cleanly.  Some of the topping got stuck in the pan and so I had to fix a couple of them.  But overall these were pretty easy and quite lovely.

The original recipe, found here, uses canned pineapple.  I’m sure they’d be great with canned pineapple, but if you have access to fresh you should use it.  I ran out of cherries and so a few of the cupcakes just had pineapple…and I kind of preferred them that way.  While there is something wonderfully nostalgic and lovely about the cherry in the center of the pineapple ring I like the simplicity of the pineapple by itself.

pineappleupsidedowncupcakes

The only change I made was to use a little less butter and brown sugar in the topping.  It calls for 1/2 tablespoon of butter and 1 tablespoon of brown sugar in each cup.  That just seemed like a lot to me.  I had to eyeball the butter, a little less than 1/2 tablespoon per cup.  And I used about 2 teaspoons of sugar in each cup.  I guess that’s not a huge change and it probably doesn’t make any difference…

I filled the cups 2/3 full.  While filling them up I realized that there was going to be a lot of batter left over, enough for 2 or 3 more cupcakes.  They baked right up to the top of the cups, so each one could have used a bit more batter, but better to have them too short than overflowing.  Enjoy!

Pineapple Upside Down Cupcakes

From Spoonful.com

Ingredients

Battter

  • 6 tablespoons (3/4 stick) butter
  • 1/2 cup milk (2% or whole)
  • 1 cup flour
  • 1 1/2 teaspoons baking powder
  • 1/4 teaspoon salt
  • 2 eggs
  • 3/4 cup sugar
  • 1/2 teaspoon vanilla extract

Topping

  • 6 tablespoons (3/4 stick) butter
  • 1/2 cup (2 teaspoons per cup) brown sugar
  • 6 maraschino cherries, halved
  • 4 fresh pineapple rings, cut into quarters

Directions

  1. Preheat the oven to 350°F.
  2. Place the butter and milk for the batter in a small saucepan over medium heat. Warm the mixture, stirring occasionally, until the butter melts.  Place in a bowl and let cool.
  3. While the butter cools, prepare the topping. Spray the muffin pan with nonstick spray.  Place a little less than 1 tablespoon of  butter into each muffin cup then sprinkle 2 teaspoons of brown sugar over the butter. Place the pan in the oven until the butter melts, about 3 minutes.
  4. Arrange the pineapple and cherry on top of the melted butter.  This may take a little finagling depending on the size of your pineapple pieces.  Set pan aside while you finish the batter.
  5. To finish the batter, whisk the flour, baking powder, and salt in a bowl. In a large bowl whisk together the eggs, sugar, and vanilla extract until smooth.  Add 1/3 of the flour mixture and stir just to combine.  Then add 1/2 of the milk mixture, stir just to combine.  Follow by 1/3 of the flour, the rest of the milk, then the rest of the flour, stirring between additions.
  6. Pour the batter into the muffin pan, dividing it evenly among all the cups. Bake the cupcakes until they’re lightly browned, dry around the edges, and pulling away from the pan a little, about 25 minutes.
  7. Transfer the pan to a rack to cool for 5 minutes. Use a butter knife to carefully loosen each cupcake from the edges and bottom of the pan, then place a cookie sheet over the top. Invert the pan, turning the cupcakes out onto the cookie sheet, then flip them pineapple side up to cool completely.  You may need to replace some of the pineapple if it sticks in the pan. Serve at room temperature.


Kale Salad with Roasted Beets, Cranberries, Almonds and Feta

A good friend of mine gifted me with a free local produce box from Greenling.  Greenling is an Austin based company that now also operates in the Dallas, San Antonio and Houston areas.  They make organic, local produce more easily accessible and do a great job of it.  They even delivered my box to my front door, and we live way out in the burbs.  In my lovely local box was a bunch of kale and 3 huge beets, along with some other treasures.  I immediately knew what would become of the kale and beets.

kaleandbeetsalad

I loved this salad.  We ate it as a side dish the night I made it and I ate it for lunch the next three days in a row.  Kale holds up so well that it was delicious every time, not soggy and droopy like salads can get after being dressed and stored overnight.  It was probably better after a night in the fridge, so you can always make it ahead of time.  Maybe leave out the almonds so they stay crunchy, and leave out the feta if you don’t want it to be pink!

The beets provide great color and earthiness, but if you don’t like beets add in some shredded carrots, chopped apples or pear.  Use golden raisins in place of the cranberries, toasted walnuts or pine nuts instead of the almonds.  I like to play around with the dressing also, different kinds of vinegar, honey instead of agave, orange juice instead of lemon.  Just start with a big bunch of kale and add in what you like and what you have on hand!  Enjoy!

Kale Salad with Roasted Beets, Cranberries, Almonds and Feta

Ingredients

Salad

  • 2 large beets
  • 1 teaspoon fresh thyme leaves
  • olive oil
  • kosher salt and pepper
  • 1 bunch of kale, stalks removed and leaves roughly chopped
  • 1/4 to 1/2 cup dried cranberries
  • 1/4 to 1/2 cup roasted almonds, roughly chopped
  • 4 ounces of feta cheese

Dressing

  • 2 tablespoons olive oil
  • 2 tablespoons balsamic vinegar
  • 2 tablespoons white wine vinegar
  • 1 lemon, juiced
  • 1 tablespoon dijon mustard
  • 1 tablespoon agave nectar
  • 1 garlic clove, grated on a microplane or very finely chopped
  • kosher salt and pepper

Directions

  1. Roast the Beets: Preheat oven to 400°F.  Peel the beets and cut them into 1 inch chunks.  Spread them onto a rimmed baking sheet and drizzle with olive oil, sprinkle with salt, pepper and thyme and toss to coat.  Roast for 40 minutes, turning twice, until they are fork tender.  Remove from the oven and let cool.  You can do this ahead of time and store the beets in a container in the fridge for a day or two.
  2. Make the dressing: Combine all ingredients and whisk well, season with salt and pepper and taste, adjust to your liking.
  3. Combine kale with half of the dressing and toss well (your clean hands work well for this!)  Add more dressing if it seems dry, but be careful not to overdress.
  4. Add in cranberries, beets, feta and almonds.  Toss gently so you don’t break up the feta too much.
  5. Serve immediately or let sit in the fridge for a few hours to let flavors marry and allow the kale to soften a bit.

Salted Chocolate Chip Coconut Oil Cookies

coconutcookies2

Coconut Oil.  Apparently it can do almost anything.  It can make your hair long and luxurious, get rid of stretch marks, help nursing moms increase their milk supply and bring about world peace when applied daily.  I’ve been seeing it everywhere lately and thought I’d give it a try as a replacement for butter in cookies.

These were delicious and I would definitely make them again.  The coconut oil gives them a subtle coconut flavor without the texture and chew of coconut flakes and a richness that is different than that of butter.  Sprinkling a little flaked salt on top before and right after baking really makes these special.  Ben, who doesn’t always love sweets, enjoyed the combination of salty and sweet and I think he ate more than just the one obligatory cookie.  And that is saying something.

Guittard milk chocolate chips (the ones in the silver bag with blue label) are my favorite and using them in these cookies didn’t hurt in making them extra super tasty.  They’re a little larger than the typical chocolate chip and so delicious and creamy.  I’ve been known to sit with a bag of these and snack my way through half of it.  Which is why when I am going to buy a bag to make cookies I buy a second bag for snacking.  No lie.  It might be a problem?  If you’d rather, dark chocolate chips would also be wonderful I am sure.  Enjoy!

Salted Chocolate Chip Coconut Oil Cookies

Makes 18-24

Ingredients

  • 2 2/3 cup flour
  • 3/4 teaspoon baking powder
  • 3/4 teaspoon salt
  • 1 cup coconut oil (softened if needed)
  • 1/2 cup white sugar
  • 1 1/3 cup brown sugar
  • 2 eggs
  • 2 teaspoons vanilla
  • 1 1/2 cups chocolate chips
  • flaked salt

Directions

  1. Preheat oven to 325°F.
  2. Beat together coconut oil and sugars, then beat in eggs and vanilla until well mixed.
  3. Add in the flour, baking powder and salt and mix just to combine.
  4. Stir in the chocolate chips and coconut.
  5. Scoop by rounded tablespoons onto parchment lined cookie sheets and sprinkle each cookie with a bit of salt flakes.
  6. Bake for 10-15 minutes (depending on size) until edges are just browned.  Remove from the oven and immediately sprinkle a bit more salt on each cookie.
  7. Let cool and enjoy!

Healthy Banana & Oat Breakfast Cookies with Cranberries and Nuts

bananaoatcookie2

I don’t really cook anything for Carson that has no added sugars or is made with only whole grains.  I don’t get locally grown organic fruits and vegetables at the farmers market.  I don’t say “no” to fast food.  I’m not anti health food and I don’t roll my eyes at people who do those things.  I make sure Carson gets fruits and veggies every day.  I don’t let the child skip dinner and then get cookies before bed.  I’m not unconcerned with healthy eating, I’m just not overly concerned with it.  But, if I see something that looks easy and healthy for my kids I will try it.  And that is what led me to try these cookies.

When I saw these cookies on Pinterest I thought, “What a simple recipe!  This person says they’re awesome!  So they must be!”  A couple of mashed bananas, oats and nuts.  No added sugar.  No butter or shortening.  I gave them a shot.  These are advertised as “cookies”.  Sorry.  They’re not cookies.  Not cookies as I know them.  I like sugar and butter, and I think they have their place.  And that place is in cookies.  So when I ate one of these after they came out of the oven I was really disappointed.  Not because they were bad, they just weren’t cookies.  I don’t know why I thought they’d taste like anything other than banana, oats and nuts.  Maybe because I fell victim to another Pinterest post and its false promises.  If there is one thing Pinterest has taught me it is to be skeptical.  And that the options for IKEA furniture are endless.  I gave one of the cookies to Carson.  He took one bite, took the bite out of his mouth and left it all on the table.  Fail.

I packed them in a tupperware after they had cooled and stashed them in the freezer because I cannot throw food away.  It almost physically hurts me to do it.  The next morning I saw them in the freezer and thought I’d try one again.  I took one out and microwaved it for 15 seconds.  It was surprisingly tasty, and a really perfect breakfast cookie.  Not too sweet.  Full of hearty oats.  Nuts for protein.  Cranberries for tartness.  A touch of cinnamon.  I ate these for breakfast the rest of the week.

So these didn’t turn out to be a great toddler cookies (not for my toddler anyway) but I enjoyed them after accepting that they were not sweet dessert cookies.  These are breakfast cookies, and a couple of them with a cup of coffee and some fruit made for a lovely start to the day.

Banana & Oat Breakfast Cookies

From Skinnytaste

Makes 12-18

Ingredients

  • 2 medium semi ripe bananas
  • 1 cup oats
  • 1/2 teaspoon cinnamon
  • 1/4 to 1/3 cup roughly chopped nuts
  • 1/4 to 1/3 cup cranberries (or other dried fruit)

Directions

  1. Preheat oven to 350°F
  2. Mash bananas until smooth.
  3. Mix in oats, cinnamon, nuts and fruit.
  4. Drop by rounded tablespoons onto cookie sheet lined with parchment paper.
  5. Bake for 15 minutes.


Monte Cristo Sandwiches

These sweet and savory sandwiches remind me of a restaurant that used to be in Austin called Bombay Bicycle Club.  It was a special place we’d go for birthdays and I’m pretty sure that I almost always ordered the monte cristo.  Theirs was full of meat and cheese, deep fried, covered in powered sugar and served with a side of raspberry preserves.  And I think it came with fries.  And I probably had a hot fudge sundae for dessert.  This was back in the days of high metabolism.  Those were good days.

montecristo6

When a post came up on the King Arthur Flour blog the other day about croque monsieurs and monte cristos I immediately added the ingredients to my grocery list.

I usually buy groceries a few days in advance, and sometimes (when Ben does the grocery shopping for me on Sunday afternoons) I will have groceries for the entire week of meals and not need to go to the store.  The only problem with this is that sometimes I get to the day I had planned to make such-and-such for dinner and I don’t want to make it.  That happened with this meal.  It just seemed like more work than I wanted to put in to dinner that night.  But in the end it was a really quick meal with less mess than I’d anticipated and more deliciousness.

I found this incredible brioche loaf at Whole Foods (set me back $8 but was totally worth it).

montecristo1

You can use any bread you like, but a soft white is pretty wonderful since it really soaks up the egg.  These are triple-decker sandwiches, turkey and ham on one half and Emmentaler swiss on the other.

montecristo2


If you’re using thick bread slices you may want to smoosh the sandwich a bit with your hand.

montecristo3

After assembling the sandwiches you dredge both sides in a mix of egg and milk.

montecristo4

And then cook them until golden brown.

montecristo5

After cooking, sprinkle with powdered sugar and serve up with a side of raspberry preserves for dipping.

montecristo7


If you’re making more than 2 sandwiches just increase the amount of bread, meat and cheese.  The egg is enough for probably 4 sandwiches.  Set your oven to 200°F and put the finished sandwiches on a cookie sheet lined with foil while you cook the rest of the sandwiches.  They won’t have the great crunch they do when they’re fresh, but at least they’ll be warm.  To make sure your sandwiches are heated through and that the cheese gets perfectly melted, take the meat and cheese out of the fridge for 20 minutes before cooking so that it’s not cold when it goes into the pan and keep the heat medium-low so that the outside doesn’t cook too much before the center is warm.  Enjoy!

Monte Cristo Sandwiches

Makes 2 sandwiches

Ingredients

  • 6 slices of good white bread
  • 4 slices of ham
  • 4 slices of turkey
  • 2-4 slices of swiss cheese (depending on the size of your bread and how cheesy and delicious you’d like your sandwich to be)
  • butter
  • 1 egg
  • 2 tablespoons of milk
  • powdered sugar
  • raspberry preserves

Directions

  1. Heat skillet over medium-low heat.
  2. Arrange meats on bottom layer of bread, top with a slice of buttered bread, top with a slice or 2 of cheese.  Repeat with other sandwich.  If your bread is thick, press the sandwich down with your hand to flatten it slightly.
  3. Whisk egg and milk together in a pie plate or shallow dish.  Dip both sides of the sandwich in the egg.
  4. Melt a little butter in your pan, then place the sandwiches in the pan and cook for 3-4 minutes on each side, making sure it doesn’t get too dark.  If it is cooking too quickly, turn down the heat.
  5. Move sandwiches to a cutting board and slice in half.  Move to plates and sprinkle lightly with powdered sugar.


Bacon Wrapped Meatloaf with Caramelized Onions

The more I cook, the more I realize how much I absolutely love cooking comfort food.  And eating comfort food.  I really love eating comfort food.  And I’ve been doing a lot of it lately. This meatloaf has been one of our favorites.

baconmeatloaf

Covering your dinner with bacon can’t be a bad thing.  This meatloaf is covered in 10 strips of bacon which give it great flavor and create a great slicing guide.  I got this recipe from The Pioneer Woman, my go-to for comfort food.  Try her pot roast!  It makes me smile just thinking about it.  The only change I made to this meatloaf was to add some caramelized onion.

I’ve made this twice now.  The first time I followed the recipe exactly, but felt that the bacon was kind of soggy.  So the next time I baked the meatloaf without the sauce at the beginning of the cooking time at an attempt to crisp it up a little before putting the sauce on.  I think it was better, not so much that I could definitely tell a difference but enough that I will do it that way in the future.  Either way the bacon is a great addition and makes this meatloaf spectacular.  It would still be good without the bacon, so leave it out if you must.

I don’t have a roasting pan.  Not sure why.  I should probably get one.  So I baked the meatloaf on a shallow baking pan lined with parchment.  It releases a lot of juice, so I soaked it up with paper towels after it came out of the oven.  I can see why a roasting pan would be helpful, but don’t fret if you don’t have one.  You don’t need it.

This would easily feed 8 people, possibly 10.  Ben and I can easily make 3 meals out of it.  Sliced for dinner the first night, then meatloaf sandwiches for lunch or dinner a couple of times.  Few things can beat a meatloaf sandwich on some soft white bread.  Enjoy!

Bacon Wrapped Meatloaf with Caramelized Onions

From The Pioneer Woman

Ingredients

Meatloaf

  • 1 medium yellow onion, halved and sliced thin
  • 1 tablespoon butter
  • 1 cup milk
  • 6 slices white bread
  • 2 pounds ground beef (I used 1 pound of 85/15 and 1 pound of 93/7)
  • 1 cup grated Parmesan cheese
  • 1/4 teaspoon seasoned salt
  • 3/4 teaspoons salt
  • 1/2 teaspoon ground black pepper
  • 1/3 cup minced Italian parsley
  • 4 whole eggs, beaten
  • 10 slices Thin/regular Bacon

Sauce

  • 1 to 1 1/2 cups ketchup
  • 1/4 to 1/3 cup brown Sugar
  • 1 teaspoon dry mustard

Directions

  1. Caramelize the onion: Heat 1 tablespoon of butter and drizzle of olive oil over medium heat in a skillet.  Add the sliced onion and stir the onion to coat with butter.  Sprinkle with kosher salt and a generous pinch of sugar.  Let cook, stirring occasionally and monitoring the heat so the onions do not burn, 10-15 minutes.  Onions should be brown and soft.  If the onions begin to crisp and burn and there is no moisture left in the pan, add a few teaspoons of water.  Remove from the pan from the heat and let cool.
  2. Preheat oven to 350 degrees. Pour milk over the bread slices. Allow it to soak in for several minutes.
  3. Place the ground beef, milk-soaked bread, onion, Parmesan, seasoned salt, salt, black pepper, and parsley in a large mixing bowl. Pour in beaten eggs.
  4. With clean hands, mix the ingredients until well combined. Form the mixture into a loaf shape on a broiler pan, which will allow the fat to drain. (Line the bottom of the pan with foil to avoid a big mess!)
  5. Lay bacon slices over the top, tucking them underneath the meatloaf.
  6. Cook meatloaf for 15 minutes.
  7. While the meatloaf is cooking, make the sauce: stir together ketchup, brown sugar and mustard in a mixing bowl. Pour 1/3 of the mixture over the top of the bacon. Spread with a spoon.
  8. Bake for 30 minutes, then pour another 1/3 of the sauce over the top. Bake for another 15 minutes. Slice and serve with remaining sauce.


My Favorite Granola

Granola is one of those foods I often see on lists with titles like, “Foods you Thought Were Good for You!”  And I guess it’s true that many store bought granolas are full of sugar and other not-too-healthy ingredients.  But if you make your own, then you have control over what goes into it.  I’m not saying this is perfect health food or that it is “good for you”.  But I do know that it is delicious.

This is my favorite granola.  I brought a bag of it to Christmas with my family this year and everyone loved it.  I’m pretty sure it was gone in just a couple of days.  You can change the nuts and fruits in this to personalize it to your taste.  If you like chocolate in yours, I’d suggest dark or semi sweet chips.  My favorite combination is pecans, almonds, pumpkin seeds, cranberries, cherries and blueberries.

granola

I like to eat this granola on top of some plain yogurt.  Or I’ll mix a couple spoonfuls of it in with my Kashi cereal to make things a little more interesting.

This recipe came from a Bon Appetit magazine, probably 5 or 6 years ago.  Since I started making it I’ve changed some things, but one thing I haven’t changed is the special instruction to store it in the freezer.  By doing this the moisture from the fruit doesn’t soften the granola.  I’ve never not done this.  When I’m bringing the granola somewhere I keep the granola and the fruit separate until I find a freezer.  If you’re brave enough to try storing it at room temp, let me know how it goes.  Enjoy!

My Favorite Granola

Adapted from Bon Appetit

Ingredients

  • 3 cups old fashioned rolled oats
  • 1 cup unsweetened coconut flakes
  • 1/3 cup vegetable oil
  • 1/3 cup dark brown sugar
  • 1/4 cup honey
  • 1/2-1 teaspoon cinnamon
  • 1/4 teaspoon kosher salt
  • 1/2 cup roughly chopped pecans
  • 1/2 cup roughly chopped almonds
  • 1/2 cup green pumpkin seeds
  • 1 cup dried cherries
  • 1/2 cup dried cranberries
  • 1/2 cup dried blueberries

Directions

  1. Preheat oven to 325°F.
  2. Stir together oats, coconut, oil, sugar, honey,  cinnamon, salt and nuts in a large bowl.
  3. Spread mixture evenly on a large rimmed baking pan.  Bake, stirring occasionally, until golden, between 25 and 30 minutes.  Watch carefully after 20 minutes.  You do not want it to get too dark.
  4. Remove the granola from the oven and set the pan on a rack to cool, the granola will be soft.  It will harden up as it cools.
  5. After it is cool, stir in the fruit.  Store in a sealed container in the freezer.

Scrambled Eggs with Spinach & Feta

Breakfast for me is almost always a piece of fruit and a bowl of cereal, unless my sweet man has suggested going to pick up donuts or breakfast tacos.  When I scramble eggs for Carson I will sometimes scramble some for myself and toast up a piece of bread.  Scrambled is really the only way I like my eggs.  I cannot stand a runny yolk.  I wish I could because I want so badly to order eggs benedict simply because I find it to be a beautiful dish.  Alas, I am stuck with boring (and rather unattractive) scrambled eggs.  Eggs are good for you.  They are full of protein, and you can cook them quickly. They can be a really wonderful way to start your day.  And there are ways to dress them up and make your eggs more interesting.

My mom would make us cheesy eggs as kids.  The more cheese the better, specially if some of it got slightly crunchy on the edges of the pan.  It’s kinda like fricco!  You can’t go wrong stirring some salsa, cheese and crunched up tortilla chips into scrambled eggs for some cheater migas.  I remember once my sister made scrambled eggs for the family with feta cheese and fresh dill.   When I took out the carton of eggs a few weeks ago I saw the feta cheese and decided I’d add some to my eggs.  Then I remembered that I had some spinach that needed to get used up or else I’d have to toss it, so I took that out as well.  I wound up with quite a tasty breakfast and a nice change of pace from cold cereal.

eggsandfeta

This will serve one person, so adjust as needed for more servings.  I use one whole egg and one egg white.  Once upon a time I was scared of the yolk because that’s where that fat is!  Then I wised up and realized that not only did I need fat in my diet, but a little yolk makes scrambled eggs much tastier.  I tried making these eggs the first time by adding the raw spinach in with the eggs, but I didn’t like the way the eggs cooked.  So the next time I sauteed the spinach in a teeny bit of olive oil, took it out of the pan and let it drain a little on a paper towel, scrambled my eggs, then added the spinach back in near the end of cooking along with the feta.  I found this to be a much better method.

Spinach cooks down to practically nothing.  So be very generous with the amount of raw spinach you cook.  Better to have extra than to find yourself wishing you’d cooked more of it.  As far as the feta goes, you don’t need much.  It’s a very flavorful cheese, so a little goes a long way.  The feta is also pretty salty.  Use extra salt sparingly.

This is a great savory breakfast and a tasty way to eat more vegetables, something I am working on in my meals.  Adding some fresh herbs in with the spinach would be lovely.  Goat cheese would be a nice cheese to try instead of the feta.  And there are other veggies you can add as well, cherry tomatoes, sauteed zucchini or peppers.  Lots of options.  Let me know if you come up with a spectacular combination!  Enjoy.

Scrambled Eggs with Spinach & Feta

Ingredients

  • 2 eggs
  • a generous handful of baby spinach
  • feta cheese
  • salt and pepper
  • olive oil

Directions

  1.  Heat a medium sized skillet over medium heat.  Drizzle a tiny bit of oil in the pan, then add your spinach.  Sprinkle with a little salt and cook, stirring until spinach has just wilted.  Transfer to a plate lined with a paper towel to drain off some of the liquid.
  2. In a small bowl whisk the eggs (or one whole egg and one egg white) until they are combined and a little foamy.  I like to use a tiny whisk or a fork.  A big whisk and such a small amount of liquid doesn’t really work well.
  3. Spray your pan with non-stick spray.  Add the eggs and scramble as you like.  My mom scrambles them into small pieces.  I like them a bit bigger, so I let them cook for a little bit right when I add them to the pan, then I stir gently and infrequently until they just about done, a little undercooked.  Add the spinach and feta to the pan and stir to combine.  Season with pepper if desired and salt if needed.


Cauliflower Mac with White Cheddar, Parmesan and Thyme

In my dreams I am someone who eats nothing but good-for-you foods, mainly fruits and vegetables, that are all beneficial to my health and do things like make my skin glow, provide me with all my daily vitamins, and will add years to my life.  I grow all my own vegetables and get my eggs from the chickens I’m raising in my backyard.  In that backyard I am hanging my clothes out to dry on the clothesline.  In reality I love a greasy hamburger with cheese and bacon served up with a plate of crispy fries and followed by a creamy vanilla milkshake.  I’ve never grown anything edible besides some tomatoes that didn’t make it through the season.  And I actually hate the way clothes feel and smell after drying outside.  I’m nothing like I am in my dreams.  I like healthy foods, but I also really like to indulge.  I’ve visited both extremes of unhealthy habits with food and over time I’ve become better able to understand that there is a healthy balance between the two.  I believe that there is a time to indulge in cheesy macaroni and a time to take it easy and fill your body with nutritious vegetables.  This dish allows you to have your mac and eat it too.

cauliflowermacaroniandchees

Upon first reading this recipe in Fine Cooking I dismissed it as being way too much work.  I came across it again a few weeks later and thought I should give it a try.  It turned out to be really delicious and not terribly time consuming.  This is nothing at all like the ooey gooey cheesy macaroni and cheese I usually make, so it isn’t truly fair to compare them.  However, the flavor of this macaroni was full and rich thanks to the sharp cheese and fresh thyme.  Since it’s a warm baked pasta dish it still serves as comfort food, but it doesn’t carry all the butter, whole milk and cheese (and guilt) of the full fat version.  One of the best parts about it is the cauliflower and onion puree.  There’s half a head of cauliflower in this!  And it adds a wonderful flavor and creaminess as well as a good amount of vitamin C.  Purees are a great way to get more vegetables into your diet, and I’m going to look for ways to do more with them.  There are only so many salads and sides of steamed broccoli a girl can take before she needs some real food.  And while you eat this you can feel good knowing you’re getting some of your daily veggies.

There are a few things I did that are different from the original recipe.  I used macaroni instead of penne.  I used heaping measurements for the cheese because, well, I just love cheese.  And I used 2% milk instead of 1%.  I know there is a big difference between the two, and next time I will try 1% if I remember to pick some up.  Ben and Carson both drink 2%, and I have recently made the switch to almond milk, so that’s all the milk we have in our house most of the time.

If you make this dish start to finish it probably wouldn’t take you all that long, but it dirties a lot of dishes.  One of those dirty items is a blender, and I kinda hate cleaning the blender, not sure why.  As a stay-at-home mom I rarely have the luxury of making dinner leisurely and I also don’t want me or my husband to be stuck with a bunch of dishes when all we want to do is sit down after the kids are in bed.  So, here are some ways to make this easier and less stressful to prepare.

  • Make the vegetable puree earlier in the day, or even the day before, and store it in the fridge.  Warm it up in the saucepan and continue the recipe from that point.
  • Grate the cheese ahead of time and store in the fridge in ziplocs or tupperware.  (I prefer bags because I can throw them away.  But that’s because I am lazy and wasteful.)
  • Cook everything, put it in the pan, cover and put in the fridge.  Bake it that evening or the next day.

Give this a try. Even if you hate cauliflower I think you’ll like it.  And if you have any healthy and delicious recipes to share, please do!

Cauliflower Mac and Cheese

Ingredients

  • 4 cups 1-1/2-inch cauliflower florets (about 1 lb.; from 1/2 head) 
  • 1 medium onion, peeled and sliced 
  • 2 cloves garlic, peeled 
  • salt and pepper
  • 12 oz. macaroni noodles
  • 2 cups 2% milk 
  • 1 tsp. dry mustard 
  • 2 tsp. chopped fresh thyme 
  • 2 oz. coarsely grated sharp white Cheddar (about 1/2 cup) 
  • 1-1/2 oz. finely grated Parmigiano-Reggiano (1-1/2 cups using a rasp grater)

Directions

  1. Position a rack in the center of the oven and heat to 375°F.
  2. Put the cauliflower, onion, and garlic in a steamer basket set over 1 inch of boiling water in a 6- to 8-quart pot. Cover and steam until the cauliflower is tender, 10 to 15 minutes. Transfer the cauliflower, onion, and garlic to a blender.
  3. Fill the pot three-quarters full of salted water and bring to a boil over high heat. Add the pasta and cook for 3 minutes less than the package timing. Drain and return the pasta to the pot.
  4. While the pasta cooks, add 1 cup of the milk, the dry mustard, 1 tsp. salt, and 1/2 tsp. pepper to the vegetables in the blender and purée until smooth. Transfer to a 3-quart saucepan and stir in the remaining 1 cup of milk and the thyme. Heat over medium-low heat until hot but not boiling, about 3 minutes.
  5. In a small bowl, mix the Cheddar and Parmigiano. Add all but 1/2 cup of the cheese to the sauce and stir until the cheese is melted. Add the sauce to the pasta and stir to combine.
  6. Transfer the pasta and sauce to an 8-inch square baking dish and sprinkle with the remaining cheese.
  7. Bake until heated through and the cheese is beginning to brown, 20 to 30 minutes.