cream cheese

Fleur de Sel Caramel and Cream Cheese Apple Galette

We are well into November, which means it’s time to start thinking about your Thanksgiving meal.  Not Christmas yet though, despite the fact that almost every retail store I’ve been to has their trees up already.  Straight from Halloween to Christmas!  It’s crazy.  But Thanksgiving is just a little over 2 weeks away so let’s talk food.  I’ll share a few recipes over the next couple of weeks.

FLEUR DE SEL CARAMEL AND CREAM CHEESE APPLE GALETTE | Hottie Biscotti

The more I cook the more recipes I have stored up either here on the blog or in a ridiculous collection of books and binders that I can turn to.  I come from a family of 4 girls, all of whom enjoy cooking.  So when it comes to holiday meals we all start searching for things we’d like to make.  We almost never make the same thing twice, except for my Grandma June’s dressing which is always on the table, as is her apple pie.  But we like to branch out and try other ways to prepare vegetables, desserts and sides.

This simple apple galette would be a lovely Thanksgiving dessert, but could easily make its way to your table on a weeknight.  It’s simple to prepare and doesn’t require many ingredients or much time.  You can use a scratch pie crust or a store bought one to make it even simpler.

applegalette11 applegalette14 applegalette13 FLEUR DE SEL CARAMEL AND CREAM CHEESE APPLE GALETTE | Hottie Biscotti

This caramel sauce takes this simple dessert to a special place and I am so thankful to my good friend who introduced me to it!  Go grab yourself a few jars.  It’s also terrific as a dip for raw apples slices, so whatever you have leftover from this galette you can use as an afternoon snack.  You’re welcome.

applegalette10

This is different enough from a pie that you could get away with having a traditional apple pie and this galette on the same dessert table.  The thin-ness of this galette makes me feel a little better about eating dessert, even though it’s probably not too much better for me.  The cream cheese is subtle and pairs well with the apples and caramel, but you could easily leave it out if you don’t have any around or if you just don’t care for it.

FLEUR DE SEL CARAMEL AND CREAM CHEESE APPLE GALETTE | Hottie Biscotti FLEUR DE SEL CARAMEL AND CREAM CHEESE APPLE GALETTE | Hottie Biscotti FLEUR DE SEL CARAMEL AND CREAM CHEESE APPLE GALETTE | Hottie Biscotti FLEUR DE SEL CARAMEL AND CREAM CHEESE APPLE GALETTE | Hottie Biscotti

I’m really looking forward to Thanksgiving.  I really enjoy this holiday and this year we get to spend it at the lake with my husband’s family, which will be lovely as always.  What are you planning to make for Thanksgiving?  Do you have any recipes you make every year?

Fleur de Sel Caramel and Cream Cheese Apple Galette

Serves 6-8

Ingredients

  • 1 round pie dough
  • 2 Granny Smith apples
  • 3 1/2 tablespoons sugar, divided
  • 1 teaspoon cinnamon
  • salt
  • 4 ounces cream cheese, softened
  • 3-4 tablespoons Fleur de sel Caramel Sauce
  • 1 egg

Directions

  1. Preheat oven to 400°F.
  2. Peel and core apples, then slice thinly.
  3. Mix apples with 2 tablespoons of sugar, cinnamon and a pinch of salt.  Set aside.
  4. Beat cream cheese with 1 1/2 tablespoons of sugar until smooth.  Set aside.
  5. Roll dough out on a large piece of parchment paper into a 12 inch circle.
  6. Spread cream cheese onto dough leaving a 1 1/2 inch border.
  7. Arrange apples in 2 concentric circles, overlapping as needed, on top of the cream cheese.
  8. Warm up 4 tablespoons of the caramel sauce in a small bowl in the microwave.  Drizzle 1 1/2 tablespoons of the caramel sauce evenly over the apples.
  9. Fold the dough over the edges of the apples.
  10. Whisk egg in a small bowl with 1 teaspoon of water, then brush onto the dough.
  11. Transfer parchment to a large baking sheet and bake for 25-35 minutes, until crust is golden and apples are tender.
  12. Remove from the oven and drizzle with the rest of the caramel sauce.
  13. Serve warm or room temperature with ice cream or whipped cream and more caramel sauce.


Mini Pumpkin Swirl Cheesecakes with Oreo Crust

It was bound to happen.  I jumped aboard the pumpkin train!  I did manage to hold out until mid October.  Things get a little crazy this time of year on food blogs with an abundance of recipes containing pumpkin and pumpkin spices.  But I truly do love this time of year, and the smells and tastes associated with it.  And these pumpkin cheesecakes are truly delicious.  So here’s my obligatory fall pumpkin submission.  Enjoy!

Mini Pumpkin Swirl Cheesecakes with Oreo Crust | Hottie Biscotti

One of the great things about these mini cheesecakes is that they are significantly easier than making a big cheesecake.  They are also easier to serve.  No water bath, no wrapping your spring-form in foil so it doesn’t leak or let water in, no worried anticipation when you take the spring-form off wondering if it’s going to remain beautiful, no cracked top or slicing pieces for guests.  Just mix, fill, bake, chill and enjoy.  Guests serve themselves little cheesecake cupcakes, there’s less clean up and everyone is happy.

Mini Pumpkin Swirl Cheesecakes with Oreo Crust | Hottie Biscotti Mini Pumpkin Swirl Cheesecakes with Oreo Crust | Hottie Biscotti Mini Pumpkin Swirl Cheesecakes with Oreo Crust | Hottie Biscotti

I really like the chocolate Oreo crust, but you could stick with graham crackers or use gingersnaps for some extra fall spice.  Another variation would be to make these all pumpkin and add about 3/4 to 1 cup of pumpkin to the filling.  Keep the spices the same.

This filling is going to make more than enough for a dozen cheesecakes by about 2 or 3, with more pumpkin than plain filling.  I suggest either adding a couple extra Oreos and a tad more butter initially and baking up a few more cheesecakes OR put an entire whole Oreo in the extra baking cups and fill those with the remaining filling.  Bake these after you bake the full tin and keep an eye on them, they will probably bake up a little quicker.  Or you could do as this lazy woman does and just toss the extra.  I’m sorry if wasting food appalls you.  I typically don’t do it.  But I had a crying baby on my hands and needed to finish as soon as possible!

Mini Pumpkin Swirl Cheesecakes with Oreo Crust | Hottie Biscotti pumpkin9 pumpkin18 pumpkin19 pumpkin8

These would make a great addition to a fall dessert table, the orange and black qualify them for Halloween and they would also be perfect for Thanksgiving.  Since they have to be chilled you can make them ahead of time, up to but not more than 48 hours.  After the initial chilling make sure to cover them if they will be kept more than a day in the fridge.

Mini Pumpkin Swirl Cheesecakes with Oreo Crust | Hottie Biscotti

Mini Pumpkin Swirl Cheesecakes with Oreo Crust

Adapted from Bru Crew and Tasty Kitchen

Ingredients

Crust

  • 16 whole Oreo  cookies
  • 4 tablespoons melted butter

Filling

  • 2 packages cream cheese, room temperature (full or low fat)
  • 3/4 cup sugar
  • 2 tablespoons sour cream
  • 2 eggs, room temperature
  • 1 tablespoon vanilla
  • pinch of salt
  • 1/2 cup canned pumpkin puree
  • 3/4 teaspoon pumpkin pie spice
  • 1/4 teaspoon cinnamon

Directions

Crust

  1. Preheat oven to 350°F.
  2. Place cupcake liners in cupcake tin and spray lightly with cooking spray.
  3. Crush Oreos (either in a food processor or in a plastic bag using a rolling pin and some muscle) to fine crumbs.
  4. Combine Oreo crumbs with butter and mix to combine evenly.
  5. Divide crumb mixture equally between muffin cups (about 2 rounded teaspoons per cup).
  6. Press down firmly and bake for about 6 minutes.  Make filling while these bake.

Filling

  1. Beat cream cheese, sugar and sour cream together until fully combined.  Add in eggs, vanilla and salt,  then beat well.  Scrape the bowl and beat for another 30 seconds or so.
  2. Remove a little less than half (about 1 1/4 cups) of this mixture to another bowl.  Add in the pumpkin and spices and mix well.
  3. On top of each cooked crust spoon one spoonful of plain and one spoonful of pumpkin filling.  Repeat with another spoonful of each, pumpkin on top of plain and plain on top of pumpkin, then swirl them together without mixing too much.
  4. Repeat with the rest of the cups. Each cup should be almost full, but you will probably have a little more filling left over.  See above for how to deal with the excess.
  5. Reduce oven to 325°F and bake for 20 minutes, then increase oven to 350°F and bake 5 minutes more. When the centers of the cheesecakes jiggle just a bit when you shake the pan they’re done.  If they seem really jiggly, bake a few minutes more.  Remove from the oven, let cool for 30 minutes, then transfer entire pan to the fridge for a few hours.  Serve up!


Fall Vegetable Tart with Goat Cheese and Prosciutto

Fall is coming! Here in Southeast Texas we enjoyed a “cold front” this past weekend.  The mornings were slightly chilly and the days incredibly pleasant.  This week it’s humid and hot again.  But the promise of cooler weather is near.  And cooler weather means comfort food and cute coats and sweaters for my kids.

This fall tart recipe comes from the latest issue of Fine Cooking which I received last week and I’ve already made this twice.  I can see it appearing in our dinner rotation many more times in the coming months.  I love roasted vegetables.  I love goat cheese.  I love savory pie crust.  And so naturally, I love this tart.  It is incredible.

veggietart6

You can make this from start to finish in a couple of hours, or you can make the vegetables ahead of time and simply assemble and bake the tart when you’re ready.  I’ve done it both ways now.

The combination of vegetables (butternut squash, carrot, cauliflower and red bell pepper) is great.  The recipe calls for leeks, but I decided to use a yellow onion instead.  I didn’t make a great grocery list and ended up using my only onion in another dish so I left out the onion entirely.  The tart didn’t suffer a bit.  The measurements in the recipe below are from the magazine, but I didn’t really measure.  I’m sure I used a bit more, maybe heaping amounts of those listed here.

After roasting the vegetables you mix in a bunch of chopped proscuitto.  That’s magic right there.  Magic.

veggietart11

The dough is simply flour, butter, cream cheese and a pinch of salt.  It comes together in a food processor in no time and doesn’t need to be chilled before being rolled out.  However, this means you absolutely must roll it out onto parchment paper.  I made the mistake of rolling it out on the counter the first time and won’t do that again.  Since this is a rustic tart you don’t need to worry too much about how neat the edges of your dough are.

veggietart8

After you roll out your dough you spread some softened goat cheese on it.  Again, there’s magic happening in your kitchen right about now.  Be sure the goat cheese is room temperature or it will pull too much on the dough and rip it.  I know from experience.

veggietart10

On top of the cheese goes the vegetables.

veggietart1

Fold up the edges, brush with a beaten egg and bake.  I baked mine on a pizza stone the second time with great results, but a cookie sheet works well, too.

veggietart12

After cooling for a few minutes, slice and serve and enjoy.  It’s so amazing warm, but I ate a slice cold from the fridge as I was running out the door at lunchtime and it was still delicious.  As far as reheating goes you need to be prepared for a slightly soggy bottom crust.  But again, still delicious.  If you’re serving this to at least 4 people you probably won’t need to worry about leftovers, though.

veggietart9

Fall Vegetable Tart with Goat Cheese and Prosciuttio

From Fine Cooking

Ingredients

Dough

  • 6 ounces (1 1/3 cups) flour
  • 6 ounces (1 1/2 sticks) cold butter cut into chunks
  • 6 ounces cold cream cheese (low fat is fine) cut into chunks
  • 3/4 teaspoon salt
  • 1 beaten egg for egg wash

Filling

  • olive oil
  • 1 1/2 cups butternut squash cut into 1/2 inch cubes
  • 3/4 cup sliced carrots (1/2 inch thick half moons)
  • 3/4 cup sliced leek (optional)
  • 3/4 cup chopped red bell pepper
  • 3/4 cup chopped cauliflower
  • 1 tablespoon finely chopped fresh rosemary
  • 2 teaspoons chopped fresh thyme
  • kosher salt and pepper
  • 4 ounces thinly sliced prosciutto, cut in to bite sized pieces
  • 4 ounces goat cheese, room temperature

Directions

Filling

  1. Preheat oven to 375°F.
  2. Toss the vegetables together with rosemary, thyme 3/4 teaspoon salt and 1/2 teaspoon pepper and a drizzle of olive oil.
  3. Transfer to a 9×13 pan, cover tightly with foil and roast for 30-40 minutes until just fork tender.
  4. Let cool for 10-15 minutes then add in the prosciutto.

Dough

  1. Put flour, butter, cream cheese and salt in the bowl of a food processor and pulse until the dough just begins to come together.
  2. Place a large piece of parchment on the counter and sprinkle with a little flour.  Turn dough out onto the parchment and bring together with your hands, sprinkling with more flour if needed.
  3. Roll dough out onto the parchment into a roughly 16-inch round.

Assemble

  1. Preheat oven to 400°F.
  2. Transfer parchment to a cookie sheet or pizza stone and trim any excess parchment that hangs off the sheet or stone.
  3. Spread goat cheese onto the dough leaving a 1 1/2 inch border.
  4. Pile vegetable evenly on top of the goat cheese.
  5. Fold edges of the dough over the vegetables, then brush with beaten egg.
  6. Bake for 35-45 minutes.  Let cool for 10 minutes before slicing and serving.


Daring Bakers: Raspberry and Cream Cheese Kolache

I’m not sure about other parts of the country, but anyone from central Texas isn’t wondering what a kolache is.  As a kid I have fond memories of stopping in West, Texas , a Czech community on I-35 in between Austin and Dallas, for kolaches.  I made them once in college, right when I was beginning to really enjoy baking, but I haven’t made them since, which is a shame!  I was really excited to have the opportunity to try them again this month.

Raspberry and Cream Cheese Kolaches | Hottie Biscotti

The September Daring Bakers’ challenge was brought to us by Lucie from ChezLucie. She challenged us to make a true Czech treat –Kolaches!

We were given the option of making 3 different types of kolaches.  I’d never heard of the first two types, Prague Kolach and Kolache from Chodsko.  Both looked so beautiful but were larger scale, more like a cake or tart, and would be better for a group breakfast.  The Moravian kolaches are the type I am more familiar with and they lend themselves better to sharing and enjoying over a few days since they are individual servings.

Raspberry and Cream Cheese Kolaches | Hottie Biscotti

My favorite kind of kolache are cream cheese and fruit filled.  The recipe we were given for this month used a quark filling, something I’d never heard of.  After looking in to it I found that it’s a cheese spread, somewhat similar to cream cheese.  Instead of searching it out I opted to follow the same instructions and use the dough recipe provided but make a cream cheese filling.  I took another short cut and bought a can of raspberry filling instead of making my own.

The dough recipe seemed weird to me, powdered sugar instead of granulated.  I looked up quite a few other recipes before finally deciding to just go with the one we were given.  It turned out really well!  It rose nicely, was a breeze to roll out and cut and tasted just like kolache bread should.

When I made kolaches 10 years ago I rolled them into balls, made a little hole in the center and filled it with the fruit.  These kolaches are interesting in their assembly.  You divide the dough into discs, flatten it out, dollop on some cream cheese filling, wrap the dough around it and then make an indentation for the fruit.  It creates more of a layer of cream cheese that melds with the bread instead of a mass of cream cheese filling.  Since this was my first time making these I went easy on the filling and had quite a bit left.  I’d definitely use more cream cheese filling next time.

kolache1 kolache2 kolache3 kolache4

I loved the raspberry filling, nice and tart and it paired well with the cream cheese and the bread.  Poppy seed is traditional and I have seen many recipes with prune/plum filling.  I had grand plans to make another batch with pumpkin filling, but my grand plans rarely come to fruition.  Maybe next time.

kolache6 kolache7 kolache8 kolache9

The streusel topping, posypka, is beautiful and delicious.  Don’t skip it and don’t skimp on it!  You won’t use all of the recipe below, but it freezes well.  So save it for later or make another batch of kolache.

Raspberry and Cream Cheese Kolaches | Hottie Biscotti

These are best the day they’re made, but are still quite good for a couple days, especially warmed just slightly in the microwave.  Just watch out for the fruit filling.  It gets really hot and your mouth will not forgive you for days.

Raspberry and Cream Cheese Kolaches | Hottie Biscotti

If you haven’t tried kolache before, I encourage you to!  They’re fun to make and will yield tasty rewards.  Enjoy!

Raspberry and Cream Cheese Moravian Kolache

Makes 10 large kolaches

Ingredients

Dough

  • 3-2/3 cup all-purpose flour
  • ¾ cup powdered sugar
  • 1 cup milk, warm
  • 1/3 cup butter, melted and slightly cooled
  • 4 teaspoons yeast
  • pinch of salt
  • 2 egg yolks
  • 1 egg for egg wash

Cream Cheese Filling

  • 8 ounces cream cheese, room temperature
  • 1/4 cup granulated sugar
  • 3 tablespoons all-purpose flour
  • 1 egg yolk

Fruit Filling

  • 1 can fruit or poppy seed filling

Posypka (Streusel)

  • 1/2 cup sugar
  • 1/2 cup flour
  • 3 tablespoons butter, chilled

 Directions

Dough

  1. In a small bowl mix together yeast and 1 teaspoon granulated sugar.  Add 4 tablespoons (¼ cup) warm milk, mix well and sprinkle with 1 tablespoon flour.  Cover with plastic wrap and let rest for 10 – 15 minutes.
  2. In a bowl of your electric mixer (or in a large bowl) mix flour, sugar, salt, egg yolks, butter, milk and leavened yeast.  Knead with dough hook (or with wooden spoon) on low speed for about 10 minutes.  Cover with plastic wrap and let rise for one to two hours until doubled in volume.

Cream Cheese Filling

  1. Beat together all ingredients until smooth and creamy.

Posypka

  1. Using a pastry blender combine all ingredients and store in the fridge until ready to use.

Assembly

  1. Preheat oven to 340°F.  Line 2 cookie sheets with parchment paper.
  2. Turn dough out onto a floured surface.  Roll gently to a thickness of about 1 cm.  Using a 3-inch cutter make as many rounds as you can.  Re roll the scraps and cut as many more as you can.
  3. Take a dough round and flatten it a bit more.  Scoop on some of the cream cheese mixture, about 1 tablespoon.  Gather the dough around the cream cheese and pinch it together.  Place seam side down on a parchment lined baking sheet.  Repeat with the remaining dough.  Place 5-6 on each cookie sheet, well spaced.
  4. Brush the tops of each with egg wash and using the back of a spoon make an indentation in each.  Fill with raspberry filling and sprinkle with posypka.
  5. Bake one sheet at a time, 15-20 minutes until tops are beginning to become golden.
  6. Let cool briefly and then eat up!

Daring Bakers: Cinnamon Rolls with Peach Preserves & Cream Cheese Icing

I made these rolls, took pictures and began this post a couple weeks ago since I was expecting a baby mid-June.  I cannot believe I am actually posting this month!  Special thanks to my amazing friend, Carrie, who held my sweet baby boy and also entertained my toddlers and therefore made it possible for me to finish this post this morning!  You’re amazing 🙂

Our baby’s due date was June 19, so I knew I had to get this challenge completed before my typical completion of a Daring Bakers challenge, a day or two before posting.  The day I made these rolls I thought, “It will be good to have these for our house guests after the baby comes.” thinking that this baby would be early like our other two.  But over a week passed before our sweet baby arrived and we’d already finished off a pan!  I froze the other pan after baking it so we did have some for grandparents when they came to see the baby.

peachrolls3

And here he is!  Christopher was born on June 23 and we love him.

photo 2 (95)

This month the Daring Bakers kept our creativity rolling with cinnamon bun inspired treats. Shelley from C Mom Cook dared us to create our own dough and fill it with any filling we wanted to craft tasty rolled treats, cinnamon not required!

peachrolls4

This challenge had me excited from the moment I read it!  I love cinnamon rolls, both the making of and the consumption of them.  But I’ve never ventured beyond the traditional cinnamon sugar filling.  This challenge encouraged creativity from the Daring Bakers.  I know some people got incredibly creative, and I admire those people for not only having creative minds but for being brave enough to try something new!  I played it pretty safe and just added peach preserves to the rolls.  I know, it’s kinda lame.  But it’s still  super delicious!

I used a sweet dough recipe from America’s Test Kitchen as the base for the rolls.  In the cookbook this dough is also used for hot cross buns and sticky buns.  It comes together nicely, rises well, is easy to roll out and handle, and bakes into a lovely sweet bread.  It’s a keeper.

peachrolls6 peachrolls7 peachrolls8 peachrolls9

Peach just seemed like a good summer choice, but you could use any kind of jam or preserves in these rolls.  Add in nuts if you like.  Or leave out the jam and make a simple cinnamon roll with a traditional cinnamon and brown sugar filling.

peachrolls10 peachrolls11 peachrolls5

The icing is sweet with just enough tang from the cream cheese.  You can make it more icing-like by adding less milk, or more like a glaze by adding a little more.  The recipe below makes a generous amount for the 2 pans of rolls.  Ice these when they are still a little warm so that the icing can seep in between the layers and get all wonderfully gooey.  Or you can ice them individually to control the amount of icing on each roll since some people are big icing lovers and others are crazy not so much.

peachrolls1

Peach Cinnamon Rolls with Cream Cheese Icing

Adapted from America’s Test Kitchen Family Cookbook

Ingredients

Dough

  • 3/4 cup buttermilk
  • 6 tablespoons butter, melted and cooled
  • 3 eggs, lightly beaten
  • 4 1/4 cups flour
  • 1/4 cup sugar
  • 2 1/4 teaspoons instant yeast
  • 1 1/4 teaspoon salt

Filling

  • 3/4 cup brown sugar
  • 1  1/2 teaspoons cinnamon
  • 3 tablespoons melted butter
  • 3/4 to 1 cup peach preserves

Icing

  • 5 tablespoons cream cheese
  • 1 1/2 cups powdered sugar
  • 3-5 tablespoons milk

Directions

Dough

  1.  Whisk the buttermilk, butter and eggs in a small bowl.
  2. Mix 4 cups of flour, sugar, salt and yeast in stand mixer fitted the dough hook.
  3. Add buttermilk mixture to flour, mix on low until dough comes together.
  4. Increase speed to medium low and knead until dough is smooth and elastic, about 10 minutes.  Add extra flour if dough seems sticky, one tablespoon at a time.
  5. Turn dough out onto clean counter and knead by hand to form a smooth round ball.
  6. Place dough in oiled bowl, cover and let rise for 2 to 2 1/2 hours until doubled in size.

Fill, Shape and Bake Rolls

  1. Mix brown sugar and cinnamon in a small bowl and set aside.
  2. Turn dough out onto a floured surface and dust lightly with flour.  Pat the dough fat, and then use a rolling pin to roll dough out into a 12×16 inch rectangle.
  3. Brush dough with melted butter, then spread with peach preserves leaving a 1/4 inch edge all around.  Sprinkle brown sugar mixture over the preserves and spread out.
  4. Roll dough into a long cylinder, as tight as you can get it.  Pinch the edge of the dough to seal the roll.
  5. Use a serrated knife to carefully cut into 14-16 buns.
  6. Butter 2 round cake pans and place 7 or 8 buns in each.  Cover with plastic wrap that has been sprayed with non-stick spray and let rise for about 1 to 1 1/2 hours.  Rolls should be pressed up against each other.  To Make Ahead: Pop them in the fridge after covering, before they rise.  Keep them there for up to 16 hours.  When you’re ready, take them out and let them rise at room temp for 1 1/2 hours, then bake as below.
  7. Preheat oven to 350°F.
  8. Bake rolls for 25-30 minutes, until golden brown and puffed.
  9. Let rolls cool for 10 minutes before icing.

Icing (make while rolls are baking)

  1. Beat cream cheese and powdered sugar until mixed well.  Add in milk, a tablespoon at a time until the icing is the consistency that you like.
  2. Ice rolls in the pan or turn rolls out and ice on a platter.


Blueberry & Cream Cheese Coffee Crumb Cake

With the birth of our 3rd baby fast approaching I’m finding myself trying everyday to accomplish things that will make the transition easier.  Having all the laundry cleaned and put away, keeping the kitchen well stocked (and relatively clean) for our older kids for when we’re in the hospital and someone else is watching them, washing newborn clothes for a girl and a boy, checking my hospital bag daily to be sure I haven’t forgotten anything, and going through my lists of baby names to narrow it down.  But what do I decide is the most important?  Making this coffee cake, of course.  Baking is a great way to procrastinate, don’t you think?

Blueberry & Cream Cheese Coffee Crumb Cake | Hottie Biscotti

I saw this recipe for cream cheese coffee cake from Shugary Sweets on Pinterest and immediately knew I needed to make it.  With a pint of beautiful blueberries in the fridge it became blueberry cream cheese coffee cake because there was just no other option.

Blueberry & Cream Cheese Coffee Crumb Cake | Hottie Biscotti

So I put this together, baked it, and let it cool.  No big deal.  And I had a little corner of it in the evening before I went to bed.  It was delicious.  In the morning I cut myself another square for breakfast.  Something wasn’t right.  It seemed a little underbaked.  I had baked it 5 minutes longer than instructed, so I was surprised.  As I cut a little more into the center I saw that it was mostly raw goo.  I was real bummed about it.  I tried to save what I could around the edges, but then I had to do one of the hardest things a sweets loving girl can do.  I had to scrape all of that goodness right into the trashcan.  Heartbreaking.

Later in the day I restocked on blueberries, cream cheese, and butter and came home and did it all over again.  Because I’d originally misread the ingredients and messed up the streusel topping I was glad to have a second chance at it.  So I guess it was kind of a good thing that I underbaked it the first time?  Regardless, I wound up with this lovely cake when all was said and done and that makes it all worth it.

Blueberry & Cream Cheese Coffee Crumb Cake | Hottie Biscotti

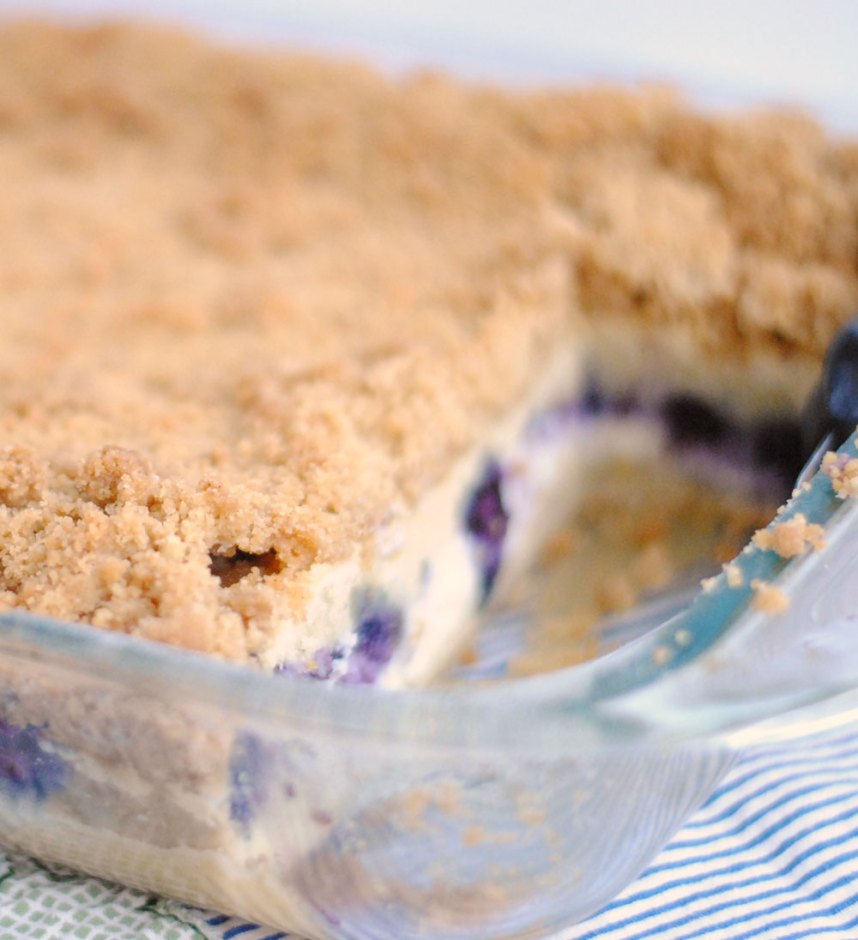
This breakfast dish is delicious and quite decadent, but the blueberries make it good for you!  It’s fruit!  The berries also add a nice pop of color and a lovely tartness to each bite.  The cream cheese filling is amazing, and the crunchy streusel topping is the perfect counterpart to the smooth cake and creamy filling.  Enjoy!

Blueberry & Cream Cheese Coffee Crumb Cake | Hottie Biscotti

Blueberry & Cream Cheese Coffee Crumb Cake

Ever so slightly adapted from Shugary Sweets

Serves 12-16

Ingredients

Cake

  • 2 1/2 cups of flour
  • 1 cup sugar
  • 1/2 teaspoon baking powder
  • 1/2 teaspoon baking soda
  • 1/2 teaspoon kosher salt
  • 3/4 cup unsalted butter, room temperature
  • 3 eggs
  • 2 teaspoons vanilla
  • 2/3 cup buttermilk

Cream Cheese Filling

  • 2 packages cream cheese, room temperature (low fat is fine)
  • 1/2 cup sugar
  • 1 egg
  • 1 pint of blueberries, rinsed and dried and tossed with a tablespoon of four (the flour keeps them from sinking all the way down in the batter)

Streusel Topping

  • 1 stick of butter, melted
  • 1/3 cup sugar
  • 1 cup brown sugar
  • 1 1/2 teaspoons cinnamon
  • 1 to 1 1/2 cups flour

Directions

Cake

  1. Preheat oven to 325°F
  2. Grease and flour a 9×13 inch pan.
  3. Beat flour, sugar, baking powder, baking soda and salt with the softened butter until combined.
  4. Add in the eggs, one at a time, beating between each addition.
  5. Add in buttermilk and vanilla.  Cream for 3-4 minutes until mixture lightens in color and is fluffy.
  6. Spread half of the batter in to the prepared pan.

Filling

  1. Beat cream cheese, sugar and egg together until creamy.
  2. Spread evenly over the cake batter.
  3. Sprinkle the berries over the cream cheese layer.
  4. Spread the remaining cake batter over the berries.

Streusel

  1. Combine both sugars and cinnamon.
  2. Add in the butter and mix to combine.
  3. Add in a cup of the flour and, using clean hands, mix together until crumbly.  Add in up to 1/2 cup more flour if it seems too wet.
  4. Spread evenly over the batter.

Bake

  1. Bake for 1 hour, until toothpick or cake tester inserted into the center of the cake comes out with a few crumbs attached.
  2. Let cool completely on a wire rack before cutting and serving.


Cream Cheese & Pecan Blondies

More than a few food bloggers I’ve read in the last couple of days have mentioned being done with chocolate.  After Valentine’s Day I was in the same boat.  And while I had the desire to bake something sweet and delicious I knew I needed to steer clear of cocoa.  These blondies were the perfect compromise.

creamcheesepecanblondies

I love blondies, maybe, just maybe more than I love brownies, but it depends so I can’t say for sure.  These blondies have a cream cheese swirl and pecans to make them even more delicious.  The top and edges get crispy and crunchy while the inside stays moist and chewy.  It’s a glorious combination.

creamcheesepecanblondies4

You can substitute walnuts for the pecans, or leave the nuts out altogether if you’re just not a fan of nuts or if you have an allergy.  The blondie batter can even be used on its own without the cream cheese.  You could mix in white or dark chocolate chips, toffee, or whatever you’d like.  The recipe calls for cake flour, and while I think all purpose would be OK, I haven’t tried it out.  Let me know if you come up with any spectacular combinations!

creamcheesepecanblondies6

These are wonderful on their own, but also quite nice with a scoop of vanilla ice cream.  But really, what isn’t nice with a scoop of vanilla ice cream?  “Enjoy!” says Betsy.creamcheesepecanblondies7

Cream Cheese & Pecan Blondies

Adapted slightly from More from Magnolia Cookbook

Ingredients

Blondies

  • 1 1/2 cups cake flour
  • 1 teaspoon baking powder
  • 1/2 teaspoon salt
  • 1 1/2 sticks butter, softened
  • 1 1/2 cups brown sugar
  • 2 eggs, at room temperature
  • 2 teaspoons vanilla
  • 3/4 cup chopped pecans, toasted

Cream Cheese Topping

  • 6 ounces cream cheese (1/3 fat is fine) softened
  • 3 tablespoons sugar
  • 1 egg yolk
  • 1 1/2 tablespoons flour
  • 1/2 teaspoon vanilla

Directions

  1. Preheat oven to 350°F.  Grease a 9×13 inch pan and set aside.
  2. Whisk together flour, baking powder and salt in a small bowl and set aside.
  3. Beat butter and sugar together in a large bowl until well combined and light in color, 2-3 minutes.
  4. Beat in the eggs, one at a time, scraping down the bowl as needed.  Then mix in vanilla.
  5. Add in the four mixture and mix to combine, then fold in pecans.  Pour into the prepared pan and spread evenly.
  6. In a medium bowl beat cream cheese and sugar well.  Add in the egg yolk, flour and vanilla and mix well.
  7. Drop cream cheese mixture in heaping spoonfuls onto the blondie batter.  Use a knife to swirl the cream cheese through the batter without totally mixing it in.
  8. Bake for 35-40 minutes, until top is beginning to brown and cake tester inserted into the blondies comes out with just a few crumbs.
  9. Let cool to room temperature before cutting OR let cool for 20 minutes at room temperature then pop them in the fridge for half an hour before cutting.


The Best Dip Ever: Goat Cheese Dip with Piloncillo Chipotle Sauce

This recipe came from a restaurant in San Antonio called Liberty Bar.  I’ve never actually been, but my sister lived in San Antonio for a while and has been there.  When she saw this recipe in a magazine, something like 10 years ago, she decided we should make it.  And we did.  And it was incredible.  I usually refer to it as “the piloncillo dip” to my family, and they immediately know what I’m talking about.  And then we all start drooling.

piloncillodip1

For some reason I had kind of forgotten about it until recently.  I’ve now made it twice in the last month for parties and am so glad to have rediscovered it.

The dip is a great combination of flavors; spicy, sweet and tangy.  I love goat cheese, so I’m a big fan of this dip, but the goat cheese isn’t so strong that someone who isn’t crazy about it won’t like it.  The sauce is rich and creamy and sweet and amazing.  It is a little spicy because of the chipotle.  If you’re worried about it you can cut back on the chipotle, or just use the adobo sauce and not so much of the peppers themselves.

Piloncillo, also called panela, is a Mexican unrefined whole cane sugar that is available at most large grocery stores.  I always find it with the other Mexican foods and have seen it in a cone form and also in a round disc.  It is similar in flavor to dark brown sugar, but has a different texture.  You might be able to substitute brown sugar in this recipe, but I’ve never tried it.  Let me know if you do and if it’s successful.  Chipotles in adobo are in the same spot as the piloncillo at my grocery store.  But my sister in New York has said it’s hard to find.  You don’t end up using the whole can in this recipe, but I’ve frozen the extra in a small tupperware or freezer bag, thawed it out and used it in other recipes with great success.  Don’t let it go to waste, especially if it’s a rarity where you live!

piloncillodip2

Serve this with pita chips or slices of grilled bread.  I serve the sauce on top of the dip, but you can also serve the cheese dip and sauce in separate bowls, allowing people to get just the amount of sauce and cheese they want.  To serve altogether I usually lay a piece of plastic wrap in the botttom of a pie plate, spread the cheese in an even layer, cover with plastic wrap and refrigerate.  Then I uncover the cheese spread and flip it out onto a large platter, peel off the plastic wrap, and then cover with some of the sauce.  There is almost always extra sauce and I hate throwing it away since it’s so stinking good.  Any ideas on how to use the extra?

Goat Cheese Dip with Piloncillo Chipotle Sauce

Serves at 10-12 as an appetizer

From Liberty Bar

Ingredients

For the cheese spread

  • 6 ounces soft mild goat cheese, at room temperature
  • 12 ounces cream cheese (full fat or 1/3 fat), at room temperature
  • 1 small garlic clove, minced and mashed to a paste with 1/4 teaspoon salt (use the side of a large chef’s knife to do this)
  • 1 teaspoon minced canned chiles chipoltes in adobo sauce

For the sauce

  • 1 tablespoon minced canned chiles chipoltes in adobo sauce
  • 8 ounces piloncillo (Mexican unrefined sugar), roughly chopped
  • 1 cup heavy cream
  • Pita chips, crackers, toasted baguette slices or grilled bread slices

Directions

  1. Make the cheese spread: Beat together cheeses, garlic paste, and chipolte chiles. Transfer mixture to a small serving bowl (or pie plate lined with plastic wrap) and chill, covered, at least 4 hours or overnight.
  2. Make the sauce: In a small saucepan combine chipoltes, piloncillo, and cream and cook over low heat, stirring occasionally and breaking up sugar, until piloncillo is melted and sauce is smooth, about 10 minutes.
  3. Transfer sauce to a small serving bowl and chill, covered, for at least 4 hours or up to overnight.
  4. Serve cheese and sauce in separate bowls, or pour some of the sauce over the cheese spread to serve.


Holiday Baking: Oreo and Nutter Butter Truffles

If you’ve been part of a cookie exchange or received some gifts from the kitchen this Christmas, then there is a good chance you have seen these.  A super simple, three ingredient treat that looks way more impressive than it actually is.  These cute little goodies are so sweet and so yummy.

When you shape these, make sure to make them small.  They really are rich.  If they are too big you may not be able to eat the whole thing, or you’ll feel too guilty taking a second one, and then you won’t get to try both kinds!

The recipe for the Oreo truffles came from the Kraft website.  I used candy coating instead of chocolate squares.  Melting chocolate just never seems to harden well enough.  Does anyone have any tips for coating with real chocolate?

After I made these I thought I should have used the white candy coating for a nice contrast from outer white coating to inner dark chocolate.  Then I thought about all the possibilities there are with these truffles.  You could use any sandwich cookie.  So I did the same thing with a package of Nutter Butters.  The white coating gave me some issues, so these were not as evenly coated as the chocolate.  The peanut butter truffles would have been delicious with the chocolate coating.  Who doesn’t like that peanut butter and chocolate combination?

I love the sprinkles of cookie crumbs on top of these truffles.  It gives them more of a true chocolate truffle appearance (and it helps to hide any uneven coating).  If you really wanted to dress these up even more and make them appealing to foodies, sprinkle with some flaked sea salt.  Some people might be averse to this sweet and salty combo, but it really is wonderful.  You can find flaked sea salt at many grocery stores.  It isn’t cheap, but you don’t use very much and it goes a long way.  This one by Maldon is the one I see most often.

If you don’t have a food processor, get to work with a large ziploc bag and a rolling pin to break the cookies into crumbs.  Make sure when you start coating the balls that you have 2 cookie sheets prepped with parchment paper, wax paper or Silpats.  This makes clean up a breeze, and removing the truffles much easier.

Oreo Truffles

Ingredients

  • 1 package Oreo cookies
  • 1 8-ounce package cream cheese, softened
  • 1 package chocolate candy coating

Directions

  1. Process Oreos in a food processor to fine crumbs.
  2. Reserve about 1/2 cup of the crumbs in a small bowl.
  3. Combine the remaining crumbs and the cream cheese and mix until evenly combined.
  4. Form dough into ping pong sized balls, between 45 and 55 depending on size.
  5. Melt chocolate coating according to package instructions.  Coat each ball and place on parchment or wax paper.  Sprinkle with reserved crumbs while chocolate is still wet.
  6. Chill truffles for at least an hour, then store in sealed containers in the fridge until serving.

Nutter Butter Truffles

Ingredients

  • 1 package Nutter Butters cookies
  • 1 8-ounce package cream cheese, softened
  • 1 package chocolate or white candy coating

Directions

  1. Process cookies in a food processor to fine crumbs.
  2. Reserve about 1/2 cup of the crumbs in a small bowl.
  3. Combine the remaining crumbs and the cream cheese and mix until evenly combined.
  4. Form dough into ping pong sized balls, between 45 and 55 depending on size.
  5. Melt chocolate coating according to package instructions.  Coat each ball and place on parchment or wax paper.  Sprinkle with reserved crumbs while chocolate is still wet.
  6. Chill truffles for at least an hour, then store in sealed containers in the fridge until serving.

Peanut Butter Icebox Pie

There are not many combinations more perfect than peanut butter and chocolate.  When I came across this recipe as I was flipping though The Magnolia Bakery Cookbook I immediately stopped and added the ingredients to my grocery list.

There is no baking required and therefore no need to turn on your oven, which is nice for me.  It’s been over 100°F most days this summer.

I changed a few things about the assembly of this pie to make it a little simpler.  If you read the recipe from the cookbook you notice that the assembly requires some marbling of the caramel, peanut butter and cream cheese mixture.  I just put a layer of caramel on top of the crust and then mixed the peanut butter in with the cream cheese.  This seemed to be a fine way to assemble the pie, maybe just not as pretty as the marbling would have been.

I highly recommend putting the peanut butter cups in the fridge or freezer prior to chopping.  This makes life, cutting boards, knives and hands, much cleaner.

As you might have noticed, there is not much sugar in the filling.  I was a little worried about this, but it was perfect.  Who am I to doubt Magnolia Bakery?  Combined with the cookie crust, caramel and peanut butter cups it is just wonderful and not overly sweet.

One of my new guilty pleasures are those Reese’s Minis, and I happen to have a stash of them in the fridge (where I must keep any chocolate with it being so hot this time of year.)  I halved the minis and chopped some unsalted peanuts for the topping.  If I were feeling really crazy I might use salted peanuts as a nice salty contrast.  Something else that might be interesting would be using some of the white chocolate Reese’s…I think it could work.  Enjoy!

Peanut Butter Icebox Pie

From The Magnolia Bakery Cookbook

Ingredients

Crust

  • 1 stick butter
  • 2 cups vanilla wafer crumbs

Filling

  • 12 ounces cream cheese, softened
  • 3 tablespoons sugar
  • 1/2 teaspoon vanilla
  • 1 cup (1 pint) heavy cream, whipped to soft peaks
  • 6-8 regular peanut butter cups, chopped
  • 3/4 cup smooth peanut butter
  • 1/2 cup caramel sauce

Garnish

  • Handful of chopped peanut butter cups
  • Handful of chopped peanuts

Directions

Crust

  1. Combine butter and cookie crumbs in a bowl until crumbs are evenly coated.
  2. Press into a 9-inch pie plate.
  3. Chill in the freezer for 20 minutes.

Filling

  1. Beat cream cheese until fluffy, 2 minutes.  Add sugar gradually, then beat in peanut butter and vanilla.
  2. Whip the cream in a separate bowl, then fold gently into the cream cheese mixture.
  3. Fold in the peanut butter cups.

Assembly

  1. Remove the crust from the freezer.
  2. Spread the caramel on the bottom of the crust, then spread the filling over the caramel and smooth the top.
  3. Cover with plastic wrap and chill for 8 hours, or overnight.
  4. To serve, garnish with peanut butter cups and peanuts.