Daring Bakers: Surprise Inside Checkerboard Cake

This challenge couldn’t have come at a better time!  July is my birthday month.  Having to bake a special cake for the Daring Bakers was the perfect excuse to bake myself a birthday cake. cake29 cake30 For the July Daring Baker’s Challenge, Ruth from The Crafts of Mommyhood challenged us to bake a cake. But not just any cake; she asked us to add in a special surprise for our eyes as well as our taste buds! cake19 When I saw this challenge I immediately got on Amazon and bought the Surprise Inside Cakes cookbook, which is amazing.  But after looking through it I decided I couldn’t commit to one of her cakes right now.  I figured I’d fail at the first attempt and have to try again (or a dozen times) to get it right.  And I just couldn’t justify taking the time and energy to make multiple cakes when most of my time and energy has to go toward my kids.  So I opted to make something a little simpler, and something I’d seen before and been anxious to try. cake22 cake23   cake26 This checkerboard cake is impressive without being quite as involved as something like this.  Amazing, right?!  And something I’d like to try someday, just not today.  A lot of these kinds of cakes involve baking cake, crumbling it up and mixing it with icing, carving into other baked cake layers and then filling to space with the cake-frosting mixture.  I wasn’t even going to pretend I was brave enough to try that.  This cake just involves some cutting and layering.  I could handle that. I used cake mix for this challenge because if it didn’t turn out I did not want to throw a scratch cake away, and, let’s face it, scratch cake is easier and always reliable.  Start by baking two boxes of cake mix into 8-inch rounds.  I used a dark chocolate and funfetti cause it’s my birthday!  Wrap them in plastic and chill them in the fridge for at least a couple hours or overnight. cake1Now you want to level them to all the same height.  I used one of these.  It’s a favorite cake tool of mine.  You can also use a serrated knife. cake2 Now cut each layer using a 5-inch circle and a 3-inch circle.  I tried to center them perfectly but they weren’t quite perfect.  It turned out fine.  Also, as you can see below, I had my knife at a slight angle when I cut the first circle.  Try to keep it straight, but know that if you have the same problem as I did, it will still work out.cake3 cake4 cake5 cake6 Then do the same with the chocolate layers.  Be very careful when moving the rings!  They become very fragile. cake7 Now would be a good time to chill or freeze the layers.  I didn’t and wish I had.  They would’ve been easier to move if they were cold.  Whip up a batch of frosting, I used this one.  Place one large vanilla ring on a cake plate.  Spread some frosting around the inside of the ring. cake8 Place a chocolate ring inside of this one. cake9 Frost the inside of this ring and then place a small vanilla circle in the center.  NOTE: Your icing is going to get full of chocolate crumbs.  Try to keep the big bowl of frosting relatively crumb free.  I scooped frosting into a smaller bowl as I needed it. cake10 Top this layer with frosting.  Then repeat with the rest of the cake layers, alternating chocolate, vanilla, chocolate.  Frost the entire cake with a crumb coat and put in the fridge to set, at least a couple hours. cake11 cake12 cake15 Now you may need to make another batch of frosting, depending on how much you made the first time around.  Finish off the cake with the final coat of frosting. cake16 Place the cake in the fridge until you’re ready to cut in to it.  These kinds of cakes cut more cleanly when cold. Stick some candles in and celebrate! cake18 cake25

Orzo Salad with Chickpeas, Tomatoes, Herbs and Feta

I have three of the best sisters on the planet.  I was lucky enough to have two of them down to visit a couple weeks ago.  We are all different, but we all share an interest in food and cooking.  When a holiday or party is coming up we often menu plan together.  Lindsey and Sarah found this recipe for an orzo salad while they were visiting and it was the perfect side dish for the steak Ben grilled for dinner.  I made it again the following weekend when my parents were in town and it was a hit yet again!  This salad is simple and delicious and a great choice for a summer side dish.

ORZO SALAD WITH CHICKPEAS, TOMATOES, HERBS AND FETA | Hottie Biscotti

This salad comes together quickly, can be prepared ahead, and can be served room temperature or cold, making it a really convenient dish.  You can adjust the ingredients to your liking.  I used a lot of tomatoes and herbs, with a small amount of dressing and feta.  You can serve more dressing and feta on the side for guests who want more of it.  You could leave out the chickpeas if you don’t care for them, but I probably wouldn’t add anymore than the can called for.  The chickpea to orzo ratio seemed just about perfect.

The basil and mint combination make this salad bright and refreshing, the feta is a great flavor addition, the chickpeas are a nice texture surprise and the tomatoes provide lovely flavor and color.ORZO SALAD WITH CHICKPEAS, TOMATOES, HERBS AND FETA | Hottie BiscottiORZO SALAD WITH CHICKPEAS, TOMATOES, HERBS AND FETA | Hottie Biscotti

The first time my sister made the dressing I was almost out of red wine vinegar so she subbed in some balsamic to make up the difference.  The next time I made it I used all red wine vinegar and it definitely changes the dish.  I think I preferred it with a little balsamic, but both ways are quite good.

I hope this makes its way to your table this summer!  You will not be disappointed.

ORZO SALAD WITH CHICKPEAS, TOMATOES, HERBS AND FETA | Hottie Biscotti

Orzo Salad with Chickpeas, Tomatoes, Herbs and Feta

From Giada DeLaurentiis

Ingredients

Salad

  • 1 1/2 cups orzo
  • 1 15-ounce can chickpeas, drained and rinsed
  • 1 1/2 to 2 cups cherry, grape or other small tomatoes, halved or quartered depending on their size
  • 1/2 cup finely chopped red onion
  • 1/2 cup fresh basil leaves
  • 1/4 cup fresh mint leaves
  • 4-6 ounces feta cheese, crumbled
  • salt and pepper to taste

Red Wine Vinaigrette

  • 1/2 cup red wine vinegar (can sub in half for balsamic)
  • 1/4 cup lemon juice
  • 2 teaspoons honey
  • 2 teaspoons salt
  • fresh ground pepper to taste
  • 1/2 cup olive oil

Directions

  1. Whisk vinegar, lemon juice, honey, salt and pepper together in a bowl.  While whisking, drizzle in the oil.  Set aside.  Note: You won’t use all the dressing.  Save what’s left in the fridge to use on a green salad.
  2. Cook orzo in boiling water according to package instructions, until al dente.  Drain, then transfer to a serving bowl, toss and let cool.
  3. Toss orzo with the beans, tomatoes, onions and herbs.
  4. Drizzle with some of the dressing, taste and add more until you’re pleased with the flavor.
  5. Toss in the feta if serving right away, otherwise cover and chill until ready to serve.  Toss in the feta right before serving.

Chocolate Chip Chickpea Cookies with Raisins and Pecans

A dear friend gave me her copy of “Deceptively Delicious” , the cookbook by Jessica Seinfeld, when I complained about my kids not eating certain foods.  Vegetables being our main problem.  While perusing the cookbook I came across some really yummy looking recipes.  The great thing is that almost every one sneaks veggies into foods that kids love (macaroni and cheese, spaghetti and meatballs, chicken nugget, etc .)  I came across a chocolate chip cookie recipe that has an entire can of chickpeas in it.  Well, we all know what I had to do that very day.

Chocolate Chip Chickpea Cookies | Hottie Biscotti

I changed a few things about the recipe, using butter instead of tub margarine, one egg and one egg white instead of two egg whites, and white whole wheat flour instead of all purpose.  I also mashed up the chickpeas instead of adding them whole, just to avoid biting into a big ol’ chickpea, which didn’t sound super appealing.

The results were not bad!  You can’t taste the chickpeas.  Ben actually took one off of the cooling rack when he got home, ate it and declared it good before I told him they were semi-healthy.  I didn’t even tell him about the chickpeas.  He’s finding out now via the blog…

Chocolate Chip Chickpea Cookies | Hottie Biscotti

The cookies are cakey and bake up in mounds with very little spreading.  I left some in mounds and flattened others.  You can flatten them with your hand, the bottom of a glass or the back of a fork.  Eaten the same day they’re baked they are really tasty.  After storing them in a container for a day they stick together a bit and are very soft.  BUT still quite delicious.

Chocolate Chip Chickpea Cookies | Hottie Biscotti

I used milk chocolate chips, but I think semi sweet or dark would be better.  The raisins are optional, but I really liked them in these cookies.  I used pecans, because that’s what I had.  But, and I know this is out of character, I think walnuts would be better.  I don’t think the white whole wheat flour made much of a difference in these since they’re already very hearty in texture, I used it because I had some and it made me feel like I was making these even healthier!  Healthier cookies means I can eat more of them!  And I feel better about giving them to the kids.  Both of the big kids, almost 4 and almost 2, really liked these.  So while I won’t be making these cookies every time I want chocolate chip cookies, I will be making these again.

Chocolate Chip Chickpea Cookies | Hottie Biscotti

Chocolate Chip Chickpea Cookies

From Deceptively Delicious

Makes 2 dozen

Ingredients

  • 1 cup brown sugar
  • 3/4 cup (1 and 1/2 sticks) butter, softened
  • 1 egg and 1 egg white
  • 2 teaspoons vanilla
  • 2 cups flour (all purpose or white whole wheat)
  • 1 teaspoon baking soda
  • 1/2 teaspoon salt
  • 1 15-ounce can chickpeas, rinsed and drained
  • 1 1/2 cups chocolate chips
  • heaping 1/2 cup pecans
  • heaping 1/2 cup raisins
  • 1/2 cup oats

Directions

  1. Preheat oven to 350°F.
  2. Place chickpeas in a bowl and mash with a potato masher or a fork, until mixture is coarse, just a few larger pieces, but not perfectly smooth.
  3. Beat butter and brown sugar in a large bowl of a stand mixer, or with a hand mixer.  Beat for 2  minutes, then scrape the bowl.
  4. Add in egg and egg white and beat well, then ass in vanilla and scrape bowl.
  5. Mix in flour, baking powder and salt until just combined.  Then mix in oats.
  6. Mix in chickpeas, chocolate chips, pecans and raisins until evenly mixed.
  7. Scoop by rounded tablespoons onto a cookie sheet lined with parchment.  Bake for 10-12 minutes, until tops are beginning to brown.  Let cool on the pan for a minutes, then move to a wire rack.

Toasted Oat Scones

After having a baby (2 weeks and 3 days ago) I am anxious to have a semi-predictable life again and get back to some of the things I was doing before he was born, like baking, cooking and blogging.  And sleeping, that’d be nice.  However, I have been consistently reminded that life with kids, and especially life with a newborn, is anything but predictable.  I tried and failed to make some coffee cake muffins earlier this week.  I blame sleep depravity, the speed at which I tried to put everything together, not totally thinking through my plan, and holding a screaming baby while filling muffin cups with batter and streusel!  Thankfully they only looked ugly but tasted delicious!

muffins2

I was frustrated with myself.  But I realize my expectations for getting back to blogging were set a little high.  It’s just not going to happen like it used to, at least not for now.  I am no longer guaranteed a time in the afternoon where all the sweet children are tucked away in their beds and I can cook, bake, take pictures and type away.  So I’m going to be a little more realistic with blogging and be happy with whatever I can manage for the next couple of months!  And remember to cherish this time with the babies, like so many people who have kids that are now grown, tell me to.  After all, the days are long but the years are short.

This morning I found myself up at 7am with my two older kids while the little man slept in until almost 9:30!  I took advantage of the time and baked up some super simple scones.  This recipe sits right next to the coffee cake recipe I attempted yesterday and is in the ATK Family Cookbook.  I figured it was a sign.

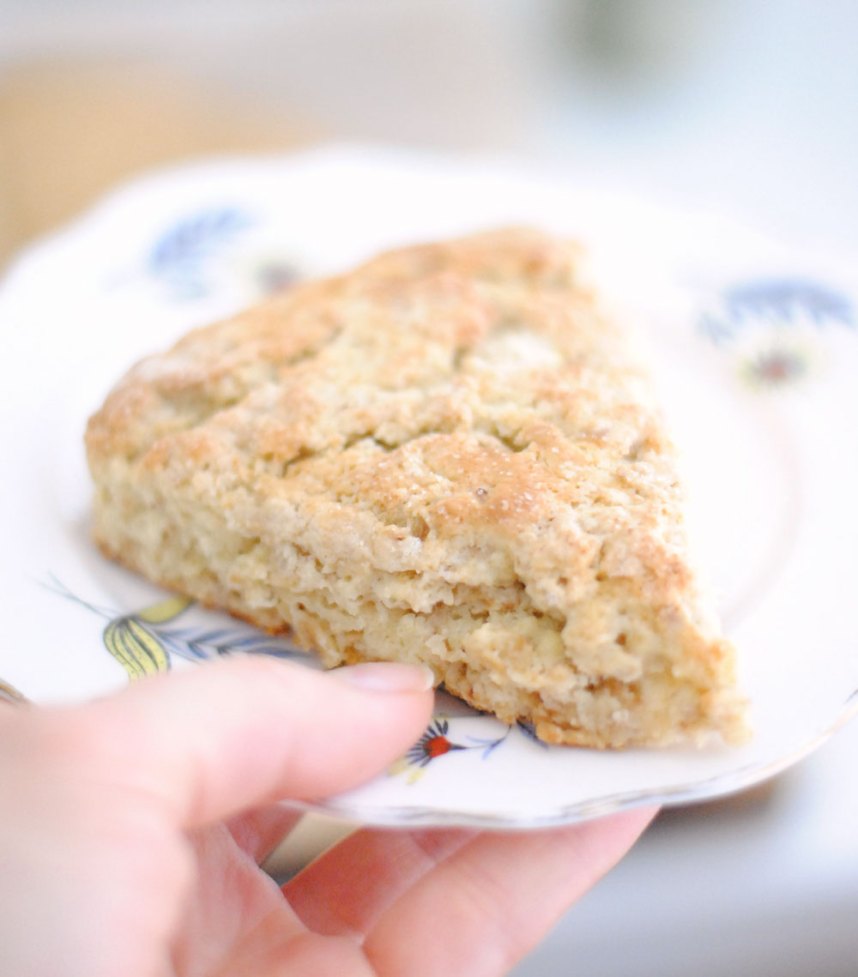
Toasted Oat Scones | Hottie Biscotti

It took me less than 20 minutes to mix these up and get them in the oven.  They’re done baking in 15 minutes and ready to eat in 10.  The ingredient list couldn’t be simpler which yields a simple and satisfying scone with nothing extra to take away from the hearty oats and rich butter.

Toasted Oat Scones | Hottie Biscotti

Eat these plain, warm or at room temperature.  Spread with a little extra butter and jam.  Have one for breakfast, one for mid-morning snack and one in the afternoon with some tea or coffee for a little pick-me-up.  The scones aren’t too sweet, which is nice.  They’re almost like a biscuit, just with more texture and a bit more dense.

Toasted Oat Scones | Hottie Biscotti

I am so glad I stumbled across this recipe, and thankful for the cooperative children who made this blog post possible!

Toasted Oat Scones

From ATK Family Cookbook

Ingredients

  • 1 1/2 cups oats, old fashioned or quick cooking
  • 1/2 cup half and half (plus 1 tablespoon for brushing on the scones)
  • 1 egg
  • 1 teaspoon vanilla
  • 1 1/2 cups flour
  • 1/3 cup sugar (plus extra for sprinkling on the scones)
  • 2 teaspoons baking powder
  • 1/2 teaspoon salt
  • 10 tablespoons butter, cold, cut into chunks

Directions

  1. Preheat oven to 375°F.
  2. Spread oats out onto a rimmed baking sheet lined with parchment.  Toast the oats for about 8 minutes, just as they begin to brown.  Let cool.
  3. Increase oven to 450°F.
  4. In a small bowl, whisk half and half, the egg and vanilla together and set aside.
  5. In the bowl of a food processor combine flour, sugar, salt and baking powder and pulse a few times.
  6. Add in the butter and pulse until butter is in pieces no larger than the size of a pea.
  7. Pour flour mixture into a large bowl and fold in the milk mixture until it just comes together.  Flour your hands and bring the dough together in the bowl.
  8. Turn out onto a floured surface and pat into a round about 1 inch thick.  Transfer to a parchment lined baking sheet and cut into 8 wedges.
  9. Brush the tops with half and half, then sprinkle with sugar.
  10. Bake for about 15 minutes, until golden.  Cool on the baking sheet for 10 minutes, then transfer to a cooling rack.

Daring Bakers: Cinnamon Rolls with Peach Preserves & Cream Cheese Icing

I made these rolls, took pictures and began this post a couple weeks ago since I was expecting a baby mid-June.  I cannot believe I am actually posting this month!  Special thanks to my amazing friend, Carrie, who held my sweet baby boy and also entertained my toddlers and therefore made it possible for me to finish this post this morning!  You’re amazing 🙂

Our baby’s due date was June 19, so I knew I had to get this challenge completed before my typical completion of a Daring Bakers challenge, a day or two before posting.  The day I made these rolls I thought, “It will be good to have these for our house guests after the baby comes.” thinking that this baby would be early like our other two.  But over a week passed before our sweet baby arrived and we’d already finished off a pan!  I froze the other pan after baking it so we did have some for grandparents when they came to see the baby.

peachrolls3

And here he is!  Christopher was born on June 23 and we love him.

photo 2 (95)

This month the Daring Bakers kept our creativity rolling with cinnamon bun inspired treats. Shelley from C Mom Cook dared us to create our own dough and fill it with any filling we wanted to craft tasty rolled treats, cinnamon not required!

peachrolls4

This challenge had me excited from the moment I read it!  I love cinnamon rolls, both the making of and the consumption of them.  But I’ve never ventured beyond the traditional cinnamon sugar filling.  This challenge encouraged creativity from the Daring Bakers.  I know some people got incredibly creative, and I admire those people for not only having creative minds but for being brave enough to try something new!  I played it pretty safe and just added peach preserves to the rolls.  I know, it’s kinda lame.  But it’s still  super delicious!

I used a sweet dough recipe from America’s Test Kitchen as the base for the rolls.  In the cookbook this dough is also used for hot cross buns and sticky buns.  It comes together nicely, rises well, is easy to roll out and handle, and bakes into a lovely sweet bread.  It’s a keeper.

peachrolls6 peachrolls7 peachrolls8 peachrolls9

Peach just seemed like a good summer choice, but you could use any kind of jam or preserves in these rolls.  Add in nuts if you like.  Or leave out the jam and make a simple cinnamon roll with a traditional cinnamon and brown sugar filling.

peachrolls10 peachrolls11 peachrolls5

The icing is sweet with just enough tang from the cream cheese.  You can make it more icing-like by adding less milk, or more like a glaze by adding a little more.  The recipe below makes a generous amount for the 2 pans of rolls.  Ice these when they are still a little warm so that the icing can seep in between the layers and get all wonderfully gooey.  Or you can ice them individually to control the amount of icing on each roll since some people are big icing lovers and others are crazy not so much.

peachrolls1

Peach Cinnamon Rolls with Cream Cheese Icing

Adapted from America’s Test Kitchen Family Cookbook

Ingredients

Dough

  • 3/4 cup buttermilk
  • 6 tablespoons butter, melted and cooled
  • 3 eggs, lightly beaten
  • 4 1/4 cups flour
  • 1/4 cup sugar
  • 2 1/4 teaspoons instant yeast
  • 1 1/4 teaspoon salt

Filling

  • 3/4 cup brown sugar
  • 1  1/2 teaspoons cinnamon
  • 3 tablespoons melted butter
  • 3/4 to 1 cup peach preserves

Icing

  • 5 tablespoons cream cheese
  • 1 1/2 cups powdered sugar
  • 3-5 tablespoons milk

Directions

Dough

  1.  Whisk the buttermilk, butter and eggs in a small bowl.
  2. Mix 4 cups of flour, sugar, salt and yeast in stand mixer fitted the dough hook.
  3. Add buttermilk mixture to flour, mix on low until dough comes together.
  4. Increase speed to medium low and knead until dough is smooth and elastic, about 10 minutes.  Add extra flour if dough seems sticky, one tablespoon at a time.
  5. Turn dough out onto clean counter and knead by hand to form a smooth round ball.
  6. Place dough in oiled bowl, cover and let rise for 2 to 2 1/2 hours until doubled in size.

Fill, Shape and Bake Rolls

  1. Mix brown sugar and cinnamon in a small bowl and set aside.
  2. Turn dough out onto a floured surface and dust lightly with flour.  Pat the dough fat, and then use a rolling pin to roll dough out into a 12×16 inch rectangle.
  3. Brush dough with melted butter, then spread with peach preserves leaving a 1/4 inch edge all around.  Sprinkle brown sugar mixture over the preserves and spread out.
  4. Roll dough into a long cylinder, as tight as you can get it.  Pinch the edge of the dough to seal the roll.
  5. Use a serrated knife to carefully cut into 14-16 buns.
  6. Butter 2 round cake pans and place 7 or 8 buns in each.  Cover with plastic wrap that has been sprayed with non-stick spray and let rise for about 1 to 1 1/2 hours.  Rolls should be pressed up against each other.  To Make Ahead: Pop them in the fridge after covering, before they rise.  Keep them there for up to 16 hours.  When you’re ready, take them out and let them rise at room temp for 1 1/2 hours, then bake as below.
  7. Preheat oven to 350°F.
  8. Bake rolls for 25-30 minutes, until golden brown and puffed.
  9. Let rolls cool for 10 minutes before icing.

Icing (make while rolls are baking)

  1. Beat cream cheese and powdered sugar until mixed well.  Add in milk, a tablespoon at a time until the icing is the consistency that you like.
  2. Ice rolls in the pan or turn rolls out and ice on a platter.


Perfect Chocolate Cake & Frosting

As with much of my spur of the moment baking, this was the result of perusing Pinterest right after my kids went down for naps.  I saw this amazing looking chocolate cake and had to have it.  Now.

Perfect Chocolate Cake | Hottie Biscotti

Perfect Chocolate Cake | Hottie Biscotti

As luck would have it I had all the ingredients (and you probably do, too!) which makes this a terrific cake to make at the last minute.  I decided to make it around 2 in the afternoon and it was cooled and frosted and ready to consume by 5.  Both the cake and the frosting come together so quickly.  Making this cake was a great use of nap time.  It was also a great way to take my mind off of the fact that my due date was going to come and go without meeting our new babe!  If only chocolate cake induced labor…

Perfect Chocolate Cake | Hottie Biscotti

I’ve had this cake before and remember asking who made it and if I could get the recipe.  For some reason I was surprised to find out it was a Hershey’s recipe.  I shouldn’t have been, I guess.  The best oatmeal cookie recipe is found on the top of the Quaker oats container, after all!  I didn’t use Hershey’s cocoa, though.  I had just enough Guittard cocoa left, so that is what I used.  The cake is moist and chocolatey and comforting, as chocolate cake should be.  The frosting is sweet and rich yet light and not dense.  I added a layer of crushed Oreos in between the layers of cake and also pressed some into the sides of the frosted cake and sprinkled some on top.  It adds some nice texture both in appearance and in your mouth, but it also helps to disguise a sloppy frosting job…which mine definitely was.

Perfect Chocolate Cake | Hottie Biscotti

You can make this in 9-inch cake pans, like I did, or in a 9×13 pan, 3 8-inch pans, a bundt pan, or you can make cupcakes.  I can easily see this becoming my new go-to chocolate cake recipe.

ONE-PAN CAKE: Grease and flour 13x9x2-inch baking pan. Heat oven to 350° F. Pour batter into prepared pan. Bake 35 to 40 minutes. Cool completely. Frost.

THREE LAYER CAKE: Grease and flour three 8-inch round baking pans. Heat oven to 350°F. Pour batter into prepared pans. Bake 30 to 35 minutes. Cool 10 minutes; remove from pans to wire racks. Cool completely. Frost.

BUNDT CAKE: Grease and flour 12-cup fluted tube pan. Heat oven to 350°F. Pour batter into prepared pan. Bake 50 to 55 minutes. Cool 15 minutes; remove from pan to wire rack. Cool completely. Frost.

CUPCAKES: Line muffin cups (2-1/2 inches in diameter) with paper bake cups. Heat oven to 350°F. Fill cups 2/3 full with batter. Bake 22 to 25 minutes. Cool completely. Frost. About 30 cupcakes.

Perfect Chocolate Cake | Hottie Biscotti

The next time I post I hope it’s to announce the birth of our baby, but I might just find myself doing some more baking if this baby decides he or she is just not ready!  Happy weekend!Perfect Chocolate Cake | Hottie Biscotti

Perfect Chocolate Cake

From Hershey’s

Ingredients

Cake

  • 2 cups sugar
  • 1-3/4 cups all-purpose flour
  • 3/4 cup unsweetened cocoa
  • 1-1/2 teaspoons baking powder
  • 1-1/2 teaspoons baking soda
  • 1 teaspoon salt
  • 2 eggs, room temperature
  • 1 cup whole milk, room temperature
  • 1/2 cup vegetable oil
  • 2 teaspoons vanilla extract
  • 1 cup boiling water

Frosting

  • 1/2 cup (1 stick) butter
  • 2/3 cup unsweetened cocoa
  • 3 1/2 cups powdered sugar
  • 1/3 cup milk
  • 1 teaspoon vanilla extract
  • Optional: Crushed Oreos for topping (about a sleeve and a half)

Directions

Cake

  1. Preheat oven to 350F.
  2. Grease and flour 2 9-inch cake pans.  Set aside.
  3. In the bowl of a stand mixer, or in a large bowl, mix together sugar, flour, baking soda, baking powder and salt.
  4. Add in oil, milk, eggs and vanilla and beat for 2 minutes.
  5. Add in the boiling water and mix to combine.  The batter will be very thin, and that’s ok!
  6. Pour batter into prepared pans, dividing evenly, and bake for 30-35 minutes.  A toothpick inserted into the center of the cake should come out clean or with a few moist crumbs attached.
  7. Let cool in the pans on wire racks for 15 minutes, then turn out onto the racks to let cool completely before frosting.

Frosting

  1. Measure cocoa into a medium sized bowl.  Melt butter and pour into the cocoa and whisk to combine.
  2. Using a mixer, beat in powdered sugar and milk alternately in 5 batches (sugar, milk, sugar, milk, sugar).  Add in more sugar if you want the frosting to be a little thicker.  Stir in the vanilla.
  3. Frost the cake, layering some of the Oreos in between the layers and press some onto the edges.  Serve immediately or let chill in the fridge for an hour if your house is especially warm (like mine was!).


Blueberry & Cream Cheese Coffee Crumb Cake

With the birth of our 3rd baby fast approaching I’m finding myself trying everyday to accomplish things that will make the transition easier.  Having all the laundry cleaned and put away, keeping the kitchen well stocked (and relatively clean) for our older kids for when we’re in the hospital and someone else is watching them, washing newborn clothes for a girl and a boy, checking my hospital bag daily to be sure I haven’t forgotten anything, and going through my lists of baby names to narrow it down.  But what do I decide is the most important?  Making this coffee cake, of course.  Baking is a great way to procrastinate, don’t you think?

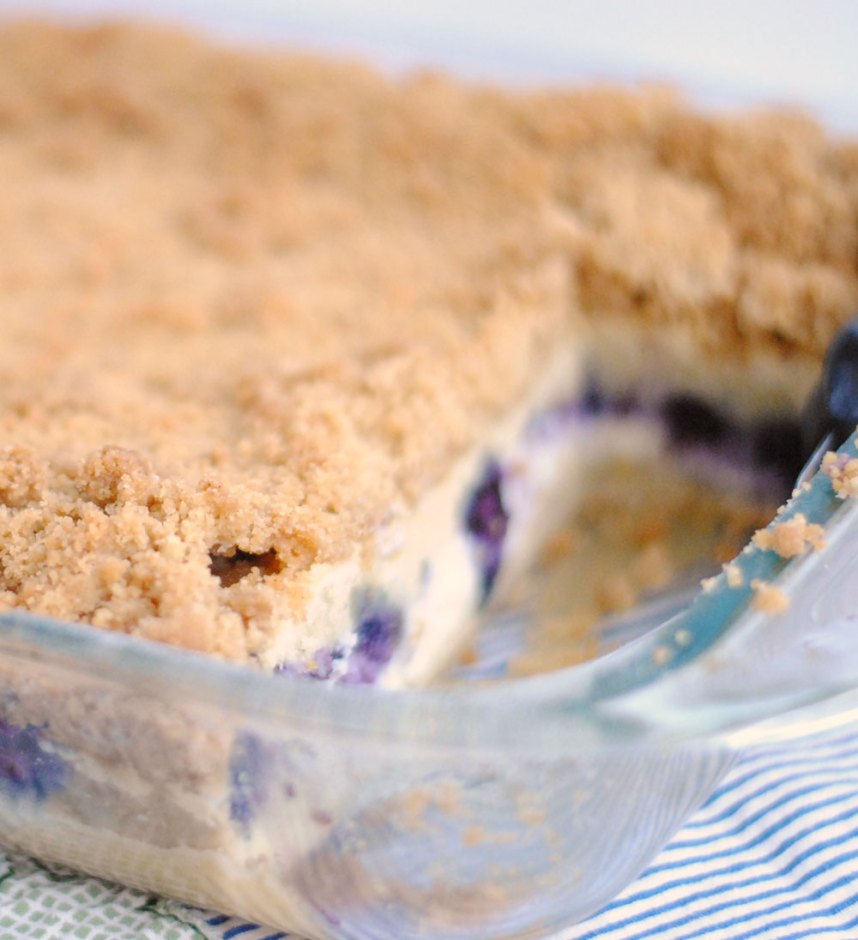
Blueberry & Cream Cheese Coffee Crumb Cake | Hottie Biscotti

I saw this recipe for cream cheese coffee cake from Shugary Sweets on Pinterest and immediately knew I needed to make it.  With a pint of beautiful blueberries in the fridge it became blueberry cream cheese coffee cake because there was just no other option.

Blueberry & Cream Cheese Coffee Crumb Cake | Hottie Biscotti

So I put this together, baked it, and let it cool.  No big deal.  And I had a little corner of it in the evening before I went to bed.  It was delicious.  In the morning I cut myself another square for breakfast.  Something wasn’t right.  It seemed a little underbaked.  I had baked it 5 minutes longer than instructed, so I was surprised.  As I cut a little more into the center I saw that it was mostly raw goo.  I was real bummed about it.  I tried to save what I could around the edges, but then I had to do one of the hardest things a sweets loving girl can do.  I had to scrape all of that goodness right into the trashcan.  Heartbreaking.

Later in the day I restocked on blueberries, cream cheese, and butter and came home and did it all over again.  Because I’d originally misread the ingredients and messed up the streusel topping I was glad to have a second chance at it.  So I guess it was kind of a good thing that I underbaked it the first time?  Regardless, I wound up with this lovely cake when all was said and done and that makes it all worth it.

Blueberry & Cream Cheese Coffee Crumb Cake | Hottie Biscotti

This breakfast dish is delicious and quite decadent, but the blueberries make it good for you!  It’s fruit!  The berries also add a nice pop of color and a lovely tartness to each bite.  The cream cheese filling is amazing, and the crunchy streusel topping is the perfect counterpart to the smooth cake and creamy filling.  Enjoy!

Blueberry & Cream Cheese Coffee Crumb Cake | Hottie Biscotti

Blueberry & Cream Cheese Coffee Crumb Cake

Ever so slightly adapted from Shugary Sweets

Serves 12-16

Ingredients

Cake

  • 2 1/2 cups of flour
  • 1 cup sugar
  • 1/2 teaspoon baking powder
  • 1/2 teaspoon baking soda
  • 1/2 teaspoon kosher salt
  • 3/4 cup unsalted butter, room temperature
  • 3 eggs
  • 2 teaspoons vanilla
  • 2/3 cup buttermilk

Cream Cheese Filling

  • 2 packages cream cheese, room temperature (low fat is fine)
  • 1/2 cup sugar
  • 1 egg
  • 1 pint of blueberries, rinsed and dried and tossed with a tablespoon of four (the flour keeps them from sinking all the way down in the batter)

Streusel Topping

  • 1 stick of butter, melted
  • 1/3 cup sugar
  • 1 cup brown sugar
  • 1 1/2 teaspoons cinnamon
  • 1 to 1 1/2 cups flour

Directions

Cake

  1. Preheat oven to 325°F
  2. Grease and flour a 9×13 inch pan.
  3. Beat flour, sugar, baking powder, baking soda and salt with the softened butter until combined.
  4. Add in the eggs, one at a time, beating between each addition.
  5. Add in buttermilk and vanilla.  Cream for 3-4 minutes until mixture lightens in color and is fluffy.
  6. Spread half of the batter in to the prepared pan.

Filling

  1. Beat cream cheese, sugar and egg together until creamy.
  2. Spread evenly over the cake batter.
  3. Sprinkle the berries over the cream cheese layer.
  4. Spread the remaining cake batter over the berries.

Streusel

  1. Combine both sugars and cinnamon.
  2. Add in the butter and mix to combine.
  3. Add in a cup of the flour and, using clean hands, mix together until crumbly.  Add in up to 1/2 cup more flour if it seems too wet.
  4. Spread evenly over the batter.

Bake

  1. Bake for 1 hour, until toothpick or cake tester inserted into the center of the cake comes out with a few crumbs attached.
  2. Let cool completely on a wire rack before cutting and serving.


Caramelized Pineapple Ice Cream

I had an excess amount of pineapple in my fridge last week (a situation I’ve found myself in more than once) after cutting up a fresh one to eat with dinner. Even after we’d had our fill with dinner and I’d done some snacking on it through the week I still have enough left over that I needed to do something with it.  So I started brainstorming what to do.  Pineapple ice cream.

pineappleicecream1

I found a few recipes, but this one with pineapple cooked down with sugar and cinnamon sounded so delicious.  The blog where I found the ice cream recipe had a great set of pictures showing how to cook the pineapple.  She even includes are warning about being careful not to leave it cooking while you go do something else.  Well, even with the warning I left it cooking over low heat while I spent some time outside with the kids and it cooked a little too much.  After cooling it some of the sugar had hardened on the bottom of the pan.  I kept going with the recipe and was glad I did because the deep caramel flavor with the pineapple and cream was spectacular.

pineappleicecream4

I wound up using the raw egg version, but here are some cooked egg custard vanilla ice cream base recipes that you could easily substitute.  Just stir the cooled pineapple puree into the cold custard and freeze in the ice cream maker.

pineappleicecream2

This ice cream is rich, which isn’t hard to predict without trying it when you see the ingredient list!  With all that cream and milk a little goes a long way.   I really prefer to eat rich and creamy ice cream, it’s so much more satisfying.  I always wind up eating more of the light and airy stuff and it’s never as good as a small amount of the good stuff.

Caramelized Pineapple Ice Cream

From La Gringa’s Blogicito

Ingredients

  • 5 cups of fresh pineapple chunks
  • 3/4 cup sugar
  • 1 teaspoon cinnamon
  • 2 eggs
  • 2 cups heavy cream
  • 1 – 1 1/2 cups milk

Directions

  1. Place pineapple chunks in a large saucepan over medium heat.  Add sugar and cinnamon and stir together.
  2. Cook, stirring occasionally and monitoring the heat so that it is just at a medium simmer, for 20-30 minutes.  The pineapple will release a bunch of juice at first and then start to thicken up.  Remove from the heat and let cool for a few minutes.
  3. Place pineapple and as much of the sugary stuff as you can scrape from the pan into a blender or food processor and mix until very smooth.
  4. Transfer to a bowl and let cool in the fridge until cold.  (You can also put it in the freezer to speed up the process without letting it freeze.)
  5. Whisk eggs in a large bowl for 2 minutes.  Add in the cream and the pineapple puree (Add in all of it if you have 1 1/2 cups or less, if you have more than 1 1/2 cups, then save the excess for ice cream topping).
  6. Add in enough milk to make no more than 5 cups of ice cream mix.
  7. Place the bowl in the freezer and stir every 30 minutes for 1-2 hours, until the edges of the mixture begin to freeze.
  8. Transfer to an ice cream maker and freeze according to the manufacturers instructions.
  9. Transfer to a freezer safe container and let chill in the freezer for at least 1 hour.

Green Posole with Black Beans

This is far from a summer recipe.  It’s soup.  It’s hot and comforting.  Not exactly what anyone is looking for when temps are rising outside.  The last thing you probably want to do is eat a bowl of something warm.  But my sister sent the recipe to me after trying it herself and I didn’t want to wait!

greenposole1

This spicy vegetarian posole is super delicious.  I’ll definitely be bringing this recipe out again in the fall.  But even with the warm weather my husband and I still really enjoyed this soup and will be having leftovers tonight.

I topped this subtly spicy soup with chunks of avocado, monterey jack cheese, cilantro, tortilla strips, sour cream and a spritz from a lime wedge.  My sister recommends radish slices and shredded green cabbage.  Having all of those things as options would be a great way to serve this soup to guests.

greenposole5

The recipe calls for a blender to puree some of the ingredients, but it just about filled my blender to the brim.  My sister used an immersion blender with great results, so use one of those if you have one.  A blender works fine if not.

I forget how much I love posole.  There’s just something about the hominy that makes me happy.  It has such a great texture, especially in soup.  The chiles and poblano add a nice heat, but it’s not terribly spicy.  If you like it hot, then don’t be so careful when seeding the peppers.  Be sure to check the seasonings after the soup has simmered.  Mine needed a nice dose of salt along with the lime juice.  You could easily add some cooked shredded chicken for a heartier version.

greenposole4

Green Posole with Black Beans

From Martha Stewart adapted from Homesick Texan

Serves 6

Ingredients

  • 1 poblano chile
  • 1/2 pound fresh tomatillos, husks removed
  • 2 serrano chiles, stemmed, quartered, and seeded
  • 1/2 medium yellow onion, diced
  • 4 garlic cloves, chopped
  • 1 cup roughly chopped fresh cilantro (extra for serving)
  • 1/2 cup roughly chopped fresh parsley
  • 1 ounce baby spinach leaves, 1 large handful, about 1 cup
  • 1 teaspoon ground cumin
  • 1 teaspoon dried oregano
  • 6 cups low-sodium vegetable or chicken broth
  • 2 cans (15 ounces) hominy, rinsed and drained
  • 1 can (15 ounces) black beans, rinsed and drained
  • fresh lime juice from 1 lime (extra wedges for serving)
  • kosher salt
  • monterey jack cheese
  • 1 avocado, sliced or cut into chunks
  • sour cream
  • tortilla chips or baked tortilla strips

Directions

  1. Heat broiler with rack in top position.  Place a sheet of foil on the rack.  Broil the poblano until charred and skin is bubbling, 4-5 minutes per side.   You can also do this over a gas burner using tongs.  Transfer to a paper sack or zip-top plastic bag, close it tightly, and let steam 20 minutes.  Rub the poblano with paper towels to remove skin.  Stem, seed, and place in a blender.
  2. In a large pot of boiling water, cook tomatillos until soft, about 5 minutes.  Drain and transfer to the blender.
  3. Add serranos, onion, garlic, cilantro, parsley, spinach, cumin, oregano, and 2 cups of broth.  Blend until smooth.  OR you can put everything from the poblano to the broth to a pot and blend with an immersion blender.
  4. Pour tomatillo mixture into a large pot and stir in 4 cups broth, the hominy, and the black beans.
  5. Bring to a boil over high heat, then reduce heat to low and simmer, uncovered, until slightly thickened, stirring occasionally, about 45 minutes.
  6. Add lime juice.  Taste, add salt and adjust seasonings.
  7. Garnish with avocado, cilantro, cheese, sour cream, chips and extra lime juice if desired.

Buttermilk Chess Pie

This buttermilk chess pie is declared “the easiest pie to prepare in this chapter” in the America’s Test Kitchen Family Cookbook.  And it truly is simple.  It’s also quite delicious, creamy, smooth, rich and downright heavenly.

Buttermilk Chess Pie | Hottie Biscotti

After making this strawberry rhubarb pie and finishing off the last of it recently I was seriously craving more pie.  I’ve typically reserved pie for the holiday baking season, making cobblers more often in the summer.  But that’s just silly.  Pie can easily be a year round food and should be embraced as much now, when the weather is warm, as when it’s chilly out.  While some pies are better for cool weather and some for warmer days, this one can be enjoyed any time of year.  Pairing it with some fresh seasonal berries during the coming months will make it a great summer dessert.

buttermilkchess11 buttermilkchess8 buttermilkchess9

You can serve this custard pie warm, room temperature, or chilled.  The flavors shine through best when it’s warm or room temp, though.

The crust in this pie, as with most if not all pie, is important and can really make the dessert special.  If you use a store bought crust the dessert will be fine, but if you have the time to make your own it will be extra delicious.  I’ve used this all butter pie crust recipe from Smitten Kitchen the last couple of times I’ve made pie and I really like it.  The recipe makes enough for 2 crusts, so just stash one away for another time.

buttermilkchess7

The ingredient list is simple and straightforward, you probably have everything in your kitchen right this very moment.  Once you make the crust all you have to do is whisk everything else together, pour it into the pie crust and bake.  So, what are you waiting for?!

buttermilkchess6

Buttermilk Chess Pie

From America’s Test Kitchen Family Cookbook

Ingredients

  • 1 pie crust, fit into a pie plate, chilled and unbaked
  • 3/4 cup buttermilk
  • 6 tablespoons butter, melted and cooled
  • 1/2 cup sugar
  • 1/2 cup brown sugar
  • 2 eggs + 2 egg yolks
  • 1 tablespoon fine-ground cornmeal
  • 1 tablespoon cornstarch
  • 1 tablespoon vanilla extract
  • 1/4 teaspoon salt
  • Berries for garnish
  • Whipped cream for garnish

Directions

  1. Prepare pie crust by fitting it into a pie plate and placing the plate in the refrigerator for at least 30 minutes.
  2. Place a rimmed baking sheet into the oven and preheat to 375°F.
  3. Whisk all of the ingredients together and pour into pie shell.
  4. Place onto heated cookie sheet and bake for 40-45 minutes.  Top of the pie should be golden brown and center should be just set.
  5. Let cool on a wire rack until just warm or all the way to room temp.
  6. Garnish with fresh berries and/or whipped cream.